Topic Doc: ODBC Installation Instructions
RecTrac 3.1 | Progress 11.7

Written by Seth Warren
Updated at March 8th, 2024
Table of Contents
Document Summary
The Set ODBC program allows you to create/delete User IDs with which you establish Other Database Connections (ODBC). This document provides instructions for creating the User and establishing the connection.
Vermont Systems does not support 3rd party reporting, querying and etc… using the ODBC connection.
If you have additional questions about setting up an ODBC User ID and establishing an ODBC connection to your RecTrac database after reading this document, please contact Vermont Systems Customer Service by phone at 887-883-8757 or generate a Support Case through the Customer portal of the Vermont Systems web site using your Customer ID and password.
License – Maintenance Agreement
The ODBC Interface is free. Use of the interface requires a Vermont Systems license and annual maintenance agreement for RecTrac and the component modules discussed in this document. Before implementing any process outlined in this document, please contact the Vermont Systems Sales Department at 1-877-883-8757 to verify that you are authorized to use the modules discussed in this document and if not, to obtain a quote and/or approval.
Note:
VS will support establishing an Open Database Connectivity (ODBC) connection in environments where allowed (such as VS Premium Cloud Hosting). The database schema can be printed by running the RecTrac Dictionary Listing report from within the RecTrac application. Current entity relationship diagrams are also available (can be accessed via the VS FTP site). No other ODBC support services will be provided by VS, such as but not limited to development assistance and development troubleshooting.
Create an ODBC User ID
Note:
All file paths and screen/tab locations in this document refer to file paths and screen/tab locations as they appear in the standard, default Vermont Systems Design. Your setup and Design may vary.
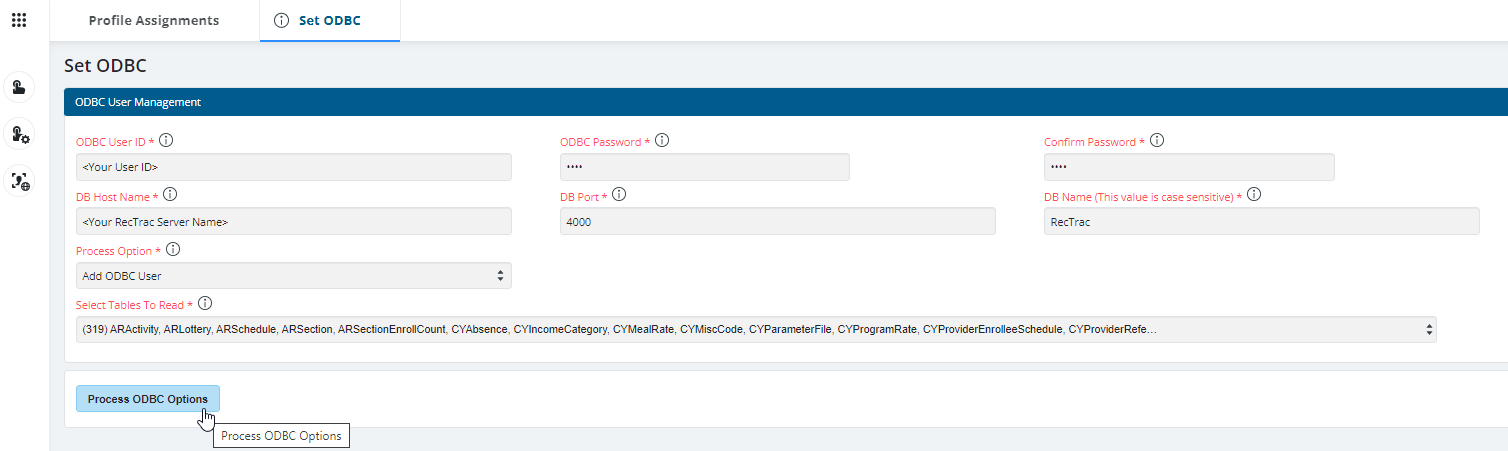
- In RecTrac, go to ODBC Connection Management.
-
Note:
All fields on this screen are mandatory and all fields are case-sensitive.
-
- Enter a User ID in the ODBC User ID field. This must a User ID in your RecTrac database.
- Enter a password in the ODBC Password and re-enter it in the Confirm Password field. This is the password for the User ID you entered above.
- Enter the RecTrac DB Host Name. This is the name of your RecTrac server.
- Enter the Port Number of the RecTrac database to which you wish to connect.
- If connecting to the Live database, then enter the port number of your RecTrac Live database. By Vermont Systems-default, this is port 4000. Your setup may vary (i.e. you may be using port 4050 for the RecTrac Live database, etc….)
- If connecting to the Demo database, then enter the port number for your RecTrac Demo database. By Vermont Systems-default, this is 4003. Your setup may vary (i.e. you may be using port 4053 for the RecTrac Demo database, etc….)
- Enter the name of your RecTrac database. By Vermont Systems-default, this is RecTrac, but your setup may vary (i.e. your database name could be rectrac, RECtrac, RECTRAC, live, LIVE, etc….)
Caution:
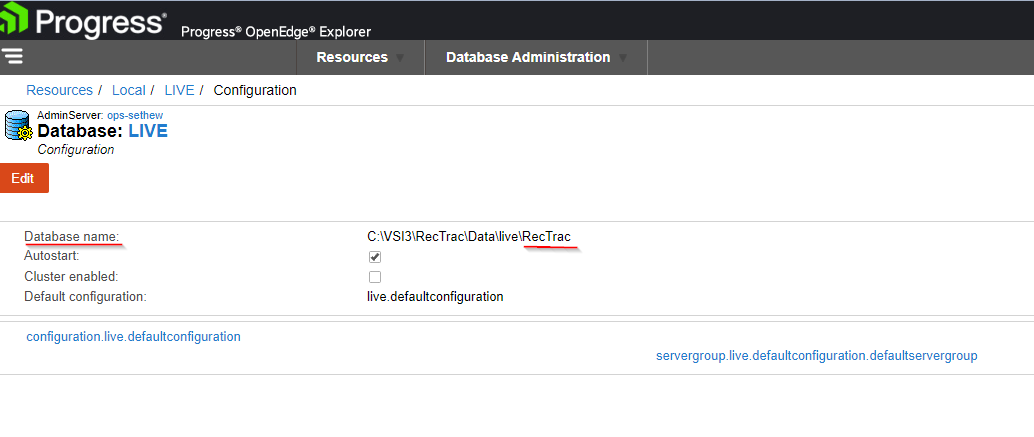
This field is case-sensitive. The name of your database must be entered exactly as it appears in your Progress Database.
To get the database name, go to OpenEdge Explorer, click on the database engine you want to connect to and then click on Configuration. Be certain to use the exact spelling and letter case.
- Expand the Drop-down list for Process Option and select:
- Add ODBC User - To create the new User listed in the ODBC User ID field.
- Remove ODBC User - To remove the User listed in the ODBC User ID field.
- Click the Combo Box icon and select the Database Tables to Read.
- Click Process ODBC Options. The process runs on the AppServer; you will be notified when the process is complete.
- Click X to exit the program.
Set Up ODBC on the Client
RecTrac 3.1 uses Web Client technology, which doesn’t contain the Progress OpenEdge 11.7 Driver for ODBC connections inherently. Customers wanting to connect to their database using ODBC will need to load the Client Networking Progress component manually from the 3.1 Installation CD.
Please contact Vermont Systems Support for assistance with this manual install, if needed.
Install Client Networking
Client Networking will need to be installed manually only on workstations from which you will use an ODBC connection.
To install client networking:
- Insert the RecTrac 3.1 installation DVD.
- In Windows, browse to the Progress folder on the disc and highlight/select Setup.exe. Right-click and choose Run As Administrator.
Note:
If Progress has NOT been installed on this workstation, then you will receive a Progress Not Found error. In this event, install Progress from the Progress directory on the Installation DVD first (right-click on Setup.exe and choose Run As Administrator and use the product codes in the table below)
THEN
Return to this step and complete it.
- Enter the information in the table below and exit windows when done.
- You will be prompted to select a product. Choose Client Networking.
| Product | Version Number | Serial Number | Control Code 1 | Control Code 2 | Control Code 3 |
|---|---|---|---|---|---|
| Client Networking | 11.7 | 006126530 | ZQDSH | 6QMTM | K4M?M |
Set Up the ODBC Connection on the Client
- In Windows go to Administrative Tools • Run Data Sources (ODBC).
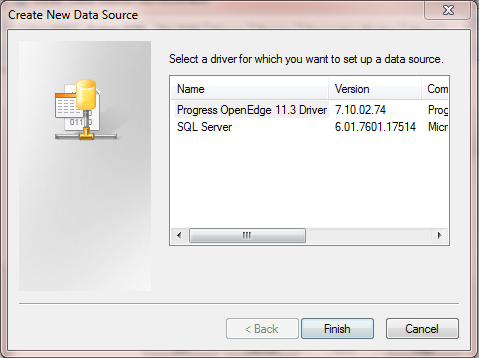
- Under the System DSN tab, click Add.
- Select Progress OpenEdge 11.7 driver.
- Click Finish.
Note:
For 64 bit users: The 11.7 ODBC driver is installed in a different location. Running Data Sources (ODBC) under Administrative tools may not display the driver. In the event it does not, access the correct driver by browsing to C:\Windows\System32. Find and run odbcad32.exe. Running this file will run the Windows ODBC Data Source Administrator program in 64 bit mode and the driver will then display.
- You will continue to the ODBC Progress OpenEdge Wire Protocol Driver Setup screen.
- Fill in the fields on the General screen as they appear in the above image with the following exceptions:
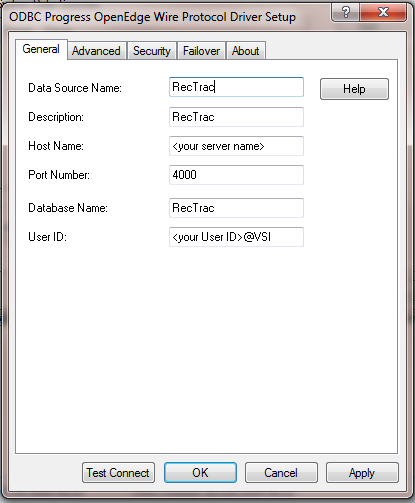
- Change <your server-name> in the Host Name field to the name of the server that is running the RecTrac database.
- By Vermont Systems-default, the Port Number is 4000 for the RecTrac LIVE database and 4003 for the RecTrac DEMO database. If your setup varies, enter the port number you're using.
- The database name field is case-sensitive. Make sure the database name (spelling and case) is entered EXACTLY as it was entered in Create an ODBC User ID above.
- Change <your User ID> in the User ID field to the same User Name you entered in Create an ODBC User ID above.
- Add the @tenant suffix, @VSI, to the end of your User ID as shown in the example above. For Example: ODBC123@VSI
Note:
Vermont Systems Hosted Customers: Your @tenant suffix will be something other than @VSI. Contact Vermont Systems Support for the proper syntax for this field.
- Click the Advanced tab.
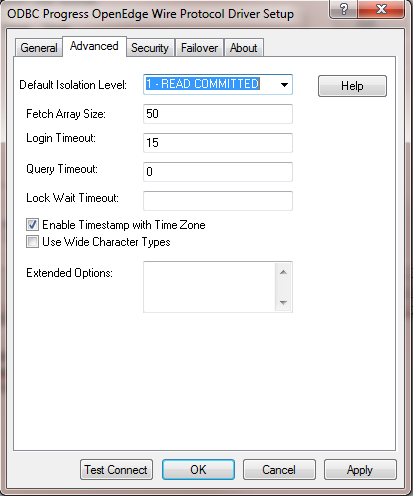
- Fill in the fields on the Advanced screen as they appear in the above image.
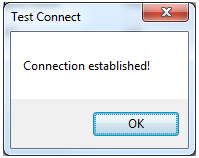
- Click Test Connect and enter the password for the User ID created above.
- Click OK. You will receive the following message if the connection is successful.
- Click Apply.
Set SQL Width
Note:
Vermont Systems-Hosted Customers can skip this section. The Vermont Systems-Hosting Team will set SQL Width in your database tenant. If you are a Vermont Systems-Hosted customer, skip to Connecting to the RecTrac Database Using ODBC.
Before pulling data from RecTrac for reports/queries using ODBC, Vermont Systems highly recommends setting the SQL width for the database tables you will be using. Two methods are available:
- Set SQL Width by Individual Table - This is a good option for customers who use a handful of tables only for your reports and processes.
- Set SQL Width for All Tables - This is a good option for customers who plan on doing a lot with ODBC, Report Writing, and database queries from many tables.
Regardless of the option you choose, Setting SQL Width MUST be done using a single WebSpeed connection to RecTrac. In other words, to set SQL Width for database tables, your RecTrac and WebTrac operations at your department will have to be down for maintenance.
To Set SQL Width by Individual Table
This is a good option for customers who use a handful of tables only for your reports and processes. Setting SQL Width in this manner is accomplished via the Vermont Systems tenant in your database ONLY, and the steps presented below can be done using a single WebSpeed connection to RecTrac. In other words, in order to set SQL Width for database tables, your RecTrac and WebTrac operations at your department will have to be down for maintenance.
- Take RecTrac and WebTrac operations at your department down for maintenance. Make certain all users are logged out of RecTrac.
- In Progress Explorer, terminate all AppServer and WebSpeed connections to your RecTrac database. Stop the following:
- WebLive
- EventLive
- VICLive
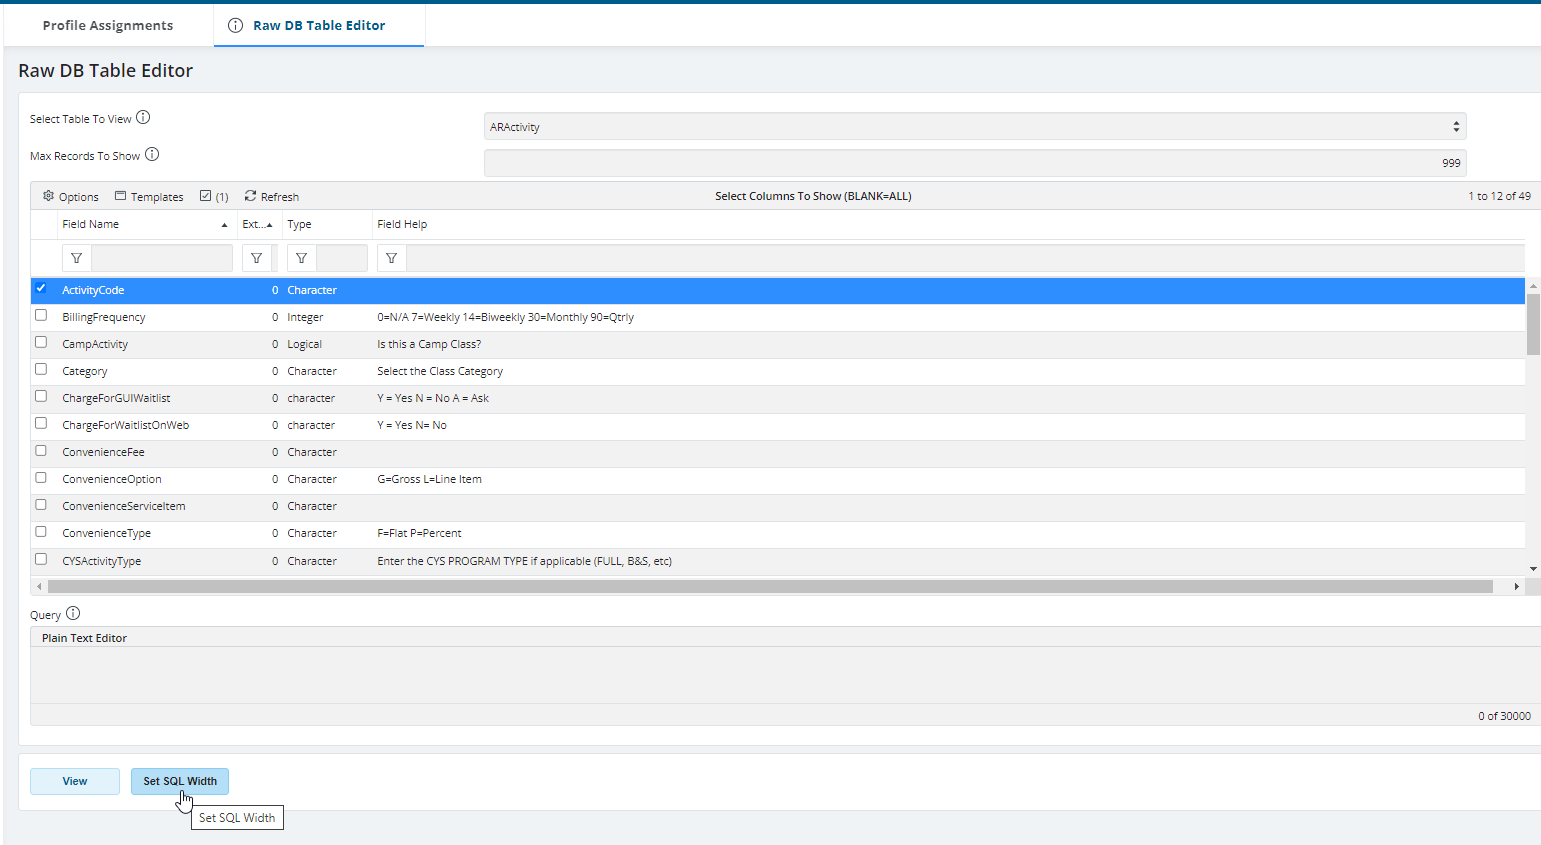
- Log into the Vermont Systems -Tenant of your RecTrac database and to go DBEdit (Management Ribbon • System Management • Misc Management Group • DBEdit). Contact Vermont Systems support for an Access Code.
- Highlight/select the database table from which you wish to pull data and click Set SQL Width. The process will be completed automatically.
Note:
If you do not have a button for Set SQL Width, you are not logged into the VSI tenant of your database. This button exists only in the VSI tenant.
- Repeat Step 3 as needed for the other tables from which you will pull data for ODBC reporting/queries.
- Exit DBEdit when done. Exit RecTrac
- In Progress Explorer, restore your AppServers and WebSpeed agents. Restart the following
- WebLive
- EventLive
- VICLive
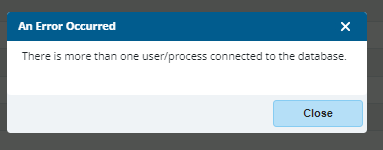
Note:
If there is more than one (1) WebSpeed agent connected to your database, the system will NOT allow you to complete Step 4 above.
To Set SQL Width for All Tables
This is a good option for customers who plan on doing a lot with ODBC, Report Writing, and db queries from many tables. Setting SQL Width in this manner is accomplished via the Progress Proenv tool on the Server. The steps presented below can be done using a single WebSpeed connection to RecTrac. In other words, in order to set SQL Width for database tables, your RecTrac and WebTrac operations at your department will have to be down for maintenance.
- Log into your RecTrac Server as an Administrator.
- In Progress Explorer, terminate all AppServer and WebSpeed connections to your RecTrac database. Stop the following:
- ClientLive
- WebLive
- EventLive
- VICLive
- Go to Start • All Programs • Progress • OpenEdge 11.7 • Proenv
- Right-click and choose Run as administrator.
- At the proenv> prompt, enter dbtool <X>:\VSI3\RecTrac\Data\Live\RecTrac, where <X> is the mapped partition on which \VIS3\ is installed.
For Example: proenv>dbtool X:\VSI3\RecTrac\Data\Live\RecTrac - You will proceed to: DATABASE TOOLS MENU - 11.0
- Enter 2, SQL Width Scan w/Fix Option, and press the <Enter> key.
- <connect>: (0=single-user 1=self-service >1=#threads)? 2 <enter>
- Padding % above current max: 25 <enter>
- <table>: (Table number or all)? all <enter>
- <area>: (Area number or all)? all <enter>
- <tenant/group>: (tenant tname | group gname | shared | all)? all <enter>
- <display>: (verbose level 0-4)? 0 <enter>
- Q for Quit when the process completes.
- In Progress Explorer, restore your AppServers and WebSpeed agents. Restart the following:
- ClientLive
- WebLive
- EventLive
- VICLive
Connecting to the RecTrac Database Using ODBC
Note:
In this example, you will use Microsoft Access to connect to the RecTrac ODBC database. This is for example purposes only. Vermont Systems does not support 3rd party reporting, querying and etc… using the ODBC connection.
- Launch Microsoft Access.
- Create a new, blank database.
- Highlight Tables under Objects (to view). Select New (table). Highlight Link Table and click OK.
- In the Files of type field, drag down and select ODBC Databases.
- Click on the Machine Data Source tab. Highlight the RecTrac database you created and click OK.
- Enter the password exactly how you created it above.
- Click OK to connect.
- Select the Tables you want to link.
Note:
If you get an error - Reserved error -7748 when attempting to link an OpenEdge 11.7 Database table in Microsoft Access, see the Troubleshooting section at the end of this document.
- Upon clicking OK, the Tables you select will be listed in the Database dialog screen.
- Refer to the RecTrac Dictionary Listing as needed.
Troubleshooting
Error -7748
WARNING - You should always make a backup of the Registry before making any changes.
- In Windows, go to RegEdit (Start • Run • Enter Regedit and click OK.)
- Locate the ODBC DSN in the Registry:
- For a USER Data Source, go to HKEY_CURRENT_USER • Software • Wow6432Node • ODBC • ODBC.INI • Database
- For a SYSTEM Data Source, go to HKEY_LOCAL_MACHINE • Software • Wow6432Node • ODBC • ODBC.INI • Database
- Click on the folder for your data source; from the menu choose:
Edit • New • String Value - Set the name of the new string value to WorkArounds2
- Double-click on WorkArounds2. In the right-hand panel, change the data value to 8192.
- Click OK.
- Close RegEdit.
- Retry the connection to Microsoft Access.