Topic Doc: Installment Billing, Auto-Debit, and ACH
RecTrac 3.1

Written by Daniel Rotondi
Updated at January 19th, 2023
Table of Contents
Document Summary
RecTrac Installment Billing/Auto Debit allows you to bill patrons, as desired, for activity enrollments, pass memberships, locker rentals and/or rental items over a scheduled, user-defined interval or time period. For Example: You might bill Annual Pass Memberships on a monthly basis, Daycare activities might be billed semi-monthly or weekly, Locker Rentals might be billed quarterly, etc…
Installment Billing/Auto Debit provides four (4) billing options any or all of which may be incorporated into your daily processing to suit the needs of your department:
- Installment Bill - The billing process will charge fees. The fees will be applied to the patron's household, and the patron will remit via personal action.
- ACH - Automated Clearing House (ACH) records. The billing process will charge fees. Fees will be paid by automatic deduction from the patron's bank account.
- Credit Card Auto-debit - The billing process will charge fees. Fees will be paid by an automatic charge to the patron's credit card.
- Payroll Deduction - The billing process will charge fees. Fees will be paid by automatic deduction from an employee's wages at the next payroll run. Generally speaking, this option should be used only if you allow your employees to pay for services at your department directly from their net wages as a part of the payroll process.
Installment Billing/Auto-debit may be used in a Cash or Receivables/Accrual environment and with or without End of Shift procedures.
License – Maintenance Agreement
The Installment Billing/ACH Interface is free. Use of the interface requires a Vermont Systems license and annual maintenance agreement for RecTrac and the component modules discussed in this document. Prior to implementing any process outlined in this document, please contact the Vermont Systems Sales department at 1-877-883-8757 to verify that you are authorized to use the modules discussed in this document and if not, to obtain a quote and/or approval.
Setup Steps
This document provides the basic File Maintenance steps required to configure your RecTrac database for Installment Billing/Auto-Debit and ACH. It also provides basic operating guidelines for standard Installment Billing/Auto-debit processes. This document will lead you through:
- Configuring and linking an ACH profile.
- Creating and linking an Installment Billing Template.
- Establishing Installment Billing fees.
- Setting Installment Billing and Auto-Pay options on a Household.
- Processing a billing run.
- Updating an existing billing plan.
- Suspending an existing billing plan.
- Cancelling an existing billing plan.
If you have additional questions about Installment Billing, Auto-Debit, and ACH setup and operation after reading this document, please contact Vermont Systems Customer Service by phone at 887-883-8757 or generate a Support Case through the Customer portal of the Vermont Systems web site using your Customer ID and password.
Before You Begin
This document is written with the following assumptions. If any of the items listed below is NOT true, contact Vermont Systems Support prior to continuing, as the steps in this document may prove difficult to complete and unexpected results may occur.
- Your organization is running RecTrac 3.1.03.01 or greater.
- You have a full understanding of how the items within the RecTrac modules for which you intend to bill/charge by installment are managed in your organization, to include but not limited to: how fees are charged and on what schedule.
- The User ID with which you sign into RecTrac has the requisite permissions and ability to access all modules and functions pertaining to Installment Billing.
- The User ID with which you sign into RecTrac has the ability to add/edit Bank Account and Credit Card information for households in your RecTrac database.
- You understand the RecTrac modules for which you will bill/charge by installment and have created the requisite Activities Passes, Rental Items, and Locker Rooms (as needed).
- You understand RecTrac DataGrids and how to maneuver through them.
- You understand RecTrac Profile Management and hierarchy.
- You MUST have an understanding of RecTrac Fees, Fee Sets and Criteria and the multiple levels of hierarchy at which Fees and Fee Sets can be linked in RecTrac. This document does not provide instruction for RecTrac Fee Maintenance beyond the minimum requirements necessary to set up and run Installment Billing/Auto-debit.
File Maintenance Setup
You will visit the following program modules to configure Installment Billing/Auto-debit logic in RecTrac:
- Profile Management - ACH profile
- Installment Billing Template Management
- Household Management
- Fee Set Management
Note: All file paths and screen/tab locations in this document refer to file paths and screen/tab locations as they appear in the standard, default Vermont Systems Design. Your setup and Design may vary.
Create and Link an ACH Profile
Important Note: Prior to populating the fields on your ACH profile, contact your bank and obtain a listing of their ACH format requirements. Banks and ACH formats vary greatly. Unfortunately there is no standard "one size fits all" answer to how the fields on your ACH profile will be/should be/must be populated.
In most cases, your bank can supply you with an easy to follow form, with examples, that will provide the exact information you need. In some instances, you may have to go through the profile field by field with your bank. In either event, it is likely your bank will ask you to create "dummy household" accounts in order simulate billing and ACH auto-debit to test the process prior to "going live" with installment billing.
If needed, Vermont Systems will work with your bank to configure your ACH profile and ensure the ACH file that gets sent to the bank is correct. This is a billable service. Contact Vermont Systems Support for more information or Vermont Systems Sales for a quote.
The ACH profile allows you to view and change the Automated Clearing House settings for the database and is an integral part of the Installment Billing/Auto-Debit process. An ACH profile is REQUIRED for all Installment Billing/Auto-Debit options, regardless of which ones you use (Installment Billing, Auto-Debit to Credit Card, ACH withdraw, and/or Payroll Deduction). Generally speaking, one (1) ACH profile only is needed and it can be linked at the Default Level of Profile Hierarchy.
Multiple ACH profiles may be created for situations where different bank accounts are used for different purposes. In this event, the different profiles must be linked at a level of hierarchy other than Default, as two profiles of the same Type cannot be linked at the same place.
For Example: Your organization has two separate recreation centers, and you use separate bank accounts for each. In this event, you would create two (2) ACH profiles, you link the separate bank accounts to each profile. You would then link the profiles to the applicable users, menu groups or workstations for which they apply.
To Create and Link an ACH Profile
- In RecTrac, go to Management Ribbon • System Management • User/Menu/Profile Management Group • Profile Assignments.
- Click Add. You will continue to the Profile Add/Update screen.
- Enter a Profile Code for your ACH profile. For Example: ACH Profile.
- Expand the Drop-down list for Profile Type and select ACH.
- Accept the "ACH" default entry in the Profile Subtype field.
- Enter a Profile Description, if desired, and click Create.

- Enter your 9-digit File ID/Origin number. Typically this is a 9-digit Tax ID number with '1' inserted as first character unless notified by a US Bank that the first number will be different.
This is NACHA mandatory field, and your bank should provide you with this number.
Note: Some banks refer to this as the Immediate Origin field.
- Enter your Bank Account Number. This is bank account into which credits will be posted.
- If you want to use an alternative routing number in the line 6C (credit) record of the ACH file that is created, enter that number in the Alt Bank R/T Number field
THEN
select the option to Use Alternate Bank Routing Number for '6C' Record. - If you want to use an alternative organization name in the ACH file that is created, enter it in the Alt ACH Organization Name field.
OR
Leave this field blank to use your Organization Name on the ACH File. If you leave this field blank, the system will pull your Organization Name from the Organization Name field of your Static Parameters profile. - Enter the name of the final destination bank in this field, if applicable. This is NOT the name of your bank.
Fill in the Destination Bank Name field with the name of the third bank (i.e. the bank your bank sends your funds to) ONLY IF both of the following conditions are true:- You are using the auto-debit payment feature in RecTrac.
- Your bank sends/transfers your funds to a third bank.
- Enter the Originating Depository Financial Institution (ODFI) ID/Trace number. Your bank should provide you with this number.
- Enter your Company ID number. Your bank should provide you with this number.
- Expand the Drop-down list for Credit Account Type and select the type of bank account into which your ACH funds will be/are being deposited (i.e. "credited"). This is the Account Type (Checking or Savings) for the Account Number you entered previously.
- Make selections in the remaining fields on the Core Settings Group as directed by your bank.
Use the "i" and "?" Help icons on the upper-right hand corner of the screen for field definitions, and examples if needed.
 - Proceed to the Additional Settings Group when ready.
ACH Profile - Additional Settings Group

- Enter your ACH File Header (i.e. "Title"). This field will accept up to 100 alpha-numeric characters.
- Enter the path and name of the ACH File that will be created by running the Installment Billing process. This is the ACH File that gets sent to your bank. The file location can be local to your workstation or to an accessible network directory.
For Example: c:\vsi\temp\ACH-v3.txt - Click the Picklist icon and select your ACH Pay Code. This will be the Check Payment Code type(s) that you use for auto-debits to patron checking/savings bank accounts. When you run billing, auto-debits from a patron's bank account will be recorded under this Payment Code.
Payment Codes are maintained in Payment Code Management. - Click the Picklist icon and select your Credit Card Pay Code List. These will be the Credit Card Payment Code type(s) that you wish to allow for auto-debits to patron credit cards. When you run billing, a charge will be placed on the customer's credit card and the corresponding payment to you will use the Payment Code you use for that credit card brand.
Payment Codes are maintained in Payment Code Management. - Enter the drawer number that you want to link to your billing run. When you run Installment billing/Auto-Debit, any payments made to you (via Debit Checking/Savings, via Debit Credit Cards, or by using an existing credit balance) will be linked to this drawer.
Note: The drawer number you use should be a valid drawer on the Drawer profile linked to the user that runs billing.
- Accept the default entry in the Hash field ("All Routing Numbers") or expand the Drop-down list to choose the alternate option. Your bank should provide you with their preference.
- All Routing Numbers - All routing numbers will be used when calculating the hash total on the ACH File regardless of duplicates. Routing numbers are BANK identifiers, not Bank Account identifiers, so if two or more patrons use the same bank (or if one household has multiple ACH withdrawals), you will have duplicate routing numbers each with its own total.
- Unique Routing Numbers - Unique routing numbers only will be used when calculating the hash total for your ACH File. Like/same routing numbers will be sub-totaled, so if two or more households use the same bank (or if one household has multiple ACH withdrawals), you will have one routing number in your Hash total for that bank with one subtotal.
- Determine whether you wish to insert a Carriage Return/Line Feed (<CRLF>) at the end of the last record in the ACH File. If selected, the <CRLF> will be inserted regardless of whether the last record is a "9" record or fill lines following the "9: record. De-select this option to omit the Carriage Return/Line Feed after the last record in the ACH File. Your bank should provide you with their preference.
- Determine whether you wish to have the system subtract/use a patron's credit balance prior to using auto-debit as payment. With this option selected, the system will use a patron's credit balance first (if any) and then auto-debit any remaining amount during the billing run. The Installment Billing Log will display a column for Credit Used, which will show the applicable transition of funds. The system looks for and uses Credit Balances in the appropriate module only. The system will not draw a credit balance from one module to pay for a bill in another module.
For Example: Molly Brown has a an annual Pass Membership that is installment billed monthly and auto-debited via her checking account. She has a $50.00 credit in the Activity module. When billing is run, the system will NOT apply the $50.00 Activity credit toward her Pass fees. IF Molly's credit were in the Pass module, then the system would apply it toward the bill during the billing run.
Leave this option de-selected if you do NOT wish to use ANY credit balances as payment toward installment billing fees. - Review your settings. Use the "i" and "?" Help icons for field definitions, and examples if needed, and click the ACH Layout when ready.
The ACH Layout Tab
The ACH Layout tab displays fields on your ACH File and allows you to add, edit and/or delete them.
- Click Auto Generate ACH Layout to generate the ACH layout based on your system settings. In the event you already have an ACH Layout the system will ask whether you wish to overwrite the existing one.
- Click Save to save your changes. You will return to Profile Assignments.

- In the Linked Profiles middle column, click to expand the Default folder.
- In the Available Profiles left-hand column, click to highlight the ACH profile you just created.
- Click again and hold the mouse button down. When you have "grabbed" the profile, a red box will appear that displays the profile name.
- Drag and drop. Drag to the Default Profiles folder in the middle column. When the box turns green, release the mouse. This will place the profile at the Default level of hierarchy. Profile Assignments are saved automatically and take effect immediately.
The level of hierarchy can be changed later, if needed. - Click the 'X' in the upper-right hand corner of the Profile Assignments panel to Exit.
This completes the setup steps for your ACH profile.
Create and Link a Credit Card Profile
If you allow Installment Bills to be paid for by automatic debit to a customer's credit card, you will to link a Credit Card-Installment Billing profile in your profile hierarchy. Where you link the profile is dependent upon your set up, but anyone who runs installment billing must be linked to it at some level of your profile hierarchy.
The Credit Card profile you create is dependent upon your Credit Card solution (i.e. PlugNPay, ETS, etc…). Refer to the applicable Credit Card solution document for step-by-step instruction. When setting up your Credit Card profile, you will want to select MOTO as the Account Type regardless of your Credit Card solution. When linking the Credit Card profile in Profile Hierarchy, be certain to select the Credit Card-Installment Billing option at the Profile Assignment Add screen.

Create an Installment Billing Template
The Installment Billing (IB) Template Management program allows you to add, update, delete, and clone Installment Billing Templates. Installment Billing Templates establish the guidelines (Billing Frequency, Billing Rules, Payment Options, etc...) by which you will charge for the items to which the template is linked. An Installment Billing Template is REQUIRED for all Installment Billing/Auto-Debit options, regardless of which ones you use (Installment Billing, Auto-Debit to Credit Card, ACH withdraw, and/or Payroll Deduction).
At a minimum, you will need one (1) Installment Billing Template for each different Installment Billing/Auto-Debit plan you offer. This is true if you offer different plans for different items (i.e. you bill Pass Memberships by the month but Summer Camps by the week) or if you offer different plans for the same item (i.e. you offer two (2) billing plans for your Annual Pass Memberships: patrons have the option of paying by the month or paying by the quarter. For Example:
- You bill all Summer Camp type programs by the week, all Pass Memberships by the Month, and all Locker Rentals by the Quarter. You would need at least three (3) Installment Billing Templates to accommodate the three different billing schedules.
- You bill Summer Camps by the week, Lockers by the Quarter but Fitness Pass Memberships by the Month and Country Club Memberships (also a Pass Code) semi-annually. You would need four (4) Installment Billing Templates because you would have four (4) billing plans.
- If, at the other extreme, you bill everything (Activity Enrollments, Pass Memberships, and Locker Rentals) by the month on the same day, you feasibly could use one (1) Installment Billing Template only because the billing plan would be the same for everything you bill by installment.
To Create an Installment Billing Template
Important Note: The following presents the steps required to create an Installment Billing Template. For purposes of example, the steps provided assume an Annual Pass Membership billed monthly on the first day of each month. Prior to creating your own Installment Billing Templates, it is imperative that you know the exact terms and conditions of the billing schedules at your department.
- In RecTrac, go to your Menu Icon and search for Installment Billing Template Management.
- Click Add. You will continue to the Installment Billing Template Update screen.

Click the Image to enlarge.
- Enter an Installment Billing Code. This field will accept up to 30 alpha-numeric characters.
- Enter a Description for your Template, if desired. This field will accept up to 100 alpha-numeric characters.
- Expand the Drop-down list for Interface Mode and select your option. This field determines how the prompt for Installment Billing will work when a billable item is selected into the shopping cart in RecTrac.
- Auto - Automatic. Upon selecting of the item into the shopping cart, the system will prompt automatically for the preferred installment billing method. This is the default option.
- Manual - Manual. Upon selecting the item into the shopping cart, the clerk must proceed to the billing screen and make selections to set up billing.
- Expand the Drop-down list for Web Usage Option and select your option. This field determines how the prompt for Installment Billing will work when a billable item is selected into the shopping cart in WebTrac.
- Always - Upon selecting of the item into the shopping cart, the WebTrac patron must set up an Installment Billing/Auto-Debit Schedule. This is the default option.
- Never - WebTrac patrons will never be required to set up an IB/Auto-Debit schedule.
- Prompt - Upon selecting the item into the shopping cart, the WebTrac patron will be given a choice to either pay the balance at the time of "check out" or set up an IB/Auto-Debit schedule.
- Determine your setting for the Prenote Not Required and Hide Pass Expiration Date on Receipts options.
- Expand the Drop-down list for Billing Frequency and choose your option. This field determines how often you do a billing run for items linked to this template.
THEN
Populate the fields which appear. These fields will correspond to the Billing Frequency you select.- Weekly on this Day - You will bill once per week on the day of the week selected in the Day of the Week field. For Example: Monday.
- Bi-Weekly on this Day - You will bill once every other week on the day of the week selected in the Day of the Week field. You must then pick your bi-weekly qualifier: 'A' Dates Only, 'B' Dates only, or 1/2 Each Cycle. For Example: Friday on 'A' Weeks.
- Semi-Monthly on these Two Days - You will bill two (2) times a month on the days of the month you select in the Day and Day 2 fields. For Example: on the 1st and 15th of the month.
- Monthly on this Day - You will bill once per month on the day selected in the Day field. For Example: On the 1st.
-
Monthly on Item Begin Day - You will bill once per month on the day the item was purchased. For Example: An Annual Pass purchased on 18 September will have 12 bills created for the 18th of each month.
Note: An item purchased on the last day of a month will have bills created for the last day of each month in the billing cycle. For Example: An Annual Pass purchased on 31 August would have bills created for 30 September, 31 October, 30 November, etc…..
- Quarterly on these Months and Days - You will bill four (4) times a year on the day selected in the Day field. Expand the Quarterly Option Drop-down list to select the four (4) months of the year during which you wish to bill. For Example: Your fiscal year starts in January. You want to quarterly on the 1st. You would select "January/April/July/October" from the Quarterly Option drop-down list and then enter "1" in the Day field.
- Semi-Annually on these Two Days - You will bill two (2) times a year on the month and day selected in the Month/Month 2 and Day/Day 2 fields. For Example: June 1 and December 1.
- Annually on this Date - You will bill once per year on the day selected in Month and Day fields. For Example: June 1.
- Bi-Annually Beginning on this Date - You will bill once every two (2) years on the day and month selected. For Example: June 1 20xx and two years later on June 1 20xy, etc....
- Expand the Drop-down list for Billing Start Date Rules and select the option for how you wish billing to commence.
- Start with Next Billing Cycle - The first bill will be created for the first possible date in the next billing cycle.
- Start with Begin Date of Item -The first bill will be created for the start date of the item. For Example: Annual Memberships run with fixed dates from January through December. IN November, Pablo Fanque buys a pass for the coming year. His first bill will be created for the January billing to coincide with his membership becoming active.
- Start with Begin Date of Item in Next Month -The first bill will be created for the first possible billing date in the next month. For Example: You bill monthly on the 15th. Eleanor Rigby purchases a pass on May 1st. Her first bill will be created for June 15th.
- Start with Begin Month of Item (Unless in Past) -The first bill will be created for the same month as the purchase of the item unless the start date of the item is in the past. In that event, the first bill will be created for the first possible billing date in the next month.
-
Specific Start Date - This option works together with the billing date option to select the earliest possible date for which the first bill will be created. For Example: You bill monthly on the 1st of the month. If you select July 1 as the specific start date of the item, July 1 will be the date of the first bill. However, if you select July 2 as the specific start date of the item, the date of the first bill will be August 1.
When selecting this option, you must enter a Specific Start Date. - Use Daycare Rules - Bill in Advance - Using the Billing Frequency and dates, the first bill will be created for the first possible billing date before the enrollment start date. For Example: You bill Daycare weekly on Mondays. Penny Lane's start date at your daycare is Wednesday, the 9th. Her first bill will be created for Monday, the 7th and will charge for the three dates (Wednesday - Friday) of the current week.
- Use Daycare Rules - Bill in Arrears - Using the Billing Frequency and dates, the first bill will be created for the first possible billing date after the enrollment start date. For Example: You bill Daycare weekly on Mondays. Penny Lane's start date at your daycare is Wednesday, the 9th. Her first bill will be created for Monday, the 14th and will charge for the three dates (Wednesday - Friday) in the previous week.
- If opting to Skip <X> Bills Before First Cycle, enter the number of billing cycles you wish to skip prior to processing a patron's first bill.
- Enter a value in the Number of Bills field, if desired. The value you enter represents the number of installment billing records that will be created upon the purchase of an item linked to this template.
For Example: This template will be linked to an Annual Pass Membership. Your billing frequency is Monthly on the 1st. You might enter "12" in this field. Or if you require payment for the first month at the time of purchase, you might enter "11" in this field instead.
Optionally you can leave this value at "0" and have the system automatically create the required number of installment bills as determined by the valid dates of the item being purchased (the number of months, for example) and the Billing Frequency. This is useful for situations where you offer different options at the time of purchase.
For Example: You rent lockers and use Fee Prompts to determine the expiration date (3-month, 6-month, 9-month, or 1-year). You bill monthly. By leaving this field at "0," the system would create a number of bills for a customer, at the time of rental, based on the answer to the Expiration Date prompt (i.e. three bills for a 3-month rental, six bills for 6-month rental, etc…). - If you allow renewals for the item(s) that will be linked to this template, fill out the renewal fields as needed.
Use the "i" and "?" Help icons on the upper-right hand corner of the screen for field definitions, if needed.
 - In the Payment Options Group, select the Billing Options you will allow for this template.
THEN
Expand the Drop-down list for Default Pay Option and select your desired default option. If allowing one (1) billing method only, it always will be selected. If allowing multiple options, the patron will be allowed to choose at the time of purchase/renewal. - Click Save. You will be returned to the Installment Billing Template Management DataGrid.
- Repeat these steps as needed to created additional Installment Billing Templates
OR
Click the X in the upper left-hand corner of the screen to exit Billing Template Management.
This completes the setup steps for your Installment Billing Templates.
Installment Billing Fees
Once you have created your Installment Billing Templates, you need to link them to fees. Installment Billing is available in the following RecTrac modules. You will link your Installment Billing Template(s) to Fee that are associated with these modules:
|
|
Where Installment Billing Templates determine the guidelines (Billing Frequency, Billing Rules, Payment Options, etc...) by which you will charge for the items to which the template is linked, Fees determine the Rate you will charge. You must create a different Fee for each Rate you will charge. For Example:
- Residents are billed $30/month for an Annual Membership. Non-Residents are billed $35/month for an Annual Membership. You would need two (2) fees because you have two (2) rates.
-
Annual Memberships are $360.00. When purchasing an Annual Membership, patrons can opt to:
- Pay the entire $360 at the time of purchase
- Pay $30/month for a year.
- Pay $90/quarter for a year.
- You would need three (3) fees because you charge three different
-
Annual Memberships are $360.00 for Residents and $420 for Non-Residents. When purchasing an Annual Membership, patrons can opt to:
- Pay the entire $360/$420 at the time of purchase
- Pay $30/$35/month for a year.
- Pay $90/$105/quarter for a year.
- You would need six (6) fees because you charge six different
- If, at the other extreme, you charge everyone the same rate for all Annual Pass Memberships, you would need one (1) rate only.
When two (2) or more Fees are required to accommodate a single Installment Billing Item, Vermont Systems highly recommends using Fee Groups/Sets, as the "one match only" logic offered by Fee Groups allows for greater flexibility during daily processing than the "all or nothing" style of individual Fees and because creating linking/re-linking a single Fee Set is more time expedient than linking multiple individual fees at every turn.
Note: There are hundreds of scenarios with regard to how Installment Billing Fees can be charged and to whom they will apply. As a result, there are hundreds of ways to establish fees, Fee Groups, and Fee Sets to accommodate your structure. This document does not attempt to discuss every nuance. For purposes of example, this document assumes the following:
- Installment Billing Item = An Annual Pass Membership
- Fees:
- Residents: $325.00 annually
- Non-Residents: $390.00 annually
- $5.00 one-time only Fee for physical printing of the pass.
- Billing Options:
- Residents:
- Full payment at time of purchase/renewal ($325.00 + one-time fee of $5.00)
- $25.00 initial payment at time of purchase/renewal (plus one-time fee of $5.00) and 12 monthly installments of $25.00
- Non-Residents:
- Full payment at time of purchase/renewal ($390.00 + one-time fee of $5.00)
- $30.00 initial payment at time of purchase/renewal (plus one-time fee of $5.00) and 12 monthly installments of $30.00
- Residents:
The setup steps required to establish this fee structure will be discussed. Vermont Systems realizes this may not mirror your structure; however, regardless of the item(s) you will bill by installment and regardless of the Module(s) you use, the basic setup in consistent (i.e. the File Maintenance required to set up Installment Billing Fees is consistent throughout RecTrac, so for example: the steps required to create and link an Installment Billing Fee for a Pass will be the same steps required to create and link an Installment Billing Fee to a Rental Item). Vermont Systems encourages you to read the entire document and use the portions that apply to you.
Create an Installment Billing Fee Set
This section will walk you through the basic process of creating a Fee Set that could be used to charge fees for the example scenario above.
Note: When working with Fee Sets, Vermont Systems advises you to create the Set first and then add the individual Fees to it. Current processing limitations do not allow for the linking of existing Fees to a newly created Fee Set. In other words, you cannot create the Fees first and then put them into a Set. You need to create the Set first and then add Fees to it.
- In RecTrac, go to Management Ribbon • System Management • Fee/Rule/Question Management Group • Set Management. You will continue to the Set Maintenance DataGrid.
- Click Add. You will continue to the Set Update Core Settings screen.
- Enter a Description for your Installment Billing Fee Set.
- Expand the Drop-down list for Record Type and choose Fee Set.
- Apply Permissions as needed and ensure the Active option is selected. A blank DataGrid will appear.
- Click Advanced Fee Add. The Fee Update screen will open.
Note: Fee Default Record Permissions determine whether or not you receive a Default Record Add pop-up message upon clicking Add Fee.
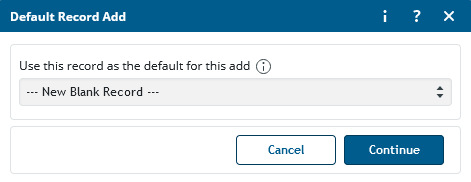
If you receive the pop-up message, you have Permissions to add "Regular" Fee Records and Default Fee Records to your database. Expand the Drop-down list and make your selection:
- If you have a Default Fee(s) established in your database, you may opt to use it, if desired.
- If you do NOT have a Default Fee(s) established in your database, Vermont Systems recommends choosing --New Blank Record-- as that option will create a new Fee.
If you do NOT receive the pop-up, you do NOT have Permissions to add Default Fee Records to your database. You will be adding a new Fee Record only.
Fee Default Record Permissions are maintained on your Permissions profile • Default Record Permissions group. Default Fees are maintained in Fee Management.

- Enter a Fee Description and a Revenue GL Code.
- Expand the Drop-down list for Fee Type and make your selection.
THEN enter the Amount you wish to charge.
The choice you make here is dependent upon the purpose of the Fee you are creating. Using the Annual Pass Membership example above:- Select Installment Billing if this is a Fee for Installment Billing (i.e. the flat dollar amount that will be added to a Household's balance as a by-product of your billing run).
In the example above, if this was the Non-Resident Installment Billing Fee, the Type would be Installment Billing and the Amount would be $30.00. - Select Standard Fee if this is a Fee that equates to the initial cost of the item, in the event you charge patrons an initial fee along with the installments.
In the example above, if this was the Initial Fee for Residents, the Type would be Standard Fee and the Amount would be $25.00. - Select Standard Fee if this is a Fee that equates to the total cost of the item, in the event you allow patrons to pay the full amount up front.
In the example above, if this was the full annual Fee for Residents, the Type would be Standard Fee and the Amount would be $325.00. - Select Standard Fee if this is an "extra" type Fee that is included in the overall cost of the item but not included in the breakdown of the Installment Bills or full price.
In the example above, if this was the one-time $5.00 Fee for the physical card printing that gets charged to everyone, the Type would be Standard Fee and the Amount would be $5.00.
- Select Installment Billing if this is a Fee for Installment Billing (i.e. the flat dollar amount that will be added to a Household's balance as a by-product of your billing run).
- Click the Combo Box icon for Transaction Type and click the Uncheck All option.
THEN select the appropriate Transaction Types and close the Combo Box. Your selections tell the system when to charge the Fee.
Your likeliest options are Purchase and Renewal. - Move to the Installment Billing Settings Group.

- Click the Combo Box icon for Installment Billing Option and click the Uncheck All option.
THEN select the appropriate Billing Option and close the Combo Box. Using the Annual Pass Membership example above:- Select <Your Installment Billing Template> if this is a Fee for Installment Billing (i.e. the flat dollar amount that will be added to a Household's balance as a by-product of your billing run).
In the example above, if this was the $30 Non-Resident Installment Billing Fee, the selection from the options presented would be Bedford Falls Annual Pass IB Template Monthly because it is the Installment Billing plan that you wish to use. - Select <Your Installment Billing Template> if this is the Initial Fee for an Installment Billing plan, in the event you charge patrons an initial fee along with the installments.
In the example above, if this was the $25 Resident Initial Installment Billing Fee, the selection from the options presented would be Bedford Falls Annual Pass IB Template Monthly because the $25 fee is part of the Installment Billing plan being selected. - Select Charge When Not Billed if this is a Fee that equates to the total cost of the item, in the event you allow patrons to pay the full amount up front.
In the example above, if this was the full $325 Fee for Residents, the selection from the options presented would be Charge When Not Billed because you want to Charge [this fee] When [it is] Not Billed. - Select Always Charge if this is a Fee that for additional "extras" which are included in the overall item cost but not included in the breakdown of Installment Bills or full price.
In the example above, if this was the one-time $5.00 Fee for the physical card printing that gets charged to everyone, the selection from the options presented would be Always Charge because you Always [want to] Charge this Fee.
- Select <Your Installment Billing Template> if this is a Fee for Installment Billing (i.e. the flat dollar amount that will be added to a Household's balance as a by-product of your billing run).
Note: By default, the Installment Billing Options selection list includes two (2) options (Charge When Not Billed and Always Charge). The other options in the selection list are your Installment Billing Templates.
IF you see the two default options only, you do not have any Installment Billing Templates established in your database. You cannot charge Installment Billing Fees without an Installment Billing Template. Refer to Create an Installment Billing Template above.- Fill in the other fields as needed. Use the "i" and "?" Help icons
 on the upper-right hand corner of the screen for field definitions, if needed.
 - When ready, click the Criteria tab.
Criteria are required if you charge different rates for different segments of your demographic. Using the Annual Pass Membership example above, Criteria for Residency would be required on Fees in order to charge the appropriate rate. Your criteria may differ. - To add a criterion to your Fee, expand the Drop-down list for Criteria Type and make the appropriate selection. Click here for a list of Criteria Types and their definitions.
- Click Add New Criteria. The <Critera Type You Selected< screen will open. For Example: If you select Fee Code as your Criteria Type, the Fee Code Criteria screen will open.
- Make selections as needed and click Done when ready. You will return to the Fee Update screen and your Criteria will appear in the DataGrid.

- Add more Criteria, if needed, or click Save at the bottom of the screen to Save your Fee.
- Upon Saving your Fee, you will be returned to the Set Update screen. Your Fee will appear in the DataGrid. Any other Fees already in your Set will appear in the DataGrid as well.
- Repeat Steps 6-18 as needed to create additional Fees for your set. Using the Annual Pass Membership example above, seven (7) Fees would be required as displayed in the following table:
| Fee | Fee Type | Amount | Transaction Type | Installment Billing Option | Criteria |
|---|---|---|---|---|---|
| Card Printing Fee | Standard Fee | $5.00 | Purchase | Always Charge | None. Fee applies to everyone. |
| Resident Monthly Fee | Installment Billing | $25.00 | Purchase, Renewal | Annual Pass IB Template | Fee Code = Resident |
| Resident Initial IB Fee | Standard Fee | $25.00 | Purchase, Renewal | Annual Pass IB Template | Fee Code = Resident |
| Resident Full Fee | Standard Fee | $325.00 | Purchase, Renewal | Charge When Not Billed | Fee Code = Resident |
| Non-Resident Monthly Fee | Installment Billing | $30.00 | Purchase, Renewal | Annual Pass IB Template | Fee Code = Non-Resident |
| Non-Resident Initial IB Fee | Standard Fee | $30.00 | Purchase, Renewal | Annual Pass IB Template | Fee Code = Non-Resident |
| Non-Resident Full Fee | Standard Fee | $390.00 | Purchase, Renewal | Charge When Not Billed | Fee Code = Non-Resident |
- Save your Fee Set when done. Repeat these steps as necessary to create additional Fee Sets or exit back to the main menu.
This completes the setup steps for a creating a Fee Set.
Linking a Fee Set
Fee Sets must be linked in some manner to the items which you wish to bill by installment. Where a Fee Set is linked determines what it will impact.
The following chart uses the Pass Module for an example and displays where you can link a Fee Set to it.
Note: When linking Fee Sets, the process is the same regardless of the Module in which you are working. In other words, the steps required to link an Installment Billing Fee Set to a pass are the same steps required to link an Installment Billing Fee Set to an activity, and a rental and a locker. So while you may not use Installment Billing for the Pass Module, the information presented below can be used in any Module.
| Fee Set Linked | Fee Applies To |
|---|---|
| To the Pass Module | All Passes in your database |
| To a single Pass | To that Pass only |
| To a Pass Category | All Passes in your database to which that Category System Code is linked |
| To a Pass Code | All Passes in your database to which that Type System Code is linked |
| To a Pass SubType | All Passes in your database to which that SubType System Code is linked |
Note: Fee Sets can also be linked to Season System Codes. In this event, the fees would apply to all Activities linked to that Season Code. Passes, Rental Items, and Lockers cannot be linked to Season Codes, so any Fees linked to a Season code would not apply to those modules.
When linking your Fee Set, determine whether you wish to link it as a Set or as a Template. The choice you make determines how updates to the fees linked within the Set are managed.
-
Fee Set Linked as a Set - Changes to Fees must be done in Set Management. Changes take effect immediately and changes are populated to ALL items where the Fee Set is linked. This is a good option if you charge the same rates for multiple items.
For Example: You offer different memberships (Pool, Fitness, and Rec Center) but you charge the exact same amount for each. Linking a Fee Set as a Set to a Pass Type System Code would result in all passes linked to that System Code using the exact same fees/fee structure, so linking your different memberships to the same Type Code and linking your Fee Set to that Type code would result in all Passes using the same fee structure. Any change to any fee within the Set would take effect immediately for all passes linked to the System Code, so if you raised your rates for the coming year, you would have to update Fees in one Fee Set only and all passes would be impacted. -
Fee Set Linked as a Set Template - Changes to Fees can be done in the Template where it is linked. Changes take effect immediately and changes are populated only to the Template that you modified. This is a good option if you use the same fee structure for multiple items but charge different rates.
For Example: you have different membership levels (Regular, Silver and Gold) for which you charge different rates but which you bill using the same plan, so all bills for all membership are billed monthly on the first of the month. Linking your Fee Set as a Template to the different memberships (i.e. the different passes at the pass level) would allow you to build the Set once but change the rates accordingly for each pass. Changes to the Template for one pass would take effect immediately for that pass but not impact the other passes using the same Template
For purposes of example, the Fee Set created above will be linked as a Set to annual pass memberships at the Pass Type (System Code) Level. Your choices, such as where you choose to link Fees/Fee Sets and whether you choose to link your Fee Set as a Set or a Template may vary.
To Link a Fee Set to a 'Type' System Code
- In RecTrac, go to Management Ribbon • System Management • Misc. Management Group • System Code Management. You will continue to the System Code Management DataGrid.
- Highlight/select the Pass Type System Code to which you wish to link your Installment Billing Fee Set and click Change.
- Click the Fees tab. Fees already linked to this System Code, if any, will be displayed in the Fees DataGrid.
- Click Link Set. The Set Maintenance - Fee Set screen will open.
- Highlight/select the Fee Set you wish to link and click Create Set Link.

- You will be returned to your Pass Type System Code DataGrid and the Fee Set you linked will be on it. Depending on the number of other fees you have linked, you may have to scroll to see it.
- Click Save at the bottom of the DataGrid. You will be returned to the System Code Management DataGrid. All Passes in your database linked to this System Code will now have this Fee Set applied.
- Repeat these steps, as needed, to link this or other Fee Sets to other System Codes or exit the DataGrid.
Note: Vermont Systems recommends linking Fees as high as possible in the hierarchy as doing so makes managing easier/more expedient.
This completes the setup steps for linking a Fee Set.
Set Installment Bill and Auto-Debit Options on a Household
By default, households in your database should be set up to allow Installment Billing/Auto-debit. However, Bank Account and/or Credit Card information must be added manually. Bank Account and/or Credit Card information can be added as standard Household Maintenance or it can be added "On the Fly" during the sale of an item for which billing is offered.
Note: The default selection you make will be linked to any new billing plans for this household. Once a billing method is linked to a billing plan, changing the default billing option will not change the billing method on an existing plan. Changes to a billing method for an existing billing plan must be done using the Installment Billing Update program.
Adding Account Information Manually
Note: For best results, complete these steps using a workstation on which you process credit card sales using your Credit Card solution, OR ensure your User Id is linked to a valid Credit Card profile.
- In RecTrac, go to Home Ribbon • Household Management. You will continue to the Household Management DataGrid.
- Look up and select the household for which you wish to add Bank Account and/or Credit Card information. Click Change to edit the Household.
- Click the Financial Info tab.

- Ensure the Drop-down list for Installment Billing Option is set to 'Allow.' (This is the default option and has to be changed manually at the household level, so this field should be pre-set).
-
(Optional) Expand the Drop-down list for Auto Pay Balance and select the method of payment this household wishes to use for Household Balance Auto Pay. Doing this allows you to link a Credit Card or Bank Account to a Household which you can then select during the Sales process. However, making a selection here DOES NOT impact Installment Billing.
Upon making your selection, applicable fields for credit card entry or bank account entry will populate in the Auto Pay Option Group. From there you can enter account information, if desired.
Notes:
- You can add Credit Card and ACH Bank Account information to the same household, if desired and you can add multiple records of each type. The Auto Pay Option group on a household will always display the currently selected Auto Pay Balance option you have selected. To test whether a household has multiple option, change the Auto Pay Balance selection for the household. To test whether a household has multiple records for the same option, click the Add/Change button for the option type selected.
- Your setting in on this field has no bearing or impact on Installment Billing. Whether a household can be installment billed/auto-debited is determined by your setting in the Installment Bill Option field only. For purposes of Installment Billing, this field simply allows you to add Credit Card or Bank Account information to a household which can then be used during a sale. The "real" purpose of this field is to select how a household will be impacted when you run the Household Balance Auto Pay program.
To Add a Credit Card Card
In the event you select CC AutoPay/NoShowTT as your Auto Pay Option, fields for Card Number, Card Brand, and Description will populate the Auto Pay Option Group.
- Click Add/Change Credit Card Information. You will proceed to the EPay Info Management - Credit Card DataGrid for the selected household.
- Click Add Credit Card You will continue to your Credit Card Gateway processing screen (i.e. If your Credit Card solution is ETS, you will continue to the ETS gateway; if your Credit Card solution is PlugNPay, you will continue to the PlugNPay WebXPress gateway, etc…).
- Enter the patron's credit card information and submit the payment to your Credit Card processor. Wait for the response as you normally would during a normal credit card sale. Upon completion you will be returned from the gateway.
Notes: This process validates the patron's credit card information and generates the token that will be used to link the credit card back to the household. In some instances, the process will generate and remove a $1.00 charge against the patron's card, but in others it will be a $0.00 transaction. The purpose is to validate the card only and generate the token used to link the patron with his/her card information at your gateway.
Remember: Full Credit Card information is NOT stored in RecTrac. Partial credit card information is stored only and all partial credit card information in RecTrac is encrypted throughout the database.
- Highlight/select the credit card record you just created and click Select. You will be returned to the Household Update • Financial Info tab. The partial credit card information will appear in the Auto Pay Option group.

- Click Save. You will be returned to the Household Management Lookup DataGrid.
- Repeat these steps as needed to add another credit card to the same household or a new credit card to a different household.
- When processing a sale to which you will link an Installment Billing plan, you will be prompted to choose a linked Credit Card when you select the appropriate Payment Code.
To Add an ACH Bank Account
In the event you select ACH AutoPay as your Auto Pay Option, fields for Routing Number, Account Number, and Account Description will populate the Auto Pay Option Group.
- Click Add/Change Banking Information. You will proceed to the EPay Info Management - Banking Info DataGrid for the selected household.
- Click Add Check/Savings Account You will continue to the ePay Info Update - Banking Info screen.
- Enter an Account Description (i.e. Checking Account) and then expand the Drop-down list for Account Type and make the appropriate selection.
- Enter the 9-digit bank Routing Number and the patron's Account Number in their respective fields.
- Click Save when ready. You will return to the ePay Info Update - Banking Info screen.
- Highlight/select the bank account record you just created and click Select. You will be returned to the Household Update • Financial Info tab. Partial account information will appear in the Auto Pay Option group.
- Click Save. You will be returned to the Household Management Lookup DataGrid.
- Repeat these steps as needed to add another bank account to the same household or a new credit card to a different household.
- When processing a sale to which you will link an Installment Billing plan, you will be prompted to choose a linked Bank Account when you select the appropriate Payment Code.
Note: You can add Credit Card and ACH Bank Account information to the same household, if desired and you can add multiple records of each type. The Auto Pay Option group on a household will always display the currently selected Auto Pay Balance option you have selected.
To test whether a household has multiple option, change the Auto Pay Balance selection for the household. To test whether a household has multiple records for the same option, click the Add/Change button for the option type selected.
Adding Account Information "On the Fly"
- In RecTrac, process a sale for an item for which you allow Installment Billing. At the Billing Option screen, select the method of payment the Household desires. These options are determined how you established your fees for this item.
- For purposes of example, this document assumes you have at least one (1) Credit Card billing option and one (1) ACH option.
To Add a Credit Card
- Select a Credit Card Billing Option and click Add/Change Credit Card Information. You will continue to the Epay Info Management - Credit Card DataGrid.

- Click Add Credit Card You will continue to your Credit Card Gateway processing screen (i.e. If your Credit Card solution is ETS, you will continue to the ETS gateway; if your Credit Card solution is PlugNPay, you will continue to the PlugNPay WebXPress gateway, etc…).
- Enter the patron's credit card information and submit the payment to your Credit Card processor. Wait for the response as you normally would during a normal credit card sale. Upon completion you will be returned from the gateway.
Notes: This process validates the patron's credit card information and generates the token that will be used to link the credit card back to the household. In some instances, the process will generate and remove a $1.00 charge against the patron's card, but in others it will be a $0.00 transaction. The purpose is to validate the card only and generate the token used to link the patron with his/her card information at your gateway.
Remember: Full Credit Card information is NOT stored in RecTrac. Partial credit card information is stored only and all partial credit card information in RecTrac is encrypted throughout the database.
- Highlight/select the credit card record you just created and click Select. You will be returned to the Billing Option screen. The partial credit card information will appear in the Selected Payment Method field.

- Click Continue and complete the sale as you normally would.
To Add an ACH Bank Account
- Select an ACH Billing Option and click Add/Change Banking Information. You will continue to the Epay Info Management - Banking Info DataGrid.
- Click Add Check/Savings Account You will continue to the ePay Info Update - Banking Info screen.

- Enter an Account Description (i.e. Checking Account) and then expand the Drop-down list for Account Type and make the appropriate selection.
- Enter the 9-digit bank Routing Number and the patron's Account Number in their respective fields.
- Click Save when ready. You will be returned to the Billing Option screen. The partial bank account information will appear in the Selected Payment Method field.

- Click Continue and complete the sale as you normally would.
Installment Billing Processes
This section of the document will walk you through the basic steps required to:
- Processing a billing run.
- Update an existing billing plan.
- Suspend an existing billing plan.
- Cancel an existing billing plan.
Run Installment Billing
The Installment Billing program allows you to process and print installment bills and/or to auto-debit the checking/savings accounts or credit card for households with family members who have installment billing or auto-debiting plans established in your database.
Notes:
- Hardcopy bills/receipts are NOT printed automatically as a by-product of this program. Rather, the program provides the following options for printing/emailing bills and/or receipts:
- Email Receipts to Households - The Core group of this program provides the option to Email Receipts. When billing is run, bills/receipts will be sent to households via email automatically. Email will be sent only to those households with an email address on their household record.
- Bulk Print Receipts - Bills/receipts that are NOT emailed are stored in the database and can subsequently be printed from the Bulk Print program and either mailed or hand-delivered.
- When you Run Installment Billing, the system performs a check against your Credit Card profile to ensure it is valid. The check looks for the following three (3) scenarios:
- The user is linked to a Credit Card profile with a sub-type of "NoVal."
- The user is liked to a Credit Card profile with a sub-type of "CCdemo."
- There is no Credit Card profile linked anywhere in the user's hierarchy.
- In RecTrac, go to Management Ribbon • System Management • Period End Processes Group • Installment Billing. You will continue to the Installment Billing screen.

- The screen retains the settings from the last time the program was run. Accept the current field entries or click Default Settings at the bottom of the screen to reset the field parameters.
- Expand the Drop-down list for Processing Option and make your selection:
- Journal Only - Print an Installment Billing Journal of pending installment bills and/or auto-debit amounts without processing installment bills and/or auto-debit amounts. Vermont Systems recommends running this option first to preview installment billing results prior to actually billing households/family members.
- Journal Only - Check for Unbilled Records - Print an Installment Billing Journal of unbilled records with a date equal to or before the date in the Billing Date field. These are installment billing records from the past that, for whatever reason, were never billed. This is a Journal Only option; no actual bills are processed.
- Process Bills - Process installment bills and auto debit amounts and print a journal/report as a byproduct. This is the option you will select when you wish to process the bills.
- Expand the Drop-down list for Prenote Option and make your selection.
- Process Bills - Skip the Prenote Option and run process Billing based on your selection in the Processing Options field. This is the option you will select when you wish to process the bills.
- Run Prenote - Run a prenote for all ACH records that will be included in your billing. A prenote (preauthorization) is a zero dollar transaction created and sent through the ACH network to test the validity of bank account information (account number and bank routing number) that was provided at the time of enrollment into the Auto-Debit program or if an account is subsequently changed. If opting to run a prenote, Vermont Systems recommends using the Process Bills Billing Option, since you want to Process the prenote.
- Expand the Drop-down list and select your Billing Date option for this billing run.
THEN
Take appropriate action in the right-hand column to specify the actual date you wish to select. The date you select will be recorded as the "Billing Date" for this billing run (i.e. the date on which records are scheduled to billed, the date the system checks against to see if a record should be billed, etc…).
If you are running this program manually, it is always safe to use Actual Date for this field and your date will be whatever your current billing date is. For Example: If you bill on the 1st of the month, your Actual Date would be mm/01/20yy because that is the date of your bills. If, on the other hand, you billed every Monday and "Monday" was the 7th, the Actual Date would be mm/07/20yy.
Note: If you opt to run this program as a Scheduled Event, you likely will choose an option other than Actual Date. Refer to RecTrac Date Select Fields for a listing of selection definitions and examples for this type of field.
- Expand the Drop-down list and select your Posting Date option for this billing run.
THEN
Take appropriate action in the right-hand column to specify the actual date you wish to select. The date you select will be recorded as the "Posting Date" for this billing run (i.e. the date on which bills are posted, household credits are applied to bills, credit cards are charged and bank accounts are debited).
If you are running this program manually, it is always safe to use Actual Date for this field and you will enter "today's" date, unlessyou are billing early. Use the following examples:- If you bill on the 1st and "today" is 09/01/20yy, you would enter 09/01/20yy in this field.
- If you bill on the 1st and "today" is 09/03/20yy, you would enter 09/03/20yy in this field.
- If you bill on the 1st and "today" is 08/29/20yy, you would enter 09/01/20yy in this field.
Remember: the date you enter here is the date on which household credits will be applied to bills, Credit Cards will be charged and funds will be withdrawn from bank accounts. IF you run billing earlier than the scheduled billing date (never recommended), your patrons will be charged as of the Posting Date. Since you likely do NOT want your patrons being charged earlier than your contract dates say you will bill them, never use a Posting Date earlier than the actual Billing Date.
Note: If you opt to run this program as a Scheduled Event, you likely will choose an option other than Actual Date. Refer to RecTrac Date Select Fields for a listing of selection definitions and examples for this type of field.
- Click the Combo Box icon for Include Bill Typesand select the Bill Types you wish to include in your Installment Billing run.
- ACH - Automated Clearing House (ACH) records. The billing process will charge fees. Fees will be paid by automatic deduction from the patron's bank account.
- Credit Card - The billing process will charge fees. Fees will be paid by an automatic charge to the patron's credit card.
- Installment Bill - The billing process will charge fees. The fees will be applied to the patron's household, and the patron will remit in person.
- Payroll Deduction - The billing process will charge fees. Fees will be paid by automatic deduction from the employee's wages at the next payroll run. Generally speaking, this option should be used only if you allow your employees to pay for services at your department directly from their net wages as a part of the payroll process.
- Click the Combo Box icon for Modules to Include and select the RecTrac Modules you wish to include in your Installment Billing run.
Only those modules you select here will be included in the billing run. If you do not select a module here, the selections you make in the Groups below (if any) will have no impact. For Example: IF you do NOT select Pass Memberships here, NO bills for Passes will be processed regardless of any selections you make in the Pass Memberships Settings Group below. - Determine whether you wish to Email Receipts. Select this option to have the system email Installment Billing / Auto-Debit receipts to patrons when running this process as opposed to processing .pdf receipts.
Note: When this option is selected, .pdf paper bills/receipts will be printed only for those households/family members that do not have an email address anywhere on their household/family member record in RecTrac. Paper bills are printed via the Bulk Print program.
- Fill in the remaining fields in this Group as needed.
Use the "i" and "?" Help icons on the upper-right hand corner of the screen for field definitions, and examples if needed.
The ACH and Installment Billing Settings Groups

- Expand the Drop-down list for ACH File Date and select your option for this billing run.
THEN
Take appropriate action in the right-hand column to specify the actual date you wish to select. The date you select will be the date stamped on the file that is sent to the bank. This will allow you to process installment bills/auto debits when you wish while still following bank regulations regarding the file's date stamp.
If you run billing manually, it is always safe to select Actual Date and enter" today's" date in this field, but conditions may vary. For Example: You process installment bills on a monthly basis on the fifth (5th) of each month. On months were the 5th falls on a work day, you select Actual Date and enter mm/05/20yy in this field. However, "this month" the 5th falls on a Sunday. Because of that, you will do your billing run on Monday the 6th instead. In order to bill the customers you will enter mm/05/20yy in the Billing Date field (because that is the date of the bills). However, since your bank requires that ACH files be date-stamped on the day you send them, you would enter mm/06/20yy in the ACH File Date field (because that is the date on which you processed billing).
Notes: If you opt to run this program as a Scheduled Event, you likely will choose an option other than Actual Date. Refer to RecTrac Date Select Fields for a listing of selection definitions and examples for this type of field.
The household's Primary Person will be the name listed in the ACH file for each transaction that you transmit to your bank.
- Expand the Drop-down list and select your Effective Date option for this billing run.
THEN
Take appropriate action in the right-hand column to specify the actual date you wish to select. This is the date you want to use for the effective date entry in the '5' record of the ACH file. Typically, this is the same as the ACH File Date, but conditions may vary. For Example: You process installment bills on a monthly basis on the fifth (5th) of each month. On months were the 5th falls on a work day, you select Actual Date and enter mm/05/20yy in this field. However, "this month" the 5th falls on a Sunday. Because of that, you will do your billing run on Monday the 6th instead. In order to bill the customers you will enter mm/05/20yy in the Billing Date field. Because you want the Effective Date for the '5' record entry to be the same as the Billing Date, you would enter mm/05/20yy in this field. - Enter an ACH Batch Description, if desired.
- Expand the Drop-down list and select your Due Date option for Installment Bills for this billing run.
THEN
Take appropriate action in the right-hand column to specify the actual date you wish to select. The date you select will appear as the "Due Date" for bills sent to your patrons as a byproduct of the billing run, and it represents the date by which you expect remittance.
Generally speaking, Due Dates are <X> Days after the bill is processed. To achieve this, you would select Today from the Drop-down list and then enter the number of days from "today" that remittance is due. For Example: If you allowed four weeks, you would enter '28' in the right-hand column because you allow "today + 28 days" for remittance.
Notes: Refer to RecTrac Date Select Fields for a listing of selection definitions and examples for this type of field.
The Household Options Group

- Expand the Household Options Group, if desired, to determine which households you wish to bill.
- Click the Combo Box icon to select the Household Features by which you wish to run Installment Billing/Auto-debit, if desired. This option allows you to process Installment Bills for a select group of Households, as only those households with a matching Feature Code will be billed.
- Determine whether to enable the option:
- Leave the Use HH Last Name Range option DE-SELECTED and make NO selections in the browser to include ALL households in the billing run.
- Select the Use HH Last Name Range option to include only those Households in the Begin and End Household Last Name range in your process, as well as any households selected in the Browser, if applicable.
THEN
Input the range of Households you wish to include. By default, the Begin/End range is <Blank> to 'ZZZZZ' (i.e. all households) - Leave the Use HH Last Name Range option DE-SELECTED to include only those Households selected in the Browser in your billing run.
Note: Begin and End Household Last Name fields appear only if the Use HH Last Name Range option is selected.
Module Groups

The fields on the Module Groups all work exactly the same.
- Expand the Group for an applicable Module.
- Leave the Use Range option DE-SELECTED to select ALL items in the module.
OR
Enable the option and then click the Pick List icons for Begin Range and End Range to select the Range of Items in the Module for which you wish to run billing.
Using the image above, and assuming Activity Enrollments and Pass Memberships are entered in the Modules to Include field at the top of the screen, the system would:- Include ALL Pass Codes in the Installment Billing run because the Use Pass Code Range option is NOT selected.
- Include ONLY Activity 370101-01 to 370101-03 in the billing run because the Use Section Range option is enabled and only those three (3) sections appear in the Range.
- The Rental Item Settings and Locker Settings groups remain collapsed because those modules are not included in the billing run.
- Make selections in the Pass Membership Settings Group and determine whether to use Wildcards, if desired.
Use the "i" and "?" Help icons on the upper-right hand corner of the screen for field definitions, and examples if needed.
Process the Billing Run
- Review your billing settings and click Process at the bottom of the screen when ready. You will proceed to the information screen.
- Determine your Report output for the Installment Billing Log and click Run Installment Billing when ready. The Processing Option you selected above will run and Installment Billing Log will be generated.
- Remember: As discussed above, hardcopy receipts/bills are NOT printed as result of clicking Process.
Note: Vermont Systems recommends running this option first to preview installment billing results prior to actually billing households/family members. If opting to do this:
- Ensure your Processing Option is Journal Only and your Prenote Option is Process Bills.
- Click Process and make your selections on the Output Selection screen.
- Preview/spot-check the ensuing report.
- When ready, change the Processing Option to Process Bills.
- Click Process again and repeat the Output Selection steps.
Update an Existing Billing Plan
The Installment Billing Update program allows you to view all billing records currently linked to a household. The Bills field and Edit Bill Details button allow you to view and change billing plans and information. The DataGrid at the bottom of the screen displays all bills for the plan currently selected. From the DataGrid, you can:
- Change the Billing Date.
- Change the Billing Status.
- Change the Billing Amount.
- Add or change a flat dollar Discount to a Billing record.
- Add new Billing Records to the existing Bill.
- Copy a selected Billing Record to all or selected Unbilled and/or Unbilled-Adjusted Billing Records
- Add or change up to three (3) separate Pre-Pay Amounts to a billing record using the Pre Pay Update button.

This section will discuss some of the more common processes that are generally done when updating a patron's billing plan.
Important Note: At present, RecTrac 3.1 does not provide Global Installment Billing Update functionality. This is a current processing limitation only.
Bulk Installment Billing Update can be performed for a single family member's single Billing Plan only using the Copy Billing Information described below.
To Change the Billing Method
When processing a sale that results in the creation of a billing plan, the method you choose (Installment Bill, ACH, Auto-Debit, and/or Payroll Deduction) becomes linked to the plan. The steps that follow will walk you through changing the billing/payment method linked to an existing bill. Changing the Auto Pay Option in Household Maintenance will not change the billing/payment method linked to a billing plan. This must be done through Installment Billing Update. For Example: Penny Lane purchased an Annual Pass membership that is billed monthly. At the time of purchase, Penny opted for ACH withdraw from her Checking Account. Six months later, Penny acquires a new credit card and decides to have the remainder of her Annual Membership bill switched from her bank account to the new Credit Card. To do this, Penny's Installment Billing plan must be updated.
- In RecTrac, go to Home Ribbon • Household Management. You will continue to the Household Management DataGrid.
Note: Installment Billing Update is available via Household Management only. Access to this button is controlled via the Permissions profile: Buttons/Misc Permissions tab • GlobalSalesLookup_ButtonInstallmentBillingUpdate.
- Lookup and select the Household for which you wish to update the Installment Billing plan.
- With the Household selected in the DataGrid, click Installment Billing Update at the bottom of the screen. You will proceed to the Installment Billing Update screen.
Note: If the Household you selected does not have an Installment Billing plan, the Bills field will display, "No Installment Bills Linked to this Household," and the DataGrid will be blank.
- The Bills field and Edit Bill Details button allow you to view and change billing plans and information.
- Bills - A Button that takes you to the Edit Bill screen where you make changes to billing type.
- Accept the default entry in the Bills field or expand the Drop-down list list to select the Billing Plan you wish to modify.
- Click Edit Bills. You will continue to the Edit Bill screen.

- Expand the Drop-down list for Billing Type and select the new option. Using the example above, you would replace Installment Billing with Credit Card.
- If applicable, click the Add/Change…button to add or select the new account.
- IF the account information had been Added to the Household, it will appear in the list. Highlight/select it and click Select. Optionally, you can double-click to select.
- IF the account information has NOT been added, you may Add it "On the Fly." Once added, you can double-click the record to select it.
- Click Save to save changes and return to the previous screen. Changes take effect the next time you run billing.
- Repeat these steps to change the billing method for another Billing Plan for this household
OR
Click the "X" in the upper right-hand corner of the DataGrid to exit.
Changes to the Billing Type for a Billing Plan take effect the next time billing is run. To verify the account linked to the Billing Plan, Run Billing using the 'Journal Only' option.
To Change Individual Billing Records
The DataGrid at the bottom of the Installment Billing Update screen displays all bills for the plan currently selected. From the DataGrid, you can:
- Change the Billing Date.
- Change the Billing Status.
- Change the Billing Amount.
- Add or change a flat dollar Discount to a Billing record.
- Add new Billing Records to the existing Bill.
- Copy a selected Billing Record to all or selected Unbilled and/or Unbilled-Adjusted Billing Records
- Delete a single bill or All Bills with an Unbilled or Unbilled-Adjusted status.

To edit any or all of the above fields, use DataGrid InLine Editing feature. Refer to RecTrac DataGrids for a detailed explanation of Inline Editing.
Important Note: At present, RecTrac 3.1 does not provide Global Installment Billing Update functionality. This is a current processing limitation only.
Bulk Installment Billing Update can be performed for a single family member's single Billing Plan only using the Copy Billing Information described below.
To Change the Dollar Amount of a Billing Record
- From the Installment Billing Update DataGrid, highlight/select the Billing Record you wish to edit and click the Stylus Icon on the left edge. You will enter 'Edit Mode.' Columns that may be altered will become active. Refer to the screen shot above.
- Make changes to the dollar of the Billing Amount as needed.
- Click the Check Mark icon on the left edge of the DataGrid to exit 'Edit Mode.' Changes take effect immediately. The Status of the Record you modified will changed to Unbilled Adjusted automatically. Exit the Installment Billing Update DataGrid and re-enter to see the change.
- Repeat these steps to change the Amount for other Billing Records as needed
OR
Use the Copy Billing Information button to apply these changes to multiple records in bulk
OR
Click the "X" in the upper right-hand corner of the DataGrid to exit.
Changes take effect the next time billing is run. To verify your changes, Run Billing using the 'Journal Only' option.
Note: To expedite the editing process for a single field on multiple Billing Records, click the DataGrid Options Icon on the upper left-hand corner and enable the applicable Edit option. Close the Settings/Option screen. The column for which you enabled Editing will be open for all Billing Records. Refer to RecTrac DataGrids for a detailed explanation.
To Apply a Discount to a Billing Record
- From the Installment Billing Update DataGrid, highlight/select the Billing Record you wish to edit and click the Stylus Icon on the left edge. You will enter 'Edit Mode.' Columns that may be altered will become active. Refer to the screen shot above.
- Enter a value in the Discount field. The value you enter is a flat dollar amount. The amount you enter will be subtracted from the Bill Amount at the time billing is processed.
Note: Discounts are available by flat dollar amount only. At present, there is no option for creating a percentage discount for an Installment Billing record in this program.
- Click the Check Mark icon on the left edge of the DataGrid to exit 'Edit Mode.' Changes take effect immediately. The Status of the Record you modified will changed to Unbilled Adjusted automatically. Exit the Installment Billing Update DataGrid and re-enter to see the change.
- Repeat these steps to change the Discount for other Billing Records as needed
OR
Use the Copy Billing Information button to apply these changes to multiple records in bulk
OR
Click the "X" in the upper right-hand corner of the DataGrid to exit.
Changes take effect the next time billing is run. To verify your changes, Run Billing using the 'Journal Only' option.
Note: To expedite the editing process for a single field on multiple Billing Records, click the DataGrid Options Icon on the upper left-hand corner and enable the applicable Edit option. Close the Settings/Option screen. The column for which you enabled Editing will be open for all Billing Records. Refer to RecTrac DataGrids for a detailed explanation.
To Change the Status of a Billing Record
- From the Installment Billing Update DataGrid, highlight/select the Billing Record you wish to edit and click the Stylus Icon on the left edge. You will enter 'Edit Mode.' Columns that may be altered will become active. Refer to the screen shot above.
- Make changes to the dollar of the Status as needed. Your options are:
- Billed - This Billing Record has been processed. This option is system-controlled and cannot be selected manually.
- Unbilled - This is a record that has not been processed.
- Unbilled Adjusted - This Billing Record has been updated previously, but has not been processed. If you are making changes to a Billing Record, the status will change automatically upon exiting the program.
- Suspended - This Billing Record is suspended. When billing is run, this record will be skipped.
- Cancelled - This Billing Record has been cancelled. When billing is run, this record will be skipped. 'Cancelled' status will be applied automatically as a by-product of the cancellation of the item linked to this Billing Plan, if applicable (i.e. if a patron cancels a Pass Membership linked to this Billing Plan, all subsequent bills for the Membership will be cancelled automatically). Likewise, you can opt to set the status to 'Cancelled' manually using this program.
- Cancelled - Withdrawn - This Billing Record has been cancelled due to a child's status in a CYMS program being set to 'Withdrawn.' Withdrawn Status is specific to Child and Youth Management Services (Military Child Care) and should not be used by Municipalities without specific instruction from Vermont Systems Support.
- Click the Check Mark icon on the left edge of the DataGrid to exit 'Edit Mode.' Changes take effect immediately.
- Repeat these steps to change the Status for other Billing Records as needed
OR
Use the Copy Billing Information button to apply these changes to multiple records in bulk
OR
Click the "X" in the upper right-hand corner of the DataGrid to exit.
Changes take effect the next time billing is run. To verify your changes, Run Billing using the 'Journal Only' option.
Note: To expedite the editing process for a single field on multiple Billing Records, click the DataGrid Options Icon on the upper left-hand corner and enable the applicable Edit option. Close the Settings/Option screen. The column for which you enabled Editing will be open for all Billing Records. Refer to RecTrac DataGrids for a detailed explanation.
To Add a New Billing Record
The Add New Billing Record button allows you to insert a new Billing Record into the Billing Plan. The new record uses "Today's Date," has a Status of "Unbilled Adjusted" and a Bill Amount of "$0.00." To add a new Billing Record line item:
- Click Add New Billing Record. The system will insert a Billing Record Line Item.
- Select the new Billing Record line time and click the click the Stylus Icon on the left edge. You will enter 'Edit Mode.' Columns that may be altered will become active. Refer to the screen shot above.
- Make changes to the Bill Date, Bill Amount, and Discount Amount fields a necessary.
- Click the Check Mark icon on the left edge of the DataGrid to exit 'Edit Mode.' Changes take effect immediately.
- Repeat these steps as needed to add additional Billing Records
OR
Click the "X" in the upper right-hand corner of the DataGrid to exit.
Notes regarding the Addition of New Billing Records:
- Adding New Billing Records allows you to extend a bill passed its original End Date. This should be used under select circumstances only. In the event of a Renewal, the bill will be extended automatically based on the Renewal Settings on your Installment Billing Template. You should never have to manually extend a bill due to an item renewal.
- Billing Records added manually use "today's" date. Unless your intention is to run billing "today," be sure to update the Bill Date field for the new bill and to a normal billing date.
- When opting to Add New Billing Record, the system performs a check for recordstatus = Charge and feetype = installment bill fee on the safee record. When found, the system will add as many billing records as fees which meet the check. In most instances, the system will add one (1) billing record only. However, if you utilize the Instilment Bill Number List field (Advanced Fees • Installment Billing Settings group), the system will add as many new billing records as you have separate fees.
The screen shot below shows how an Installment Billing Update screen might look should you perform all actions described in this section once.

To Copy Billing Information
The Copy Billing Information button allows you to copy the billing information to other records on the browser.
- Highlight/select the record you wish to copy and click Copy Billing Information. You will continue to an Information dialog.

- Choose the billing records you wish to impact (Unbilled, Unbilled-Adjusted or Both)
- Choose the billing records you wish to copy the settings to.
- Make your selection and click Copy to complete the procedure.
- You will be returned to the Installment Billing Update screen where your changes can be seen.
To Delete Unbilled Records
The Delete Billing Record and Delete All Billing Records buttons allow you to delete bills with a status of Unbilled or Unbilled Adjusted. Access to these button is controlled via the Permissions profile: Buttons/Misc Permissions tab.
- Highlight/select the record you wish to Delete and click Delete Billing Record
OR
Make no selections and click Delete All Billing Records.
To Establish Pre Payments for an Installment Bill
The Pre Pay Options screen allows you to establish up to three (3) pre pay options for your Installment Bill. Pre Pay allows you to pay all or a portion of the selected bill instantly when billing is run. The Pre Pay amount is applied toward the bill BEFORE the bill is applied to the household, so a household set up for Auto-Debit will be responsible for the portion of the bill that remains AFTER the auto-pay. Pre Pays are recorded on the household's transaction history and also appear on the Installment Billing log.
For Example: Penny Lane has a semi-monthly bill for $100. The bill is linked to her VISA card. Penny also qualifies for a hardship discount of 25% toward Memberships, so you set up a Pre Pay record for 25% linked to Discount/Agency Pay Code 76, and apply it to Penny's bill using this program. At each billing cycle, the system will apply a $25.00 payment toward Penny's bill using Pay Code 76. This is done when you run billing, and the Pre Pay is applied toward Penny's bill BEFORE the bill is applied to Penny's account. Her credit card will be charged &75.00 only per billing cycle over the length of the auto-payment.
This screen allows you to link up to three (3) Pre Pay records to an installment bill, if desired. The Pre Pay feature was developed primarily for CYMS Users to record Army Family Covenant (AFC) payments and other Agency payments that are made automatically toward a household's bill as a by-product of soldier service. However, Pre Pay can be used by municipalities and other departments as well.
Upon establishing your Pre Payments, the Installment Billing Update DataGrid will display all Pre Pays linked to the installment billing record you have selected.
To Establish a Pre Pay Option
- From the Installment Billing Update DataGrid, highlight/select a Billing Record and click Pre Pay Update. You will continue to the Pre Pay Options screen.

- Expand the Drop-down list for Pre Pay Paycode 1 and select the Payment Code that you will use to record the Pre Payment. Payment Codes are listed by their Description.
- Expand the Drop-down list for Pre Pay Option and make your selection: Flat or Percent.
- Enter the Pre Pay Amount 1 in its field.
- Expand the Drop-down list for Apply Changes To and make your selection.
THEN
Enter a Date Range, if applicable. - Repeat these steps, as necessary, for Pre Pay Paycodes 2 & 3.
- When ready, click Update to apply your changes. You will be returned to the Installment Billing DataGrid and the impacted bills will reflect your Pre Pay Update. This is illustrated by the Red Cross Relief records in the image above.
Changes take effect when billing is run for a date on which Pre Pay is established. To verify your changes, Run Billing using the 'Journal Only' option.
To Suspend Pass Membership Billing
In the event you suspend a Member's Pass and do not wish to bill the member during the dates of the suspension, you can suspend billing using the Update Status/Pass Tickler button in Global Sales • Purchase History.
- In RecTrac, go to Global Sales. Lookup and select the Member whose pass and billing you wish to suspend.
- Select the Purchase History tab. Locate the Pass you wish to suspend.
- Expand the Drop-down list for Change and select "Update Status/Pass Tickler." You will continue to the Status Update screen.

- Expand the Drop-down list for Status and select "Suspended.
- Enter the Beginning and Ending Suspension Date Range.
- Select the option to Suspend Billing and add Notes as desired.
Installment Billing records linked to this Pass with a Billing Date that falls within the Date Range entered will be have their Billing Status changed to Suspended.
For Example: You bill monthly. On 28 September you suspend a Member's pass for three (3) months, until 01 January. You opt to Suspend Billing. The Member's Installment Bills for October, November, and December will be suspended because the 01 October, 01 November, and 01 December billing dates fall within the dates of the suspension.. - Click Continue to complete the process and exit Global Sales. There is no need to complete a Transaction to put these changes into effect.
- If desired, go to the Member's Installment Billing Update program and verify that the proper bills have been suspended.
Note: In the event you wish to un-suspend billing while keeping the pass suspended, repeat the steps above and select the Unsuspend Billing option.
Bulk Installment Billing Change
The Bulk Installment Billing Change program allows you to update the Fee records linked to Installment Billing Records. The program allows you to update the Fee and/or Discount for all Installment Billing Records linked to a Fee record you have selected. This program changes the Fee, and then the system changes the detail record for each member linked to the Fee. The Bulk Installment Billing Changes program provides a good solution for instances when your organization implements new rate structures that will affect your patrons who are installment billed.
For Example: In your database, 500 members have an Annual Pass and a single Installment Billing Fee is linked to each one. Your new rates go into effect on 01 October. To bulk update the Fee for all 500 members after billing in September but prior to billing in October, you would use this program.
Note: This program does not allow for selection of households/family members. To change Installment Billing records linked to selected households only, use the Installment Billing Update program.

Main Parts of the Screen
- The Fees DataGrid displays all Installment Billing Fee records in your Database. These are the fee records, themselves, to which family member's installment bill(s) are linked.
- The Billing Fees Changes DataGrid displays the Installment Billing Fees you have selected for bulk change.
- The Item Selection Group is where you will select the Modules that will be impacted by the Bulk Installment Bill Change. Additional fields allow you to select ranges of record for each module, if desired.
- The Options Group allows you to set parameters for the on/after date on which changes will be realized and Include options.
To run the Bulk Installment Billing Change Program
- In the Fees DataGrid, highlight/select the Installment Billing Fee record(s) you wish to change and click Add Fee to move them to the Billing Fee Changes DataGrid. Multiple selection is allowed. In the example above, two (2) records have been added to the Billing Fee Changes DataGrid.
- In the Billing Fee Changes DataGrid, highlight/select a Fee, click the Stylus icon and use InLine Editing to change the value in the New Fee and/or New Discount fields. Make your changes and click the Check Mark icon again to close InLine Editing.
The value you enter in the New Fee and/or New Discount field becomes, literally, the New Fee. There is no math involved. If the original Fee was $50.00 and you want to bulk change that to $55.00, you would enter 55.00 in this field to make that the New Fee, as displayed in the example above. - In the Item Selection Group, expand the Combo Box for Modules to Include and the select the Modules to which your Installment Billing Fees are linked. In the example above, the Pass Module only has been selected.
Note: You must select at least one module in this field. Multiple selection is allowed.
- (Optional) Select any/all of the Use Range options and then enter a Range or Wildcard to limit the items within a particular module to a specific range.
- In the Options Group, select your Bill Date to Change range, and then make determine which Billing Types and Billing Statuses you wish to include. In the example above, changes will take effect for any Installment Billing record on/after 30 September 2016 and before/on 20 September 2017.
- Determine whether you wish to Suspend or Reinstate Billing. Refer to the online help for definitions.
- Determine whether you wish to Print Update Log.
- Click Process when ready. The process runs on the AppServer. You will be notified when it completes. If opting to print the report, it will open automatically.
Note: Regardless of whether you print the report, Vermont Systems recommends going to Installment Billing Update and spot-checking the billing records as well. Optionally, you can also run an Installment Billing report.