
Table of Contents
Document Summary
RecTrac 3.1 Lost Card Processing is a function of Global Sales • Purchase History and allows you to track lost cards (i.e. passes) by Member. Completing a Lost Card transaction:
- Allows you to charge a card replacement fee, if desired.
- Increases the value in the Member's Lost Card Count field (Household Management • Member Details • Additional Settings) by one.
- Prompts you to print a replacement card.
License – Maintenance Agreement
The Lost Card Processing Interface is free. Use of the interface requires a Vermont Systems license and annual maintenance agreement for RecTrac and the component modules discussed in this document. Prior to implementing any process outlined in this document, please contact the Vermont Systems Sales department at 1-877-883-8757 to verify that you are authorized to use the modules discussed in this document and if not, to obtain a quote and/or approval.
Setup Steps
This document will walk you through the basic File Maintenance and Daily Processing steps required to:
- Create and link a Lost Card Fee and Fee Prompt, in the event you charge lost card replacement fees.
- Process a Lost Card transaction.
If you have additional questions about Lost Card Processing setup and operation within RecTrac after reading this document, please contact Vermont Systems Customer Service by phone at 887-883-8757 or generate a Support Case through the Customer portal of the Vermont Systems web site using your Customer ID and password.
Before You Begin
This document is written with the following assumptions. If any of the items listed below is NOT true, contact Vermont Systems Support prior to continuing, as the steps in this document may prove difficult to complete and unexpected results may occur.
- Your organization is running RecTrac 3.1.04.01 or greater.
- The User ID with which you sign into RecTrac has the requisite permissions and ability to access all modules and functions pertaining to Pass Management and Lost Card Processing.
- You understand RecTrac DataGrids and how to maneuver through them.
- You understand your Pass Management program and all associated fees.
- You understand RecTrac Fees, Criteria and Fee Hierarchy. This document does not provide instruction for RecTrac Fee Maintenance beyond the minimum requirements necessary to set up a Lost Card Fee.
- You understand the Global Sales can process simple transactions.
Create and Link a Lost Card Fee
Complete this section only if you charge fees for lost cards.
Lost Card fees are applied directly to the purchase record of the original pass, so there is not a separate line item in the Global Sales "Shopping Cart" for a Lost Card transaction. Prior to creating a Lost Card Fee, it is a good idea to determine where within Pass Module hierarchy you wish to link it. Where a Fee is linked determines What it will apply to. In the event you charge the same fee for any lost card, Vermont Systems recommends creating one (1) Lost Card Fee and linking it to the Pass Module in Module Management. For purposes of example, this document uses the model just described. Your setup may vary.
Note: All file paths and screen/tab locations in this document refer to file paths and screen/tab locations as they appear in the standard, default Vermont Systems Design. Your setup and Design may vary.
- In RecTrac, go to Management Ribbon • System Management • Fee/Rule/Question Management Group • Module Maintenance.
- Highlight/Select the PM/Pass Memberships record and click Change.
- Click the Fees tab. You will continue to the Pass Module Fee DataGrid. Any Fees currently linked to the Pass Module will display.
- Click Advanced Fee Add at the bottom of the DataGrid. You will continue to the Fee Update screen.
Note: Fee Default Record Permissions determine whether or not you receive a Default Record Add pop-up message upon clicking Add Fee.
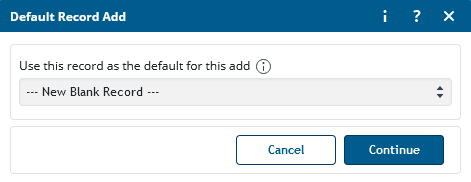
If you receive the pop-up message, you have Permissions to add "Regular" Fee Records and Default Fee Records to your database. Expand the Drop-down list and make your selection:
- If you have a Default Fee(s) established in your database, you may opt to use it, if desired.
- If you do NOT have a Default Fee(s) established in your database, Vermont Systems recommends choosing --New Blank Record-- as that option will create a new Fee.
If you do NOT receive the pop-up, you do NOT have Permissions to add Default Fee Records to your database. You will be adding a new Fee Record only.
Fee Default Record Permissions are maintained on your Permissions profile • Default Record Permissions group. Default Fees are maintained in Fee Management.

- Enter a Fee Description. For Example: PM - Lost Card Fee. This field will accept alpha and numeric characters.
- Enter the Amount you wish to charge.
- Accept Standard Fee as your Fee Type.
- Expand the Combo Box for Transaction Type.
- Click Uncheck All to clear any pre-selected items.
- Scroll down the list and click on the option for Lost Card.
- Close the Combo Box
Note: Your selection here MUST BE LOST CARD.
- Expand the Picklist icon for Revenue GL Code and make a selection. This is a mandatory field in the standard Vermont Systems design. Your design may vary.
- For Installment Billing/Auto-Debit/ACH Fees Only - If you are running Installment Billing with Lost Card Fees, expand the Installment Billing Settings group. In the Installment Billing Option field, select Always Charge.
Create a Fee Prompt for Lost Card Processing
Complete this section only if you wish to create a Fee Prompt for your Lost Card transactions.
Skip to Step 10 below if you do not wish to create and use a Fee Prompt for Lost Card transactions.
A Fee Prompt is a pop-up box that appears when selecting a fee into the Shopping Cart during Global Sales. Fee Prompts require the clerk to choose a Fee to charge. With Lost Card Processing, this allows for one final check prior to charging the lost card fee. Optionally, it allows you to waive the Lost Card Fee, if desired, while still recording the Lost Card transaction and thus re-printing the pass and increasing the Lost Card Count for on the Member's record.
Vermont Systems recommends using a Fee Prompt for Lost Card Processing, but setup remains optional.
- From the Fee Update screen, click the Picklist icon for Fee Group Code. You will continue to the Fee Group Management DataGrid.
- Click Add at the bottom of the DataGrid. You will continue to the Fee Group Update screen.

- Enter a Fee Group Code. For Example: PM - Lost Card. This is a mandatory field in the standard Vermont Systems design. Your design may vary.
- Enter a Description. The Description you enter will appear on the Fee Prompt Header when you select the Lost Card transaction into the Shopping Cart. For Example: Lost Card Prompt.
- Enter "1" in the Max Fees Allowed to be Selected field.
- Enter "0" in the Min Fees Required to be Selected field.
Note: Entering "0" in this field allows you the option of waiving the Lost Card Fee at the time of the transaction, if desired. If you do NOT wish to waive the lost card fee, enter "1" in this field.
- Select the option to Prompt for Fee during Add to Cart. This option MUST be selected for the Fee Prompt to work.
- Click Save. You will return to the Fee Group Management DataGrid.
- Highlight/select the Fee Group you just created and click Select at the bottom of the screen. You will be returned to the Fee Update screen, and the Fee Group you created will populate the Fee Group Code field.
-
Fill out any remaining fields on the Advanced Fees screens and groups as desired.
Use the "i" and "?" Help icons on the upper-right-hand corner of the screen for field definitions, if needed. - Click Save when done. You will return to the Module Update screen.
- Click Save and exit back to the main menu.
This completes the setup of your Fee Prompt.
Check Lost Card Values on the ID Swipe Profile
Complete this section only if you use physical ID Cards as opposed to Cross Reference (X-Ref) values or manual lookup when swiping passes.
When using Lost Card logic with ID Cards, ensure the Begin Lost Card Position and Lost Card Length fields on your ID Swipe profile are set properly.
- In RecTrac, go to Management Ribbon • System Management • User/Menu/Profile Management Group • Profile Assignments.
- Highlight/select your ID Swipe profile and click Update.
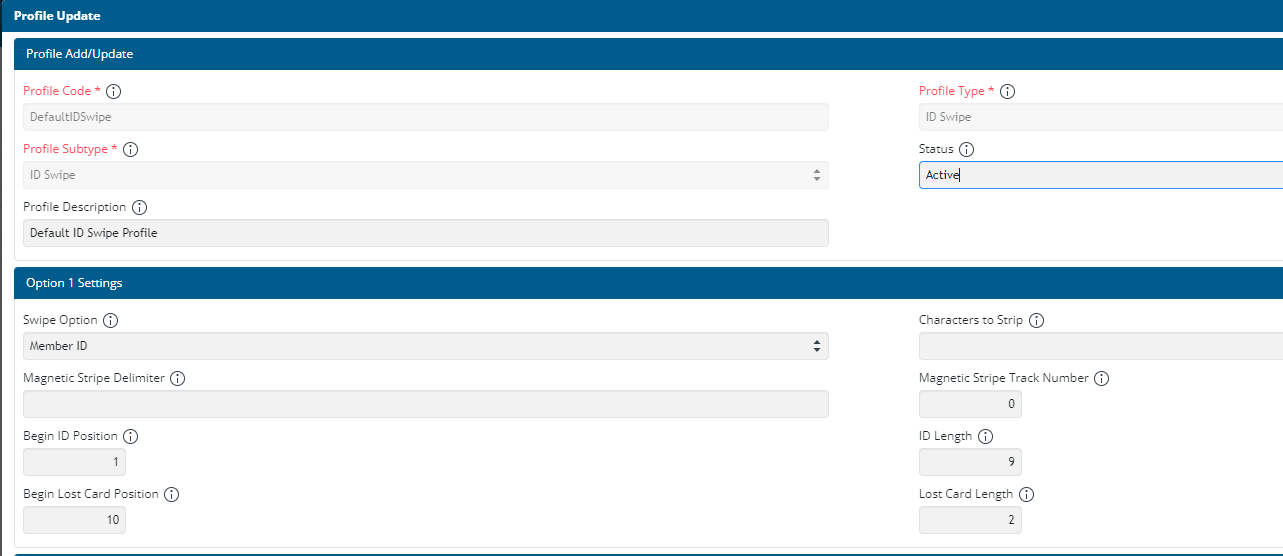
- In the Option Settings group that uses the Member ID Swipe Option, ensure the Begin Lost Card Position and Lost Card Length values are accurate.
- Begin Lost Card Position - This is the next number after your ID Length value. For Example: If your ID Length value is "9," you would enter "10" in this field.
- Lost Card Length - This is the number of digits you wish to allot for Lost Cards. Vermont Systems recommends a value of "2."
- Click Save. You will be returned the previous screen. Changes take effect immediately.
- Repeat these steps as necessary for any additional ID Swipe profiles you may have.
Perform a Lost Card Transaction
- In RecTrac, go to Global Sales and look up the member for whom you wish to process the Lost Card transaction.
- On the Global Sales screen, click the Purchase History tab.
- Highlight/select the transaction that represents the sale of the pass which has been lost and click Lost Card at the bottom of the Purchase History transaction DataGrid.
- If you created a Fee Prompt, it will display.
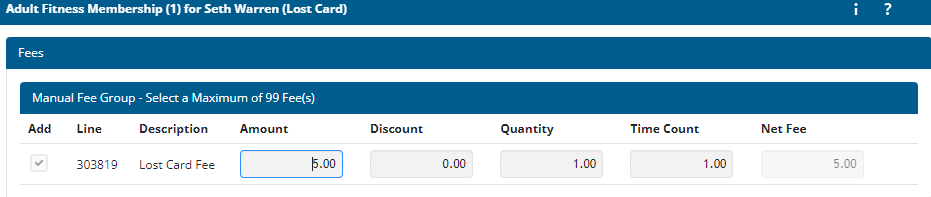
- Enable the option under Add and click Continue. The transaction will move into the Shopping Cart. The Total Due should reflect your Lost Card Fee, as well as any other balance still due for the pass that was lost.
- Click the Payment Button. You will continue to the Payment Screen.
- Process the payment as you normally would. When the transaction completes, you will be prompted to print a new card.
- Take appropriate action. You will be returned to Global Sale.