Topic Doc: RecConnect Programs

Written by Daniel Rotondi
Updated at July 10th, 2023
Document Summary
RecTrac RecConnect programs allow you to generate customer lists for email blasts, and/or hard-copy letters and mailing labels to your patrons that contain important information with regard to the RecTrac module from which the report was run. For Example: You might run RecConnect to advise patrons of upcoming Activity Registration Dates, upcoming Pass Expirations, Facility Reservation confirmations, etc…. RecConnect programs are available for all modules in RecTrac (Activity, Facility, Pass, etc…). The system also provides three (3) Global RecConnect options for a more general approach to creating household and family member listings.
Each RecConnect program includes:
- A set of module-specific selection criteria for creating a customer list.
- Common panels for Household/Family Member Criteria and Transaction Criteria by which you can further filter your customer list
- The RecConnect Options screen allows you to set Match, Zip Code, and RecConnect History options.
- The RecConnect Results screen is where you make your output selections.
Document Scope
RecConnect provides a powerful reporting tool that can be used for a wide variety of purposes in RecTrac. This document does not attempt to discuss the various ways or reasons you might opt to run a RecConnect program, nor does it offer instructions for "how to run" any specific RecConnect program.
This document provides:
- A brief outline of the basic steps required to run RecConnect and the sequence of screens you visit during in the process.
- A detailed description of the RecConnect Options and RecConnect Results screen to explain the available options and their functionality.
- Basic instruction for locating each RecConnect program using the Standard Vermont Systems Design.
- A brief description of the data each report provides.
If you have additional questions about RecConnect operation after reading this document, please contact Vermont Systems Customer Service by phone at 887-883-8757 or generate a Support Case through the Customer portal of the Vermont Systems website using your Customer ID and password.
License – Maintenance Agreement
The RecConnect Interfaces are free. The use of these interfaces requires a VSI license and annual maintenance agreement for RecTrac and the component modules discussed in this document. Prior to implementing any process outlined in this document, please contact VS Sales department at 1-877-883-8757 to verify that you are authorized to use the modules discussed in this document and if not, to obtain a quote and/or approval.
Note: SMS Text Messaging requires additional licensing. Contact VS Sales at the number above for further information or to obtain a quote and/or approval.
Before You Begin
When working with RecConnect programs (or any reports in RecTrac), keep in mind the following:
-
The Document Center - Reports are run on the AppServer and always can be found in the Document Center upon completion. The system notifies you when a report process completes.
- In the event you're running RecConnect and miss the "Show Results" notification, go to the Document Center.
- Select the RecConnect record you just ran. This will have a .json file type extension.
- Click RecConnect Results at the bottom of the Document Center DataGrid. You will continue to the RecConnect Results screen where you can finish the process.
-
Default Settings - When your report does not provide the expected results, click the Default Settings button and reselect your report filters and parameters.
- Default Settings resets the report to its baseline.
- Better than 90% of reporting difficulty stems from incorrect reporting parameters.
- Report Widgets - RecTrac Report screens offer numerous widget fields that allow you to filter the data for your report. RecTrac Widgets provides definitions and examples to show you how these work.
- Dual Column Date Select Fields are discussed here.
- Report Wildcarding is discussed here.
Running RecConnect Programs
The following provides a brief outline of the basic steps required to run RecConnect and the sequence of screens you visit during the process. For purposes of example, this document uses the Activity RecConnect. However, regardless of the RecConnect program, you're using, the steps remain the same.
To Run a RecConnect Program
- In RecTrac, go to the report you wish to run.

- Report screens memorize the settings from the last time you ran it. You can accept these settings OR click Default Settings to reset the report filters and parameters.
- Select the criteria for your report. Use the "i" and "?" Help icons for field definitions, if needed.
-
DataGrid and Use Range Selections - The Core Criteria Tab of most RecConnect programs contains a DataGrid and a Use Range field. Be certain to make a selection in one, the other, or both.
- In instances where you have a DataGrid and corresponding Range, a selection in one or the other (or both) is required. Selecting nothing from the DataGrid and nothing from the Range yields a blank report or process.
- In the example above, three (3) Writer's Workshop Sections are selected in the DataGrid, and Activity 200000_01 - 200000_4 is selected in the Range. The Output will include enrollments from both the DataGrid and Use Range fields.
- Most RecConnect Programs contain multiple tabs, which run across the top of the screen. In the example above, there are Tabs for Core Criteria, Coordinator/Instructor Criteria, HH/FM Criteria, and Transaction Criteria. Be sure to visit all Tabs to ensure you have the criteria you want.
- Output Template - Ensure your Output Template selection at the bottom of the screen is VSI - <x> RecConnect. In the example above, VSI - AR RecConnect is selected because the example displays the Activity RecConnect.
- When you have made your selections, click Process. You will continue to the Report Options screen.

- The RecConnect Options screen allows you to set Match, Zip Code, and RecConnect History filters for your RecConnect.
- Make selections on this screen as needed:
- Match Option - This determines the number of times a family member or household will be listed on the RecConnect Results DataGrid. Match Options are discussed here.
- Zip Code Option - This allows you to filter the output by Including or Restricting a list of Zip Codes if desired. In the example above, residents with 05414 and 05417 Zip Codes only will be included in the output.
- Run in Survey Mode - This option allows you to send the selected output to a random percentage of patrons. For Example: Your RecConnect run yields 100 results. You want to select a random 20 of those 100 results to survey. To do that, return to this screen, select the Run in Survey Mode option and enter 20.00 in the Survey Percent field. When you re-run the process, a random 20 of the original 100 results will be displayed in the RecConnect Results DataGrid.
- RecConnect History - These fields allow you to send the selected output based on RecConnect History records. You can opt to Include RecConnect History (send the mailing only to those households with matching RecConnect History codes) or Exclude RecConnect History (send the mailing only to those households who DO NOT have a matching RecConnect History).
- Click Continue when ready and click OK to acknowledge the Information message. The process runs on the AppServer. You will be notified when it completes.

- Click Show Results when prompted. You will continue to the RecConnect Results DataGrid.
Note: In the event you're running RecConnect and miss the "Show Results" notification:
- Go to the Document Center.
- Select the RecConnect record you just ran. This will have a .json file type extension.
- Click RecConnect Results at the bottom of the Document Center DataGrid. You will continue to the RecConnect Results screen where you can finish the process.

- The RecTrac RecConnect Results screen allows you to make selections regarding the output of your RecConnect.
From this screen, you may:- Review and remove entries from the RecConnect Results DataGrid.
- Process RecConnect for All or Selected entries in the RecConnect Results DataGrid.
- Create RecConnect History records.
- Determine how you wish to process RecConnect and select subsequent options.
- Email - Send email (or email as text messages) to the names listed in the RecConnect Results DataGrid.
- Labels - Generate mailing labels for the names listed in the RecConnect Results DataGrid.
- Letters - Generate a printed letter for the names listed in the RecConnect Results DataGrid.
- Make your selections on this screen as needed.
- Click Process RecConnect when ready to complete the sequence.
- Email/text messages as email are sent via your AppServer.
- Labels and Letters (as applicable) are queued to your printer.
Note: Email, Labels, and Letters are the RecConnect options available for RecTrac 3.1. In the event, you want an alternative output option, such as a .pdf report or .csv export, a custom template should be created. Contact Vermont Systems Support for assistance with custom reports, if needed.
Match Options
The Match Option field is found on the Report Options screen of all RecConnect Programs in RecTrac 3.1. Your Match Option selection determines the number of times a family member or household will be listed on the RecConnect Results DataGrid upon running a RecConnect program.

Match Options on RecConnect Programs work as follows:
- All Matches - The report will list everyone it finds every time it finds a match. If a household has a family member or family members that meet the report criteria multiple times, that household's family members will be listed each time a record is found. For Example: The Lane household has two daughters (Penny and Lois). Penny and Lois both meet the report criteria twice. Penny and Lois both will be listed twice (2x) on the RecConnect Results DataGrid for a total of four (4) entries.
- Unique Household - The report will list each household it finds once only regardless of how many matches the report finds for members in the household. If a household meets the search criteria more than once, only the first record found for that household will be listed. For Example: The Lane household has two daughters (Penny and Lois). Penny and Lois both meet the report criteria twice. The Lane household will be listed once (1x) on the RecConnect Results DataGrid. The single name listed will be whichever matching record was found first.
- Unique Family Member - The report will list each applicable family member once only regardless of how many matches the report finds for a single family member. If a family member meets the report criteria multiple times, that member will be listed once. For Example: The Lane household has two daughters (Penny and Lois). Penny and Lois both meet the report criteria twice. Penny and Lois both will be listed once (1x) on the RecTrac RecConnect Options browser. The record that displays for each family member will be the record of the report found first.
RecConnect Results
The RecTrac RecConnect Results screen allows you to make selections regarding the output of your RecConnect process. From this screen, you may:
- Review and remove entries from the RecConnect Results DataGrid.
- Process RecConnect for All or Selected entries in the RecConnect Results DataGrid.
- Create RecConnect History records.
- Determine how you wish to process RecConnect and select subsequent options.
- Email - Send email (or email as text messages) to the names listed in the RecConnect Results DataGrid.
- Labels - Generate mailing labels for the names listed in the RecConnect Results DataGrid.
- Letters - Generate a printed letter for the names listed in the RecConnect Results DataGrid.

Field Descriptions
The following presents a description of the main options on this screen. Use the "i" and "?" Help icons for other field definitions, if needed.
RecConnect Results DataGrid
- The RecConnect Results DataGrid displays the results of your report. Scroll up/down to view the Family Members/Households or scroll left/right to view additional details.
- Highlight/select records in the DataGrid and click Remove Selected Results as needed to strip those records from your output
OR
Highlight/select records in the DataGrid and choose "Selected Records Only" from the Process Option Drop-down list to include only those selected records in your output.
Note: Generally speaking, it is always a good idea to spot-check this DataGrid for accuracy. If more names or fewer names appear in the DataGrid than you think should be there, it is likely your report parameters need to be adjusted.
Process Option
- Expand the Drop-down list to select your Process Option:
- All Records - The output will consist of all the names/records listed in the RecConnect Results DataGrid.
- Selected Records Only - The output will include only the names/records you have highlighted/selected in the RecConnect Results DataGrid.
RecConnect History Fields
- Select this option to generate a RecConnect History record for each household included in your output.
THEN
Expand the Drop-down list for RecConnect History Category and select the RecConnect Category Code you wish to link.
Email Options
- To process email and/or email as text messages, select the Process Email option.
THEN
Expand the Email Options group.

- Select the default entry for Process Emails Only or expand the Drop-down list to make an alternate selection.
Notes: If your database is licensed for SMS, then you will not have a Process Option field, as SMS is a text messaging option.
If you are not licensed for SMS, and if you wish to send email as text messages, then additional setup may be required. Refer to Sending Emails as Text Messages for the file maintenance steps required. The option for 'Email as Text Message' will be deprecated in a future release.
- Accept the default entries for the Email From, Email From 'Friendly Name' Address Label, Email Reply to, and CC Email Addresses fields of overwrite as needed.
- Accept the default entry in the Email Subject field or overwrite as needed. If opting to overwrite, you also have the option to Add Tag to Email Subject. See below for further information regarding Tags.
- Leave the HTML Email Template field blank to use the HTML Template you linked on your Email profile.
OR
Click the Picklist icon to select an alternate Email Template Comment Code, if desired. Any selection you make in this field will overwrite your selection (if any) on the Email profile.
Note: See Also: Topic Doc - Graphical Email Templates.
- Select your Email Body Option:
-
Use Free Form Email Body - You will proceed to the Email Body field where you can enter the text for your email.
This option is depicted in the image below. -
Use RecConnect Letter - You will proceed to the Email RecConnect Letter Body Code field where you will select the RecConnect Letter Code you wish to use as the body of your email.
This option is depicted in the image above.
-
Use Free Form Email Body - You will proceed to the Email Body field where you can enter the text for your email.
- If opting to use Free Form Email, enter your email text in this field. The Text Field will accept to 30,000 alpha-numeric characters. Use the Formatting Icons across the top of the Text Field to manipulate your text as desired. Mouse-hover over the icons for definitions of their purpose. The Text Field is WYSIWYG (What You See Is What You Get) formatted.
The Text Field always displays plain text when entering this screen. The Source < > icon can be used to toggle the Text Field between plain text and HTML code, if desired.
Note: Formatting icons, as displayed below, are available only if your Email profile is set to Use HTML Email Body.

Note: If opting to "Copy, Cut, and Paste" text from a pre-generated document into the field, VSI highly recommends using .txt or .rtf file documents as the source. Microsoft Word and other word processing programs insert extra (often unseen) HTML code in their documents that often result in problems ranging from unexpected formatting issues in RecTrac to exceeding the character count in this field.
To use text from a pre-generated MS Word document:
- Copy the original document to a .txt file, such as Notepad. Copying the original into .txt format strips any hidden HTML formatting inherent in MS Word docs.
- Proof-read for accuracy and ensure:
- All special characters were copied correctly from MS Word to Notepad.
- Text is fully left-justified in Notepad. All tabs, indentations, and other formatting have been removed.
- Mid-line breaks have been removed, so text for any one line appears on its own line and/or with proper text wrapping.
- Re-copy the text from Notepad and paste it into this field.
- Format text as needed using the Formatting icons at the top of this field.
- Proofread again for accuracy.
- Database Value Codes allow you to automatically insert fields (such as First Name, Last Name, Home Address, Phone Number, Activity Number, Pass Expiration Date, Reservation Number, Trip ID, etc…) into the body of your letter.
Expand the Drop-down list to select the Database Value Code you wish to insert.
THEN
Click Add Text to place it. Codes are always placed at the end of the field. You may have to copy/cut/paste them as needed afterward. Multiple selections can be inserted throughout the body of your letter, but they must be added and placed individually.
In the Example above, all fields in Brackets are Database Value Codes, so an email sent to Penny Lane would begin "Dear Penny," because of the Database Tag "[FRSTNAME]." - If opting to send email as text messages, determine whether you wish to use the same text as your email or whether you wish to use alternate text for the text message.
THEN
Take steps appropriately.
Note: If opting to send emails as text messages, additional setup may be required. Refer to Sending Emails as Text Messages below for the file maintenance steps required.
- Determine whether you wish to Print Report for Records with Invalid/No Email When this option is enabled, you will be presented with the RecConnect Options screen upon clicking Process RecConnect. From there you may opt to print, preview, and/or email the resulting Invalid Email Addresses byproduct report. When the process completes, a copy of this report will be available in the Document Center.
Notes:
- Selecting this option will NOT produce a report listing undeliverable/returned emails. "Invalid" email addresses in this process are those without a proper email extension, such as .com, .org, .edu, etc…. RecTrac is not an email server and has no way of knowing whether the emails it generates are delivered or returned. It knows only whether an email address is properly formatted.
For Example: help@rectrac.com is a properly formatted email address and would not appear on the byproduct report because the system sees it as a valid email address.
help@rectrac.c is NOT properly formatted and will appear on the byproduct report because the system sees it as an invalid email address. - In order for the Invalid Email Addresses Report to be generated, the list of potential recipients of your email must include at least one (1) invalid email address, as outlined above. (i.e. You must have at least one (1) improperly formatted email address in the list of names you're emailing.) The system will not generate a blank report, so if no report is generated, then there were no improperly formatted email addresses in your mailing.
- Once you've run the mailing, your Email Server should be able to provide a report of "valid" email addresses that were returned as undeliverable.
- Make your other selections as needed.
- Determine whether you wish to Process Labels and/or Process Letters along with your email blast.
OR
Click Process RecConnect to have the emails sent.
Label Options
- To process labels, select the Process Labels option.
THEN
Expand the Label Options group.

Click Image to Enlarge
- Determine whether you wish to have labels printed in ALL CAPITAL LETTERS.
- Expand the Drop-down list for Additional Label Information Print Options and make a selection, if desired.
- Nothing - The recipient's name and mailing address only will appear.
- Add 'or Current Resident' -"or Current Resident" will be appended to the recipient's name. For Example: Al Czervik or Current Resident
- Add 'To Parents Of:' - "To Parents Of:" will appear prior to the recipient's name. For Example: To Parents Of: Danny Noonan
- Add Team Name and League Name - The recipient's Team and League Name will appear on the first line of the Label. The recipient's name will appear on the second line.
- Add Team/Organization Name - The recipient's Team or Organization Name will appear on the second line of the label.
- Add Source Detail - Data in the Source Description column of the RecConnect Results DataGrid will appear on the second line of the label.
- Click the Picklist icon to select your Label Template from the Inventory/Mailing Label Template Maintenance DataGrid. A label template is required if you are printing labels from this program.
- Determine whether you want to skip the printing of a label for names in the RecConnect Results DataGrid that have a valid email address. The assumption with this option is that you do not need to send a hard copy letter to someone you're sending the same information to in an email.
Note: The system looks only to see whether the household has data in the email field. The system does not check the validity of an email address, so a label will not be printed for any patron with a bogus/invalid email address in the Email Address field on their record.
- Make your other selections as needed.
- Determine whether you wish to Process Email and/or Process Letters along with your labels.
OR
Click Process RecConnect to print your labels.
Letter Options
- To process letters, select the Process Letters option.
THEN
Expand the Letter Options group.

Click Image to Enlarge
- Click the Picklist icon to select your Letter Code from the Letter Management - RecConnect DataGrid. The Letter Code you select will print when you process your results.
Note: If opting to send Emails and Letters, you can use the same Letter Code for both, if desired. Optionally, you could use different Letter Codes and/or a Letter Cod for your Letter and Use Free Form Email Body for your email.
- Determine whether you want to skip the printing of a letter for names in the RecConnect Results DataGrid that have a valid email address. The assumption with this option is that you do not need to send a hard copy letter to someone you're sending the same information to in an email.
Note: The system looks only to see whether the household has data in the email field. The system does not check the validity of an email address, so a label will not be printed for any patron with a bogus/invalid email address in the Email Address field on their record.
- Determine whether you wish to Process Email and/or Process Labels along with your letters.
OR
Click Process RecConnect to print your letters.
SMS Options
Note: The use of SMS Text Messaging requires additional licensing. Contact VSI Sales 1-877-883-8757 for further information or to obtain a quote and/or approval.
- To process SMS, select the Process SMS option.
THEN
Expand the SMS Options group.

- Select an SMS Template Comment Code you wish to use for this RecConnect program. SMS Template Comments act as the "body" of your text message. Optionally, you can leave this field blank. When left blank, the text message will consist only of whatever text you enter in the SMS Body field.
- Enter any additional text message content in the SMS Body field. The field will accept to 800 alpha-numeric characters. There is a character counter on the lower right-hand corner of the screen. Be mindful that standard SMS text messages consist of 160 or fewer characters, however, most phones and networks support concatenation and segment and rebuild messages to a greater character limit.
- Select the Database Value Code you wish to insert into your text, if any,
THEN
Click Add Tag to SMS Body to insert the tag into your text message. Tags are always placed at the end of the field. You may have to copy/cut/paste them as needed afterward. Multiple selections can be inserted throughout the body of your letter, but they must be added and placed individually.
Database Value Codes allow you to automatically insert fields (such as First Name, Last Name, Address, Phone Number, Activity Number, Pass Expiration Date, Reservation Number, Trip ID, etc.) into the body of your text message. In the Example above, all fields in Brackets are Database Value Codes. - Determine whether you want the system to print a byproduct report of names on the RecConnect Results DataGrid that have no phone number or that have an invalid phone number on their record.
Notes:
- Selecting this option will NOT produce a report listing undeliverable SMS messages. "Invalid" phone numbers in this process are those with more or fewer than 10-digits. SMS text messages are sent through a 3rd party API. RecTrac has no way of knowing whether the text messages it generates are delivered or not. It knows only whether the phone number is properly formatted.
- In order for the Invalid Phone Numbers Report to be generated, the list of potential recipients of your RecConnect must include at least one (1) invalid phone number, as outlined above. The system will not generate a blank report, so if no report is generated, then there were no improperly formatted phone numbers in your RecConnect.
- Click Process RecConnect to send your text messages.
RecConnect Programs
This section provides basic instructions for locating each RecConnect program within the Standard VSI Design as well as a brief description of the data each option provides. Use the "i" and "?" Help icons for field definitions, if needed.
Every RecConnect in RecTrac contains screens for Match Options and RecConnect Results. These are discussed above.
Note: All file paths and screen/tab locations in this document refer to file paths and screen/tab locations as they appear in the standard, default VSI Design. Your setup and Design may vary.
Global Module RecConnect Programs
RecTrac provides three (3) "Global" RecConnect options.
-
Transaction Detail RecConnect (VSI SA RecConnect)
- Path to - Reporting Ribbon • Report Listing • System Financial Group • Transaction Detail Reports • VSI - SA RecConnect Output Template
- Provides - A customer list based on Transaction Data based on a cross section of the entire database. The report allows you to picking and choose database elements from multiple modules, versus a list generated based on specific modules only.
-
Installment Billing RecConnect (VSI SA RecConnect)
- Path to - Reporting Ribbon • Report Listing • System Financial Group • Installment Billing Reports • VSI - SA RecConnect Output Template
- Provides - A customer list based on Installment Billing types, Modules, Expiration Dates, etc….
-
Household RecConnect (VSI - SA RecConnect)
- Path to - Reporting Ribbon • Report Listing • Household & Family Member Group • Household Reports • VSI - SA RecConnect Output Template
- Provides - A customer list of Households based on database-wide selection criteria vs. a list generated from activity in a specific module, such as Activity Registrations, Facility Reservations, etc….
-
Family Member RecConnect (VSI - SA RecConnect)
- Path to - Reporting Ribbon • Report Listing • Household & Family Member Group • Family Member Reports • VSI - SA RecConnect Output Template
- Provides - A customer list of Family Members based on database-wide selection criteria vs. a list generated from activity in a specific module, such as Activity Registrations, Facility Reservations, etc….
Activity RecConnect
-
VSI - AR RecConnect
- Path to - Reporting Ribbon • Activity Enrollment Reports • VSI - AR RecConnect Output Template
- Provides - A customer list of Family Members based on Activity Enrollments, current or archived. Coordinator/Instructor Criteria is available as well.
Facility RecConnect
-
VSI - FR RecConnect
- Path to - Reporting Ribbon • Facility Reservation Reports • VSI - FR RecConnect Output Template
- Provides - A customer list of Family Members based on Facility Reservations, current; upcoming; or past.
Pass RecConnect
-
VSI - PM RecConnect
- Path to - Reporting Ribbon • Pass Membership Reports • VSI - PM RecConnect Output Template
- Provides - A customer list of Family Members based on Pass Memberships by type, status, and other criteria.
Point of Sale (POS) RecConnect Programs
RecTrac provides three (3) POS RecConnect options.
-
Inventory RecConnect (VSI PSI RecConnect)
- Path to - Reporting Ribbon • Report Listing • POS Inventory Group • Inventory Sales Reports • VSI - PSI RecConnect Output Template
- Provides - A customer list of Family Members based on Inventory purchases by type, date, and other criteria.
-
Service Item RecConnect (VSI PSS RecConnect)
- Path to - Reporting Ribbon • Report Listing • POS Service Item Group • Service Item Sales Reports • VSI - PSS RecConnect Output Template
- Provides - A customer list of Family Members based on Service Item purchases by type, date, and other criteria.
-
Ticket RecConnect (VSI PST RecConnect)
- Path to - Reporting Ribbon • Report Listing • POS Tickets Group • Inventory Sales Reports • VSI - PST RecConnect Output Template
- Provides - A customer list of Family Members based on Ticket purchases by type, date, and other criteria.
Rental RecConnect
-
VSI - RN RecConnect
- Path to - Reporting Ribbon • Report Listing • Equipment/Site Rental Group • Rental Reservation Reports • VSI - RN RecConnect Output Template
- Provides - A customer list of Family Members based on equipment and/or site rentals by type, status, and other criteria.
League RecConnect
-
VSI - LS RecConnect
- Path to - Reporting Ribbon • Report Listing • League Group • League Registration Reports • VSI - LS RecConnect Output Template
- Provides - A customer list of League Teams by their Family Member contact; based on Leagues, status, and other criteria.
Trip RecConnect
-
VSI - TP RecConnect
- Path to - Reporting Ribbon • Report Listing • Trip Group • Trip Reservation Reports • VSI - TP RecConnect Output Template
- Provides - A customer list of Family Members and their trip reservations; based on Trips, status, and other criteria.
Court RecConnect
-
VSI - CR RecConnect
- Path to - Reporting Ribbon • Report Listing • Court Group • Court Reservation Reports • VSI - CR RecConnect Output Template
- Provides - A customer list of Family Members based on Court Reservations, status, and other criteria.
Personal Trainer Module RecConnect Programs
RecTrac provides two (2) Personal Trainer RecConnect options.
-
VSI - PT RecConnect
- Path to - Reporting Ribbon • Report Listing • Personal Trainer Group • Trainer Reservation Reports • VSI - PT RecConnect Output Template
- Provides - A customer list based on Personal Trainer based reservations, dates, status, and other criteria.
-
Personal Trainer RecConnect (VSI - SA RecConnect)
- Path to - Reporting Ribbon • Report Listing • Personal Trainer Group • Trainer Reports • VSI - SA RecConnect Output Template
- Provides - A list of Personal Trainers based on category, type, and other criteria.
Note: The Trainer RecConnect lists only those Staff Members who are set up as Personal Trainers. Currently, there is no SA Staff RecConnect for other Staff Members, such as Instructors, Coordinators, and Referees.
Locker RecConnect
-
VSI - LK RecConnect
- Path to - Reporting Ribbon • Report Listing • Locker Group • Locker Rental Reports • VSI - LK RecConnect Output Template
- Provides - A customer list of Family Members based on Locker Rentals by Locker Room, status, and other criteria.
CYMS RecConnect
-
VSI - CYMS RecConnect
- Path to - Reporting Ribbon • Report Listing • Child Youth Management System • CYMS Reports • VSI - CYMS RecConnect Output Template
- Provides - A list of Family Members in your CYS program based on record status and other criteria.
-
VSI - Staff/Provider RecConnect
- Path to - Reporting Ribbon • Report Listing • Child Youth Management System • CYMS Staff/Provider Reports • VSI - Staff/Provider RecConnect Output Template
- Provides - A list of CYMS Staff or Providers based on record status and other criteria.
Tracking RecConnect History
RecConnect History is the process of tracking RecConnect records that have been sent to households. When tracking RecConnect History, a RecConnect History record will be linked to each household included in your output. The RecConnect History record displays the date, time, RecConnect program, User ID, and RecConnect Category Code as well as other information. This can be viewed in Household Inquiry • RecConnect History.

When running a RecConnect, you have the option to Include or Exclude RecConnect Category Codes, thus giving you the option to control which households receive your mailings based on whether they have received a prior mailing using the same RecConnect Category Code. This determination is made on the RecConnect Options screen.
Create RecConnect Category Codes
RecConnect Category Codes are maintained in System Code Management. Type = RecConnect Category.
- In RecTrac, go to Management Ribbon • System Management • Misc Management Group • System Code Management.
- Click Add. You will continue to the System Code Update screen.
- Enter a Record Code.
- Expand the Drop-down list for Type and select RecConnect Category.
- Fill out the remaining fields as needed and click Save when done.
- Repeat these steps as need to create additional RecConnect Category Codes.
To Link RecConnect Codes to Households by Running a RecConnect Program
- Run a RecConnect as you normally would. Continue through to the Rec Connect Results screen.

- The RecConnect History fields are located beneath the Results DataGrid.
- Select the option to Create RecConnect History
THEN
Expand the Drop-down list for RecConnect History Category and make your selection from the RecConnect Category Codes you created above. - Process the RecConnect as you normally would. All households included in the output will have the RecConnect Category Code linked.
- To view the RecConnect History record, go to Inquiry Ribbon • Household Inquiry • Lookup and Select a Household • Click RecConnect History.

Note: Regardless of whether you ran the RecConnect program for Family Members or Households, your RecConnect History will be linked to the Household. RecConnect History is NOT linked to individual Family Members.
To Filter a RecConnect Program by RecConnect Category Codes
- Run a RecConnect as you normally would. Continue through to the RecConnect Options screen.

- Expand the Drop-down list for History Begin and History End Dates, if desired, to select the date range by which you wish to filter your results.
THEN
Take appropriate action in the right-hand column to specify the actual dates you wish to select. The date range you enter will be used as a filter. To be considered for Inclusion or Exclusion, RecConnect Category Codes must have been linked to households within the date range you select. Refer to the specific examples below. - Determine whether you wish to Include History Codes or Exclude them and use the Dual Select fields appropriately.
Note: To manipulate the Dual Selection List:
- To Add All or Remove All from one side or the other, click the applicable button.
- To add or remove single-column headers from one side of the Dual Selection List to the other, double-click on it with your mouse.
- To move a column header up or down in its field, click with your mouse and then "drag and drop" as needed.
- If opting to Include Records, expand the Drop-down list to select your Match Option for the RecConnect History Codes you wish to Include as filters for this process.
THEN
Use the Dual Select List to Add the RecConnect History Code(s) you wish to use to the Selected column.- Match Any - Of the Codes in the Selected column, a Household needs at least one (1) match in their RecConnect History to be included in the output.
- Match All - Of the Codes in the Selected column, a Household must have ALL codes in their RecConnect History to be included in the output.
- If opting to Exclude Records, expand the Drop-down list to select your Match Option for the RecConnect History Codes you wish to Exclude as filters for this process.
THEN
Use the Dual Select List to Add the RecConnect History Code(s) you wish to use to the Selected column.- Match Any - Of the Codes in the Selected column, a Household needs at least one (1) match in their RecConnect History to be included in the output.
- Match All - Of the Codes in the Selected column, a Household must have ALL codes in their RecConnect History to be included in the output.
- Click Continue and complete the process as you normally would.
Include / Exclude Examples
Include Option - The example image above displays this setup.
For Example: You are opting to Include households linked to RecConnect Category type Volunteers, and your Date Range is 06/01/20xx -10/31/20xx.
- A household with a Volunteer RecConnect History record dated 15 July WOULD appear on the output because the record date (15 July) falls within the Date Range entered (01 June - 31 October) and you are opting to Include records.
- A household with a Volunteer RecConnect History record dated 15 April would NOT appear on the output because the record date (15 April) falls outside of the Date Range entered (01 June - 31 October) and you are opting to Include records.
Exclude Option
For Example: You are opting to Exclude households linked to RecConnect Category type Volunteers, and your Date Range is 06/01/20xx -10/31/20xx.
- A household with a Volunteer RecConnect History record dated 15 July would NOT appear on the output because the record date (15 July) falls within the Date Range entered (01 June - 31 October) and you are opting to Exclude records.
- A household with a Volunteer RecConnect History record dated 15 April WOULD appear on the output because the record date (15 April) falls outside of the Date Range entered (01 June - 31 October) and you are opting to Exclude records.
Scheduling RecConnect Emails
You can schedule the RecConnect program to send Emails at regular intervals if desired. This option is available for Email only.
- Run a RecConnect Program.
- Proceed through to the Report Options screen.
- Upon making your selections, click Schedule. You will continue to the Schedule Generator screen.

- On the left-hand panel, enter your Schedule Settings as you would for any other report. Use the "i" and "?" Help icons for field definitions, if needed.
- On the right-hand side of the screen, enter your Email Options as discussed above.
- Click Save. The report will be scheduled, and you will be returned to the previous screen.
Exporting Email Address from RecConnect
You can export patron email addresses and other information from a RecConnect report using the latent Export Comma Delimited option from the RecConnect Results DataGrid.
To Export Email Addresses from RecConnect
- Run a RecConnect Program.
- Proceed to the RecConnect Results screen.
- In the RecConnect Results DataGrid, click the Options tab and select Export Comma Delimited.

Click Image to Enlarge
- Follow the onscreen prompts. Depending on the Browser you are using to access RecTrac,
- The file may be downloaded to your computer.
- The system may ask whether you want to open it in your default Spreadsheet program, likely MS Excel.
- From there, use standard Spreadsheet commands to manipulate the file as needed.
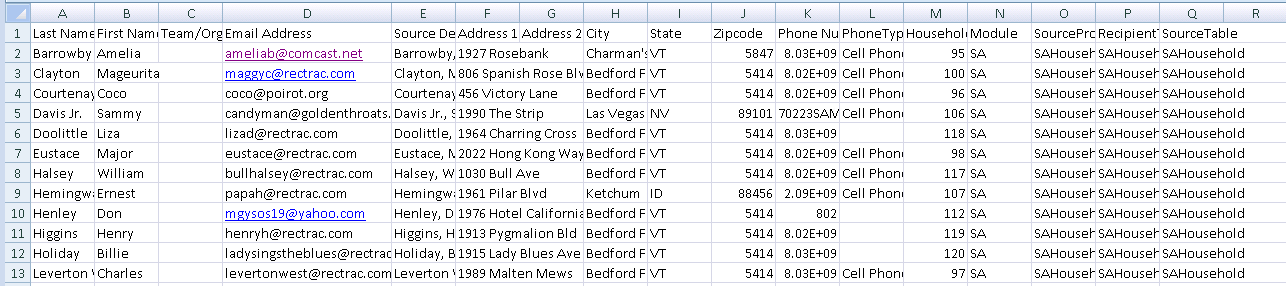
- Once the file is open in your Spreadsheet program, any column from the DataGrid may be manipulated/exported, such as Name, Address, Zip Code
Sending Emails as Text Messages
RecTrac 3.1.06.13 and later offers you the option to send emails as text messages from any RecConnect Report using the Email Options discussed above. Email as Text Message is available for households, family members, staff members and League Teams/Team Members.
To utilize this feature, some additional File Maintenance is required. The basic steps are outlined below.
To Send Emails as Text Messages
- Ensure your Cell Phone Type System Code is linked in the Default 'Cell Phone' System Code field on the Misc Settings group of your Static Parameters profile. This field MUST be populated in order to send email as text message.

- Go to Management Screen Management and add Cell Phone Provider fields, as needed, to the appropriate screens in RecTrac, such as Household Update, Member Details, Staff Update, and League Team Update. This requires a Custom Screen Design for all screens to which you will add a Cell Phone Provider field.
- Field Type = Phone <number> Provider. For Example: Phone #1 Provider.
- Phone Provider fields already exist on your screens. You need to change the FieldStatus from "Hidden" to "Updateable." Upon doing this, rearrangement of other fields may be necessary.
- Phone Provider fields are available on the following screens: SAHouseholdUpdate, SAPersonUpdate, SAStaffUpdate, and LSTeamUpdate.

- Cell Phone Provider System Codes must be created, and the Provider Domain field on each Code must be populated. The following are commonly used nationwide Provider Domains:
- ATT - @txt.att.net
- Sprint - @messaging.sprintpcs.com
- T-Mobile - @tmobil.net
- U.S. Cellular - @email.uscc.net
- Verizon Wireless - @vtext.com
If your database does not already contain them, then you must add them and the others that your patrons use. Comprehensive lists of SMS Gateways can be found Here.

- Upon adding the Provider field(s) to your screens, you will have to go to each Household, Staff Member and League and update each member manually. There is no Bulk method of assigning Cell Phone Provider codes to the cell phone numbers for your members.
- Ensure your Households, Family Members, League Teams, and Staff Members (as appropriate) have a "Cell Phone" Phone Type and the appropriate Phone Provider listed. The example image below shows a Cell Phone using Verizon Wireless as the Provider.

- Once setup is complete, you can run any RecConnect Report and send email as text message using the steps provided above.