safeeupdate_help

Written by Zach Malloch
Updated at March 19th, 2024
Table of Contents
The Fee Update screen is used to update an existing Fee record.
Note:
Field names on the screen with red labels* are required by the screen design you are using. Mandatory fields in the default Vermont Systems design are noted where appropriate. Your design and mandatory fields may vary.
See Also: RecTrac Fees for a detailed description of RecTrac Fees, set up information, and examples.
See Also: Video - Fees
Click here for a list of Criterion Types and their Definitions.
Click here for field definitions for all Criterion Types.
From the bottom of the screen....
Click Save to save your changes and return to the previous screen.
Click Cancel to return the previous screen without saving your changes.
Click Previous or Next to move to the next tab on the screen.
Core
Fee Description (SAFee_Description)
Enter a description (i.e. a name) for your Fee. This is an alpha-numeric field and will accept up to 100 characters.
For Example: Registration Fee - Resident
Amount (SAFee_Amount)
Enter the amount for this Fee. Depending on the Fee Type you are adding/modifying, this value can be:
- A dollar value, such as 5.00 ($5.00)
- A percentage, such as 5.00 (5%)
Note:
Positive values only should be entered into this field. Depending on the Fee Type you are adding the System will "do the math" for you. For Example: If adding a 10% Fee Reduction - Percentage Fee Type you would enter 10.00 in this field. When processing a transaction the system will deduct 10% from the base fee. You would NOT enter -10.00
Status (SAFee_RecordStatus)
Accept the default entry or expand the Drop-down list to select the status for this fee.
- Active - This fee is active and will be charged appropriately when linked.
- Inactive - This fee is inactive and will not be charged.
- Default - See below for a description
Default Status
Default" status allows you to create exact-copy records upon clicking the Add button from the File Management DataGrid for this module and selecting one of existing Default Options (provided at least one exists). This creates an exact copy of the "Default" record with exception that the copy's Record Status is Active instead of Default. This allows you to save substantial time when adding new records to your database since all settings on all panels (Core Settings Additional Settings etc.) and tabs (Core Fees* Rules* Questions Comments etc.) will be copied from the default record.
"Default" status records to do not show up in Daily Processing DataGrids. You cannot register for reserve or purchase a "default" record. They exist for the purpose of being copied only. If at any time you change the status of a default record to "Active" or "Inactive it will become a regular record" in your database and thus appear in Daily Processing DataGrids.
Options for adding default records are maintained on the Permissions profile Default Record Permissions Group.
* Separate default records for fees and rules can be created as well in their respective File Management program. Permissions must be set to add a Default Record and once added the default record can be linked as needed to any module.
Fee Type (SAFee_FeeType)
Note:
When selecting any Fee Type of Fee Increase Fee Reduction or Discount the system will hide non-applicable fields/groups from view. Fee Type Fee Increase - Percent (New Fee Line) is exempt from this stipulation.
Accept the default entry (Standard Fee) or expand the Drop-down list and select the type of Fee:
- Fee Increase - Flat - This is a flat dollar increase equal to the value in the Amount field (i.e. 10.00 = $10.00). The dollar amount is added to the base dollar amount being charged (provided Fee Adjustments apply) so a $10.00 increase to a $50.00 amount would result in a total fee of $60.00. This is a pure Fee increase; no GL/Cost Center entries are made no entries appear on reports receipts etc….
- Fee Increase - Percent -This is a percentage increase equal to the value in the Amount field (i.e. 10.00=10%). The percentage increase is added to the base dollar amount being charged (provided Fee Adjustments apply) so a 10% increase to a $50.00 amount would result in a total fee of $55.00. This is a pure Fee increase; no GL/Cost Center entries are made no entries appear on reports receipts etc….
- Fee Increase - Percent (New Fee Line) -This is a percentage increase equal to the value in the Amount field (i.e. 10.00=10%). The percentage increase is added to the base dollar amount being charged (provided Fee Adjustments apply) so a 10% increase to a $50.00 amount would result in a total fee of $55.00 BUT the Fee is charged on its own line in the Shopping Cart. This fee works just like the Fee Increase - Percent fee except that it will keep the increase on its own fee line vs. being added into the other fee. Because of this all Fee Groups on screen apply. This is a pure Fee increase; no GL/Cost Center entries are made no entries appear on reports receipts etc….
- Fee Reduction - Flat - This is a flat dollar decrease equal to the value in the Amount field (i.e. 10.00 = $10.00). The dollar amount is deducted from the base dollar amount being charged (provided Fee Adjustments apply) so a $10.00 decrease to a $50.00 amount would result in a total fee of $40.00. This is a pure Fee decrease; no GL/Cost Center entries are made no entries appear on reports receipts etc….
- Fee Reduction - Percent - This is a percentage decrease equal to the value in the Amount field (i.e. 10.00=10%). The percentage decrease is subtracted from the base dollar amount being charged (provided Fee Adjustments apply) so a 10% decrease to a $50.00 amount would result in a total fee of $45.00. This is a pure Fee decrease; no GL/Cost Center entries are made no entries appear on reports receipts etc….
- Deposit - Flat - This is a flat dollar deposit equal to the value in the Amount field (i.e. 10.00 = $10.00). This is a flat dollar amount deposit regardless of other fees being charged so a $10.00 deposit on a $200.00 facility reservation would be $10.00.
- Deposit - Percent - This is a percentage deposit equal to the value in the Amount field (i.e. 10.00 = 10%). The percentage amount is calculated by the total fees being charged so a 10% deposit on a $200.00 facility reservation would be $20.00.
- Discount - Flat - This is a flat dollar discount equal to the value in the Amount field (i.e. 10.00 = $10.00). The dollar amount is deducted from the base dollar amount being charged (provided Fee Adjustments apply) so a $10.00 decrease to a $50.00 amount would result in a total fee of $40.00. Discounts appear as GL/Cost Center entries and show as "Discounts" on reports receipts etc….
- Discount - Percent - This is a percentage discount equal to the value in the Amount field (i.e. 10.00=10%). The percentage decrease is subtracted from the base dollar amount being charged (provided Fee Adjustments apply) so a 10% decrease to a $50.00 amount would result in a total fee of $45.00. Discounts appear as GL/Cost Center entries and show as "Discounts" on reports receipts etc….
- Installment Bill Fee -This is a flat dollar fee equal to the value in the Amount field that is added to a household's balance as a by-product of the Installment Billing/Auto-debit/ACH process.
- Inventory Average Cost Margin - This is a percentage amount equal to the profit margin over Average Cost you wish to attain for a POS Item. Average Cost is defined in the Average Cost field under the Additional Setting group in Core Settings.
- Inventory Average Cost Markup -This is a percentage amount equal to the value of increase over average cost for a POS Item as defined in the Average Cost field under the Additional Setting group in Core Settings.
- Inventory Last Cost Margin - This is a percentage amount equal to the profit margin over Last Cost you wish to attain for a POS Item. Last Cost is defined in the Average Cost field under the Additional Setting group in Core Settings.
-
Inventory Last Cost Markup - This is a percentage amount equal to the value of increase over last cost for a POS Item as defined in the Last Cost field under the Additional Setting group in Core Settings.
Note:
See Also: Calculating Markup and Margin for a guide to determining Markup and Margin percentages.
- Late Return - This is a flat dollar fee equal to the value in the Amount field that is added to a household's balance due to the late return of a Rental Item.
- Package -This is a flat dollar fee equal to the amount you wish to charge for this item when it is part of a Package.
- Standard - This is a standard flat dollar fee equal to the value in the Amount field. This is the base cost of an item.
- Visit Registered - This is a flat dollar fee equal to the value in the Amount field. This the base cost of an Activity or League visit for a patron holding a pass.
-
Visit Drop-In - This is a flat dollar fee equal to the value in the Amount field. This the base cost of an Activity or League drop-in visit (i.e. the cost for a drop-in Visit for a patron that does not have a pass).
Note:
To charge Visit Fees NOT associated with Activities or Leagues use a Standard Fee Type.
- Guest Visit - This is a flat dollar fee equal to the value in the Amount field. This the base cost of a visit for a guest of a Pass Holder.
- Remittal -This is a flat dollar fee equal to the Seller's remittal for POS Tickets.
- Percent of Purchase - All Items - This is a percentage increase equal to the value in the Amount field (i.e. 10.00=10%) and applied to All Items in the Shopping Cart (provided Fee Adjustments apply). This fee prints on its own line so all Fee Groups on screen apply.
- Percent of Purchase - Previous Item - This is a percentage increase equal to the value in the Amount field (i.e. 10.00=10%) and applied to the last item (i.e. the Previous Item) added to the Shopping Cart (provided Fee Adjustments apply). This fee prints on its own line so all Fee Groups on screen apply.
- Percent of Original Fee - Cancel Only - This Fee Type allows you to apply a surcharge to a cancellation (provided Fee Adjustments apply). It charges the Amount as a percentage of the original price (i.e. 10.00=10%). This fee should be setup with Cancellation as the Transaction Type.
-
Rental Visit - This is a flat dollar fee equal to the value in the Amount field. Rental Visit Fee types are used when recording attendance for rental items such as campsites and charging for occupancy by day. Tiered pricing (Adult rate child rate etc… is typically maintained via Fee Prompts.
Note:
See also: Recording Rental Attendance and Charging for Occupancy by Day.
Transaction Type (SAFee_TransactionType)
Select the Transaction Type(s) to which this fee will apply. Multiple selections are allowed.
Press and hold the <CTRL> key and click with your mouse to multi-select.
- Cancellation - Any cancellation in any module.
- Change - Any change in any module.
- Book - Any Tee Time and Court Slot booking/reservation.
- Permit - Any Facility Reservation permit.
- Purchase - Any purchase in any module (i.e. Registering for an Activity or a Pass making a Facility Reservation renting a locker etc.) except Tee Times and Court Slots. Those are handled under Book.
- Renewal - Any renewal in any module (i.e. renewing a Pass renewing a Locker rental etc...).
- Transfer - Any transfer in any module (i.e. transferring an enrollment transferring a Pass etc...).
- Visit - Any fees associated with a Pass Visit.
- Visit Cancellation - Any fees associated with a Cancelled Pass Visit.
- Visit Swipe Out - Any pass swipe that results in a Visit Check Out or the end of any Rental.
- Waitlist - Any fees associated with being added to a Waitlist in any module
- Lottery Enrollment - Any fees associated with Activities set to Lotto Only enrollment where you want to charge a fee for enrollment into the lottery. Lottery Enrollment fees are applied to the balance due for lottery "winners" and are refunded to the non-winners upon completion of the Lottery Spin.
- Lost Card - Any fees associated with lost pass membership cards/key fobs.
- Late Payment - Any penalty fees for late payments.
- Tee Sheet/Court Check in - Any fees associated with/charged during Tee time or Court reservation check-in
- Rental Start - Any fees associated with/charged during the start of rental.
- Rental/Locker Completion - Any fees associated with the end/completion of a rental item or locker type rental.
- No Show - Any fees associated with reservation no shows such as Tee Time No Shows.
- Impound - Any fees associated with locker impound procedures.
- Deposit Refund - Any fees associated with deposit refunds.
Order Number (SAFee_OrderNumber)
Enter a number in this field. The number you enter is ordinal and determines the order in which the system will consider this fee when it is part of a Fee Group (i.e. Order Number "1" will be first Order Number "2" will be second etc…).
If this fee is NOT part of a Fee Group leave this field at its default setting. This field is skipped when Fees are not part of a group.
For Example: You have three (3) Fee Codes in your database: Loyalty (LOY) Resident (RES) and Non-Resident (NR). Your Fee Group consists of three (3) fees: A Loyalty Fee ($30.00) a Resident Fee ($40.00) and a Non-Resident Fee ($50.00). Your members can be Loyal Residents (RES LOY); Residents (RES); Loyal Non-Residents (NR LOY); or Non-Residents (NR). Patrons are charged the lowest possible rate based on their Fee Code. The system will apply the first matching fee it finds; the number you enter in this field determines the order in which the system will cycle through the fees. To ensure that the 'Loyalty' rate gets considered first you would give that ordinal number '1.' In that manner when cycling through fees the system will consider the Loyalty rate first and match it to any member with fee codes RES LOY or NR LOY first and apply the applicable $30.00 fee. Members not linked to the LOY Fee Code would receive the applicable RES or NR rate based on their fee code.
Revenue GL Code (SAFee_RevenueGLCode)
Select the GL Code to which this fee will be linked. This is a mandatory field for the default Vermont Systems design. Your design and setup may vary.
Splitting revenue across multiple GL Codes and/or Cost Centers is supported in RecTrac on a by Fee basis. Revenue for a single Fee can be split up to three (3) ways. To split revenue for this fee expand the Additional GL Settings group and address the six (6) Revenue GL Code/Cost Center Code fields as needed.
Revenue Cost Center (SAFee_RevenueCostCenter)
Click the Picklist icon and select the Cost Center to which this fee will be linked if desired.
Splitting revenue across multiple GL Codes and/or Cost Centers is supported in RecTrac on a by Fee basis. Revenue for a single Fee can be split up to three (3) ways. To split revenue for this fee expand the Additional GL Settings group and address the six (6) Revenue GL Code/Cost Center Code fields as needed.
Note:
Cost Center Hierarchy works as follows:
- IF the Wildcard Cost Center? option in the Additional GL Settings group of Fee Update is enabled:
- The Cost Center (if any) linked in the Wildcard Cost Center field on the Fees tab of an item (Activity Section Pass Facility Rental Item etc…) in File Management will be used.
- If no Wildcard Cost Center is linked on the Fees tab of an item in File Management the system will use the Wildcard Cost Center listed on the User's Drawer profile.
- IF the Wildcard Cost Center? option in the Additional GL Settings group of Fee Update is NOT enabled the system will use the Revenue Cost Center listed in the Core Settings group on the Fee itself.
- If none of the above no Cost Center will be used.
- Drawer profile only: If you have a Wildcard Cost Center listed on the Drawer profile then that Cost Center will be used in lieu of any Refund Cost Center(s) listed on the Drawer profile. For Example: On your Drawer Profile you have Cost Center A listed as the Wildcard Cost Center. You have Cost Center B listed as the Refund Apply Cost Center on the same profile. The system will always use Cost Center A for refunds processed through that Drawer profile regardless of the other Refund Cost Centers listed.
Exception: The wildcarding of entries to and from Control Account Cost Center(s) can be skipped if desired by use of the Use Fixed Cost Center for Control Account Entries toggle option field on the Static Parameters profile • Finacial Settings group.
Tax Table (SAFee_TaxTable)
Click the Picklist icon to select the applicable Tax Table for this item, if necessary.
Tax Tables are maintained in System Code Maintenance.
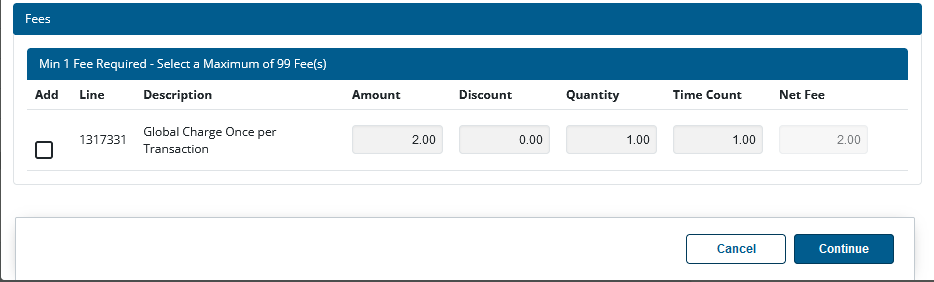
Fee Required? (SAFee_FeeRequired)
Determine whether you wish to make this fee 'Required.'
A 'Required Fee' must be charged during the transaction. The fee can be edited (i.e. increased or decreased) depending on Fee Override Settings and Permissions, but it must be charged; there is no override that will allow de-selection of the Add option for a Required Fee.
A 'Non-Required Fee' does not have to be charged during a transaction (i.e. when processing a sale for this item, the clerk can click Update Fees from Cart and de-select the Add option if desired). Similarly, a Non-Required Fee can be edited (i.e. increased or decreased) depending on Fee Override Settings and Permissions.
Fee Group Code (SAFee_FeeGroupCode)
Click the Picklist icon to select the Fee Group to which you wish to link to this Fee, if any.
Fee Groups are maintained in Fee Group Maintenance and allow you to establish fee prompts when adding items to the shopping cart in Global Sales. Fee Groups also check for override codes time count quantity fee amount and discount amount.
Fee Category (SAFee_FeeCategory)
Click the Picklist icon to select the Fee Category to which you wish to link to this Fee, if any.
Fee Category Codes are System Codes and can be used to group like fees together in a standard and reportable format.
For Example: You charge a nominal usage fee for your facilities but the fee varies depending on the type of facility being rented. You could create different Fee Category Codes (GYM MEETINGRM GAMERM etc...)and link them as appropriate to the Fees linked to different facilities. You could then run reports for the Usage Fee category.
Total Price Option? (SAFee_TotalPriceOption)
Select this option to set the total price on the Fee including tax and have the system generate the selling price of the item and appropriate tax (based on your linked Tax Table). The patron will be charged the amount of the Fee; the system will take care of separating sale revenue from tax revenue.
For Example: You set a Total Price of $50.00 on your item. Your linked tax table is set to 5%. When using the Total Price option RecTrac will charge $50.00 for the item. Behind the scenes RecTrac will create an Item Price of $47.62 and charge $2.38 in tax. This is because the Total Price ($50.00 in this example) has to equal the Item Price (47.62) + 5% (2.38). To calculate item price where sales tax is included divide the selling price by 1.00 + your tax rate. For Example: Your Total Price is $50.00. Your linked tax table is set to 5%. Using this calculation: 50.00/1.05=$47.62.
Note:
Total Price Option should NOT be enabled if your department uses the Florida Tax Option. Tax Option is determined by Module in Module Management • Module Update.
Always Charge Tax? (SAFee_AlwaysChargeTax)
Select this option to charge tax for this Fee every time it is charged. When this option is selected, tax will be charged for this Fee regardless of a household's tax/non-tax status.
Note: A household's tax status is determined by the Taxable? option. On the Standard VSI design this option is located on the Financial Info tab of Household Management
Payment Pass List (SAFee_PaymentPassList)
For use with Punch Payment Pass Codes
Click the Picklist icon to select the appropriate Punch Payment Pass Types that allowed as valid punch payments for this Fee if any.
THEN
Enter a value in the Payment Punches field to determine how many punches from a Punch Payment Pass are required for this fee.
Punch Payment Pass Types are maintained in Pass Code Management.
Additional Setup is Required. See Also: Punch Payment Passes.
Payment Punches (SAFee_PaymentPunches)
For use with Punch Payment Pass Codes
Click the Picklist icon to select the appropriate Punch Payment Pass Types that allowed as valid punch payments for this Fee if any.
THEN
Enter a value in the Payment Punches field to determine how many punches from a Punch Payment Pass are required for this fee.
Note:
If opting to Treat Punches the same as Dollars on your Punch Payment Pass Code then the value you enter in this field will represent the default value/cost for the Fee when you go to the Payment Screen and select your Punch Payment Code.
Punch Payment Pass Codes are maintained in Pass Code Management.
Additional Setup is Required. See Also: Punch Payment Passes.
Quantity Override (SAFee_QuantityOverride)
Expand the Drop-down List to select your Quantity Override option for this Fee.
These Permissions come into play in such instances as Updating Fees from the Cart (and others) and determine whether the User is allowed to update the value in the Quantity, Time Count, Amount and Discount fields respectively.

- Allow - The system will allow this fee to be charged using the condition selected (Quantity Override Time Count Override Amount Override and/or Discount Override).
- Override With Rights - The system will advise you that continuing to process the transaction will violate the condition. Users will be allowed to override the warning and bypass it IF they have an Override Code linked on their Permissions Profile for the applicable module (Core Information Tab • Module Settings Group • <Module Field>). Any Override Code will work.
- Override With Matching Codes - The system will advise you that continuing to process the transaction will violate the condition. Users will be allowed to override the warning and bypass it ONLY IF they have an Override Code linked on their Permissions Profile for the applicable module (Core Information Tab • Module Settings Group • <Module Field>) that matches any of the Override Codes listed in the Override Permissions field.
- Deny - The system will not allow you to override/bypass the condition. If this field is set to Deny no Override Code will allow you to bypass it.
Quantity Override Codes (SAFee_QuantityOverridePermissionList)
This field is applicable only if you are using the Override With Matching Codes Override option.
Click the Picklist icon to select the Override Code/Codes you wish to link to this field. In order to override the applicable setting (Quantity Time Count Amount or Discount) users must have at least one (1) of the Override Codes entered in this field linked on their Permissions Profile for the applicable module. One match only is needed.
Override Codes are maintained in System Code Maintenance. Type = Override Code.
For Example: This Fee is a Senior Discount for patrons aged 55-110.00. Your Override option is Override With Matching Codes Only. You have Override Codes 'SPORTS' and 'ADMIN' linked here. Clerks who work at the sports complex with Override Code 'SPORTS' linked to their Permissions Profile could override the restrictions on this Fee. Administrators with Override Code 'ADMIN' linked to their Permissions Profile could override this fee. Clerks who work at the Rec Center with Override Code 'RECCEN' linked to their Permissions Profile could not override Fee for this program because they do not have a matching Code.
Time Count Override (SAFee_TimeCountOverride)
Expand the Drop-down List to select your Time Count Override option for this Fee.
These Permissions come into play in such instances as Updating Fees from the Cart (and others) and determine whether the User is allowed to update the value in the Quantity, Time Count, Amount and Discount fields respectively.

- Allow - The system will allow this fee to be charged using the condition selected (Quantity Override Time Count Override Amount Override and/or Discount Override).
- Override With Rights - The system will advise you that continuing to process the transaction will violate the condition. Users will be allowed to override the warning and bypass it IF they have an Override Code linked on their Permissions Profile for the applicable module (Core Information Tab • Module Settings Group • <Module Field>). Any Override Code will work.
- Override With Matching Codes - The system will advise you that continuing to process the transaction will violate the condition. Users will be allowed to override the warning and bypass it ONLY IF they have an Override Code linked on their Permissions Profile for the applicable module (Core Information Tab • Module Settings Group • <Module Field>) that matches any of the Override Codes listed in the Override Permissions field.
- Deny - The system will not allow you to override/bypass the condition. If this field is set to Deny no Override Code will allow you to bypass it.
Time Count Override Codes (SAFee_TimeCountOverridePermissionList)
This field is applicable only if you are using the Override With Matching Codes Override option.
Click the Picklist icon to select the Override Code/Codes you wish to link to this field. In order to override the applicable setting (Quantity Time Count Amount or Discount) users must have at least one (1) of the Override Codes entered in this field linked on their Permissions Profile for the applicable module. One match only is needed.
Override Codes are maintained in System Code Maintenance. Type = Override Code.
For Example: This Fee is a Senior Discount for patrons aged 55-110.00. Your Override option is Override With Matching Codes Only. You have Override Codes 'SPORTS' and 'ADMIN' linked here. Clerks who work at the sports complex with Override Code 'SPORTS' linked to their Permissions Profile could override the restrictions on this Fee. Administrators with Override Code 'ADMIN' linked to their Permissions Profile could override this fee. Clerks who work at the Rec Center with Override Code 'RECCEN' linked to their Permissions Profile could not override Fee for this program because they do not have a matching Code.
Amount Override (SAFee_AmountOverride)
Expand the Drop-down List to select your Amount Override option for this Fee.
These Permissions come into play in such instances as Updating Fees from the Cart (and others) and determine whether the User is allowed to update the value in the Quantity, Time Count, Amount and Discount fields respectively.

- Allow - The system will allow this fee to be charged using the condition selected (Quantity Override Time Count Override Amount Override and/or Discount Override).
- Override With Rights - The system will advise you that continuing to process the transaction will violate the condition. Users will be allowed to override the warning and bypass it IF they have an Override Code linked on their Permissions Profile for the applicable module (Core Information Tab • Module Settings Group • <Module Field>). Any Override Code will work.
- Override With Matching Codes - The system will advise you that continuing to process the transaction will violate the condition. Users will be allowed to override the warning and bypass it ONLY IF they have an Override Code linked on their Permissions Profile for the applicable module (Core Information Tab • Module Settings Group • <Module Field>) that matches any of the Override Codes listed in the Override Permissions field.
- Deny - The system will not allow you to override/bypass the condition. If this field is set to Deny no Override Code will allow you to bypass it.
Amount Override Codes (SAFee_AmountOverridePermissionList)
This field is applicable only if you are using the Override With Matching Codes Override option.
Click the Picklist icon to select the Override Code/Codes you wish to link to this field. In order to override the applicable setting (Quantity Time Count Amount or Discount) users must have at least one (1) of the Override Codes entered in this field linked on their Permissions Profile for the applicable module. One match only is needed.
Override Codes are maintained in System Code Maintenance. Type = Override Code.
For Example: This Fee is a Senior Discount for patrons aged 55-110.00. Your Override option is Override With Matching Codes Only. You have Override Codes 'SPORTS' and 'ADMIN' linked here. Clerks who work at the sports complex with Override Code 'SPORTS' linked to their Permissions Profile could override the restrictions on this Fee. Administrators with Override Code 'ADMIN' linked to their Permissions Profile could override this fee. Clerks who work at the Rec Center with Override Code 'RECCEN' linked to their Permissions Profile could not override Fee for this program because they do not have a matching Code.
Discount Override (SAFee_DiscountOverride)
Expand the Drop-down List to select your Discount Override option for this Fee.
These Permissions come into play in such instances as Updating Fees from the Cart (and others) and determine whether the User is allowed to update the value in the Quantity, Time Count, Amount and Discount fields respectively.
- Allow - The system will allow this fee to be charged using the condition selected (Quantity Override Time Count Override Amount Override and/or Discount Override).
- Override With Rights - The system will advise you that continuing to process the transaction will violate the condition. Users will be allowed to override the warning and bypass it IF they have an Override Code linked on their Permissions Profile for the applicable module (Core Information Tab • Module Settings Group • <Module Field>). Any Override Code will work.
- Override With Matching Codes - The system will advise you that continuing to process the transaction will violate the condition. Users will be allowed to override the warning and bypass it ONLY IF they have an Override Code linked on their Permissions Profile for the applicable module (Core Information Tab • Module Settings Group • <Module Field>) that matches any of the Override Codes listed in the Override Permissions field.
- Deny - The system will not allow you to override/bypass the condition. If this field is set to Deny no Override Code will allow you to bypass it.
Discount Override Codes (SAFee_DiscountOverridePermissionList)
This field is applicable only if you are using the Override With Matching Codes Override option.
Click the Picklist icon to select the Override Code/Codes you wish to link to this field. In order to override the applicable setting (Quantity Time Count Amount or Discount) users must have at least one (1) of the Override Codes entered in this field linked on their Permissions Profile for the applicable module. One match only is needed.
Override Codes are maintained in System Code Maintenance. Type = Override Code.
For Example: This Fee is a Senior Discount for patrons aged 55-110.00. Your Override option is Override With Matching Codes Only. You have Override Codes 'SPORTS' and 'ADMIN' linked here. Clerks who work at the sports complex with Override Code 'SPORTS' linked to their Permissions Profile could override the restrictions on this Fee. Administrators with Override Code 'ADMIN' linked to their Permissions Profile could override this fee. Clerks who work at the Rec Center with Override Code 'RECCEN' linked to their Permissions Profile could not override Fee for this program because they do not have a matching Code.
Allow Payment Reduction? (SAFee_AllowPaymentReduction)
Select this option if you wish to allow clerks/staff the abilty to reduce the amount being charged for this fee during a transaction.
Use Accrual? (SAFee_UseAccrual)
Select this option if this Fee is used with Accrual Processing.
This option is available only if your database is set to Receivables. By default the G/L Post Option field for Cash/Receivables is located on the Financial Settings Group of the Static Parameters profile.
See Also: Topic Doc - Accrual Processing and Examples
See Also: Topic Doc - Converting from Cash-based Accounting to Receivables or Receivables/Accrual-Based Accounting .
Discount GL Code (SAFee_DiscountGLCode)
Click the Picklist icon to select a Discount GL Code, if desired. Discount GL Codes allow you to track Discounts. When using a Discount GL, the system posts the full amount of the Fee to Revenue and a negative amount equal to the discount to the Discount GL. This makes it easy for you to track the discounts you have given. For Example: Your Revenue GL Code is 111111. Your Discount GL Code is 888888. The Fee is $100.00 and you are giving a 15% discount. When the Fee is posted, $100.00 will post to GL Code 111111 and $15.00- will post to GL Code 888888.
Leave this field blank, if desired, if you do not track the discount amounts. When this field is left blank, the system still posts the full amount of the Fee to Revenue, but it skips posting the negative amount to the Discount GL.
Discount Cost Center (SAFee_DiscountCostCenter)
Click the Picklist icon to select a Discount Cost Center Code, if desired. Discount Cost Centers allow you to track Discounts. When using a Discount Cost Center, the system posts the full amount of the Fee to Revenue and a negative amount equal to the discount to the Discount Cost Center. This makes it easy for you to track the discounts you have given.
Leave this field blank, if desired, if you do not track the discount amounts. When this field is left blank, the system still posts the full amount of the Fee to Revenue, but it skips posting the negative amount to the Discount Cost Center.
Receivable GL Code (SAFee_ReceivableGLCode)
Address this field only if the GL Post Option on your Static Parameters profile is set to Receivables.
Click the Picklist icon to select a Receivable GL Code if desired. Receivable income will post to the account listed here.
Optionally you can leave this field blank to have receivable income post to the Receivables GL account listed on your Static Parameter profile.
If your GL Post Option is set to 'Cash ' leave this field blank.
Receivable Cost Center (SAFee_ReceivableCostCenter)
Address this field only if the GL Post Option on your Static Parameters profile is set to Receivables.
Click the Picklist icon to select an Unearned Cost Center if desired. Unrealized Receivables income will post to the Cost Center listed here.
Optionally you can leave this field blank to have unrealized receivables income post to the Receivables Cost Center listed on your Static Parameter profile if any.
If your GL Post Option is set to 'Cash ' leave this field blank.
Unearned GL Code (SAFee_UnearnedGLCode)
Address this field only if the GL Post Option on your Static Parameters profile is set to Receivables.
Click the Picklist icon to select an Unearned GL Code if desired. Unearned/Unrealized Receivables income against this fee will post to the GL Code listed here if any.
Optionally you can leave this field blank to have unearned/unrealized receivables income post to the Unearned GL Code listed on your Static Parameter profile if any.
Leave this field blank unless you want unearned/unrealized receivables income linked to this Fee to post to a GL Code other than that listed on your Static Parameters profile.
Unearned Cost Center (SAFee_UnearnedCostCenter)
Address this field only if the GL Post Option on your Static Parameters profile is set to Receivables.
Click the Picklist icon to select an Unearned Cost Center if desired. Unearned/Unrealized Receivables income against this fee will post to the Cost Center listed here if any.
Optionally you can leave this field blank to have unearned/unrealized receivables income post to the Unearned Cost Center listed on your Static Parameter profile if any.
Leave this field blank unless you want unearned/unrealized receivables income linked to this Fee to post to a Cost Center other than that listed on your Static Parameters profile.
Refund GL Code (SAFee_RefundGLCode)
Click the Picklist icon to select a Refund GL Code, if desired. Refunds generated as a result of a Reduction to this Fee will post against the GL Code listed here.
Optionally, you can leave this field blank to have refunds generated as a result of a Reduction to this Fee post against the Revenue GL Account linked to this Fee.
Refund Cost Center (SAFee_RefundCostCenter)
Click the Picklist icon to select a Refund Cost Center, if desired. Refunds generated as a result of a Reduction to this Fee will post against the Cost Center listed here.
Optionally, you can leave this field blank to have refunds generated as a result of a Reduction to this Fee post against the Revenue Cost Center linked to this Fee.
Suspense GL Code (SAFee_SuspenseGLCode)
Click the Picklist icon to select a Suspense Account GL Code, if desired. Lottery Enrollment income against this Fee will post to the GL Code listed here. The Lottery Suspense GL Code is used for holding lottery payments for lottery activities until the Activity Lottery Spin program is run.
Optionally, you can leave this field blank to have Lottery Enrollment income against this Fee post to the applicable Suspense GL Code listed on your Static Parameter profile, if any.
Leave this field blank unless you want Lottery Enrollment income against this Fee posted to a Suspense GL Code other than that listed on your Static Parameters profile.
Suspense Cost Center (SAFee_SuspenseCostCenter)
Click the Picklist icon to select a Suspense Account Cost Center, if desired. Lottery Enrollment income against this Fee will post to the Cost Center listed here. The Lottery Suspense Cost Center is used for holding lottery payments for lottery activities until the Activity Lottery Spin program is run.
Optionally, you can leave this field blank to have Lottery Enrollment income against this Fee post to the applicable Suspense Cost Center listed on your Static Parameter profile, if any.
Leave this field blank unless you want Lottery Enrollment income against this Fee posted to a Suspense Cost Center other than that listed on your Static Parameters profile.
Refund Apply GL Code (SAFee_ControlGLCode)
Click the Picklist icon to select a Refund Apply GL Code. Refunds processed in RecTrac as a Refund Apply" (generally speaking a situation where a refund is applied back to a household balance) will post to the GL Code listed here provided you do not have a Refund Apply GL Code linked on your Drawer profile.
The account you select here acts as a Credit Balance Control Account for this fee as any money refunded back to a household (over and above any money owed) is a credit. Likewise any pre-payments a household makes toward this fee would be applied to this account as those too are credits in the system until the money is applied to a balance generated by this fee.
Notes:
This field is applicable for Refund Apply situations only. Refunds using an alternate option (Refund Now Refund Finance) will post to the Cost Center based on Refund Hierarchy.
Refund GL Account and Cost Center Code hierarchy works as follows:
- If a Refund GL Code and/or Refund Cost Center Code is listed on the Drawer profile to which your User ID is linked then the system will use those Codes for all Refunds of this type processed through that drawer*
- If the Refund GL Code and/or Refund Cost Center Code fields for this Refund type on the Drawer profile are blank then the system will use whatever Refund GL Code and/or Refund Cost Center Code of this Refund type is found on the Fee(s) linked to the item being sold.*
- If there are no Refund GL Codes and/or Refund Cost Center Codes for this Refund type on the Fees linked to the item being sold then the system will use the Refund GL Codes and/or Refund Cost Center Codes listed for this Refund type on your Static Parameters profile.
* Exception: If a Drawer profile contains a Wildcard Cost Center Code then that Cost Center Code will be used for all Refunds processed through that Drawer regardless of whether other Cost Center Codes are listed in the Refund Cost Center fields.
Refund Apply Cost Center (SAFee_ControlCostCenter)
Click the Picklist icon to select a Refund Apply Cost Center. Refunds processed in RecTrac as a Refund Apply" (generally speaking a situation where a refund is applied back to a household balance) will post to the Cost Center listed here provided you do not have a Refund Apply GL Code linked on your Drawer profile.
The account you select here acts as a Credit Balance Control Account for this fee as any money refunded back to a household (over and above any money owed) is a credit. Likewise any pre-payments a household makes toward this fee would be applied to this account as those too are credits in the system until the money is applied to a balance generated by this fee.
Notes:
This field is applicable for Refund Apply situations only. Refunds using an alternate option (Refund Now Refund Finance) will post to the Cost Center based on Refund Hierarchy.
Refund GL Account and Cost Center Code hierarchy works as follows:
- If a Refund GL Code and/or Refund Cost Center Code is listed on the Drawer profile to which your User ID is linked then the system will use those Codes for all Refunds of this type processed through that drawer*
- If the Refund GL Code and/or Refund Cost Center Code fields for this Refund type on the Drawer profile are blank then the system will use whatever Refund GL Code and/or Refund Cost Center Code of this Refund type is found on the Fee(s) linked to the item being sold.*
- If there are no Refund GL Codes and/or Refund Cost Center Codes for this Refund type on the Fees linked to the item being sold then the system will use the Refund GL Codes and/or Refund Cost Center Codes listed for this Refund type on your Static Parameters profile.
* Exception: If a Drawer profile contains a Wildcard Cost Center Code then that Cost Center Code will be used for all Refunds processed through that Drawer regardless of whether other Cost Center Codes are listed in the Refund Cost Center fields.
Refund Finance GL Code (SAFee_RefundFinanceGLCode)
Click the Picklist icon to select a Refund Finance GL Code. Refunds processed in RecTrac as a Refund Finance" (generally speaking a situation where a refund is applied back to a household balance) will post to the GL Code listed here provided you do not have a Refund Finance GL Code linked on your Drawer profile.
The account you select here acts as a Credit Balance Control Account for this fee as any money refunded back to a household (over and above any money owed) is a credit. Likewise any pre-payments a household makes toward this fee would be applied to this account as those too are credits in the system until the money is applied to a balance generated by this fee.
Notes:
This field is applicable for Refund Finance situations only. Refunds using an alternate option (Refund Now Refund Finance) will post to the Cost Center based on Refund Hierarchy.
Refund GL Account and Cost Center Code hierarchy works as follows:
- If a Refund GL Code and/or Refund Cost Center Code is listed on the Drawer profile to which your User ID is linked then the system will use those Codes for all Refunds of this type processed through that drawer*
- If the Refund GL Code and/or Refund Cost Center Code fields for this Refund type on the Drawer profile are blank then the system will use whatever Refund GL Code and/or Refund Cost Center Code of this Refund type is found on the Fee(s) linked to the item being sold.*
- If there are no Refund GL Codes and/or Refund Cost Center Codes for this Refund type on the Fees linked to the item being sold then the system will use the Refund GL Codes and/or Refund Cost Center Codes listed for this Refund type on your Static Parameters profile.
* Exception: If a Drawer profile contains a Wildcard Cost Center Code then that Cost Center Code will be used for all Refunds processed through that Drawer regardless of whether other Cost Center Codes are listed in the Refund Cost Center fields.
Refund Finance Cost Center (SAFee_RefundFinanceCostCenter)
Click the Picklist icon to select a Refund Finance Cost Center. Refunds processed in RecTrac as a Refund Finance" (generally speaking a situation where a refund is applied back to a household balance) will post to the Cost Center listed here provided you do not have a Refund Finance GL Code linked on your Drawer profile.
The account you select here acts as a Credit Balance Control Account for this fee as any money refunded back to a household (over and above any money owed) is a credit. Likewise any pre-payments a household makes toward this fee would be applied to this account as those too are credits in the system until the money is applied to a balance generated by this fee.
Notes:
This field is applicable for Refund Finance situations only. Refunds using an alternate option (Refund Now Refund Finance) will post to the Cost Center based on Refund Hierarchy.
Refund GL Account and Cost Center Code hierarchy works as follows:
- If a Refund GL Code and/or Refund Cost Center Code is listed on the Drawer profile to which your User ID is linked then the system will use those Codes for all Refunds of this type processed through that drawer*
- If the Refund GL Code and/or Refund Cost Center Code fields for this Refund type on the Drawer profile are blank then the system will use whatever Refund GL Code and/or Refund Cost Center Code of this Refund type is found on the Fee(s) linked to the item being sold.*
- If there are no Refund GL Codes and/or Refund Cost Center Codes for this Refund type on the Fees linked to the item being sold then the system will use the Refund GL Codes and/or Refund Cost Center Codes listed for this Refund type on your Static Parameters profile.
* Exception: If a Drawer profile contains a Wildcard Cost Center Code then that Cost Center Code will be used for all Refunds processed through that Drawer regardless of whether other Cost Center Codes are listed in the Refund Cost Center fields.
Refund Now GL Code (SAFee_RefundNowGLCode)
Click the Picklist icon to select a Refund Now GL Code. Refunds processed in RecTrac as a Refund Now" (generally speaking a situation where a refund is applied back to a household balance) will post to the GL Code listed here provided you do not have a Refund Now GL Code linked on your Drawer profile.
The account you select here acts as a Credit Balance Control Account for this fee as any money refunded back to a household (over and above any money owed) is a credit. Likewise any pre-payments a household makes toward this fee would be applied to this account as those too are credits in the system until the money is applied to a balance generated by this fee.
Notes:
This field is applicable for Refund Now situations only. Refunds using an alternate option (Refund Now Refund Now) will post to the Cost Center based on Refund Hierarchy.
Refund GL Account and Cost Center Code hierarchy works as follows:
- If a Refund GL Code and/or Refund Cost Center Code is listed on the Drawer profile to which your User ID is linked then the system will use those Codes for all Refunds of this type processed through that drawer*
- If the Refund GL Code and/or Refund Cost Center Code fields for this Refund type on the Drawer profile are blank then the system will use whatever Refund GL Code and/or Refund Cost Center Code of this Refund type is found on the Fee(s) linked to the item being sold.*
- If there are no Refund GL Codes and/or Refund Cost Center Codes for this Refund type on the Fees linked to the item being sold then the system will use the Refund GL Codes and/or Refund Cost Center Codes listed for this Refund type on your Static Parameters profile.
* Exception: If a Drawer profile contains a Wildcard Cost Center Code then that Cost Center Code will be used for all Refunds processed through that Drawer regardless of whether other Cost Center Codes are listed in the Refund Cost Center fields.
Refund Now Cost Center (SAFee_RefundNowCostCenter)
Click the Picklist icon to select a Refund Now Cost Center. Refunds processed in RecTrac as a Refund Now" (generally speaking a situation where a refund is applied back to a household balance) will post to the Cost Center listed here provided you do not have a Refund Now GL Code linked on your Drawer profile.
The account you select here acts as a Credit Balance Control Account for this fee as any money refunded back to a household (over and above any money owed) is a credit. Likewise any pre-payments a household makes toward this fee would be applied to this account as those too are credits in the system until the money is applied to a balance generated by this fee.
Notes:
This field is applicable for Refund Now situations only. Refunds using an alternate option (Refund Now Refund Now) will post to the Cost Center based on Refund Hierarchy.
Refund GL Account and Cost Center Code hierarchy works as follows:
- If a Refund GL Code and/or Refund Cost Center Code is listed on the Drawer profile to which your User ID is linked then the system will use those Codes for all Refunds of this type processed through that drawer*
- If the Refund GL Code and/or Refund Cost Center Code fields for this Refund type on the Drawer profile are blank then the system will use whatever Refund GL Code and/or Refund Cost Center Code of this Refund type is found on the Fee(s) linked to the item being sold.*
- If there are no Refund GL Codes and/or Refund Cost Center Codes for this Refund type on the Fees linked to the item being sold then the system will use the Refund GL Codes and/or Refund Cost Center Codes listed for this Refund type on your Static Parameters profile.
* Exception: If a Drawer profile contains a Wildcard Cost Center Code then that Cost Center Code will be used for all Refunds processed through that Drawer regardless of whether other Cost Center Codes are listed in the Refund Cost Center fields.
Revenue Percent 2 (SAFee_RevenuePercent2)
This field is applicable only if you are opting to split Revenue for this Fee across multiple GL Codes.
Splitting revenue across multiple GL Codes and/or Cost Centers is supported in RecTrac on a by Fee basis. If opting to split revenue for this Fee click the Picklist icon for Revenue GL Code 2 and select the second GL Code to which this fee will be linked.
THEN
Enter a value in this field. The value you enter will be the percentage of this Fee that you wish to allocate to the GL Code/Cost Center (if applicable) that you selected in the fields above.
For Example: Your Fee Amount is $100.00. You wish to split revenue for this fee across three (3) GL Codes allocating 50% to GL Code 1001 and 25% each to GL Codes 1002 and 1003. To accomplish this you would:
- Enter 100.00 in the Amount field on the Core Settings group.
- Select GL Code 1001 in the Revenue GL Code field on the Core Settings group.
- Select GL Code 1002 in the Revenue GL Code 2 field in this group.
- Enter 25.00 in the Revenue Percent 2 field in this group.
- Select GL Code 1003 in the Revenue GL Code 3 field in this group.
- Enter 25.00 in the Revenue Percent 3 field in this group.
Note:
If opting to split revenue for this Fee across two (2) GL Codes and/or Cost Center Codes only then leave the Revenue GL Code/Cost Center Code 3 fields blank.
Revenue GL Code 2 (SAFee_RevenueGLCode2)
This field is applicable only if you are opting to split Revenue for this Fee across multiple GL Codes.
Splitting revenue across multiple GL Codes and/or Cost Centers is supported in RecTrac on a by Fee basis. If opting to split revenue for this Fee click the Picklist icon and select the second GL Code to which this fee will be linked.
THEN
Enter a value in the Revenue Percent 2 field. The value you enter will be the percentage of this Fee that you wish to allocate to the GL Code/Cost Center (if applicable) that you selected in the fields above.
For Example: Your Fee Amount is $100.00. You wish to split revenue for this fee across three (3) GL Codes allocating 50% to GL Code 1001 and 25% each to GL Codes 1002 and 1003. To accomplish this you would:
- Enter 100.00 in the Amount field on the Core Settings group.
- Select GL Code 1001 in the Revenue GL Code field on the Core Settings group.
- Select GL Code 1002 in the Revenue GL Code 2 field in this group.
- Enter 25.00 in the Revenue Percent 2 field in this group.
- Select GL Code 1003 in the Revenue GL Code 3 field in this group.
- Enter 25.00 in the Revenue Percent 3 field in this group.
Note:
If opting to split revenue for this Fee across two (2) GL Codes and/or Cost Center Codes only then leave the Revenue GL Code/Cost Center Code 3 fields blank.
Revenue Cost Center 2 (SAFee_RevenueCostCenter2)
This field is applicable only if you are opting to split Revenue for this Fee across multiple Cost Center Codes.
Splitting revenue across multiple GL Codes and/or Cost Centers is supported in RecTrac on a by Fee basis. If opting to split revenue for this Fee click the Picklist icon and select the second Cost Center Code (if applicable) to which this fee will be linked.
Revenue Percent 3 (SAFee_RevenuePercent3)
This field is applicable only if you are opting to split Revenue for this Fee across multiple GL Codes.
Splitting revenue across multiple GL Codes and/or Cost Centers is supported in RecTrac on a by Fee basis. If opting to split revenue for this Fee click the Picklist icon for Revenue GL Code 2 and select the third GL Code to which this fee will be linked.
THEN
Enter a value in this field. The value you enter will be the percentage of this Fee that you wish to allocate to the GL Code/Cost Center (if applicable) that you selected in the fields above.
For Example: Your Fee Amount is $100.00. You wish to split revenue for this fee across three (3) GL Codes allocating 50% to GL Code 1001 and 25% each to GL Codes 1002 and 1003. To accomplish this you would:
- Enter 100.00 in the Amount field on the Core Settings group.
- Select GL Code 1001 in the Revenue GL Code field on the Core Settings group.
- Select GL Code 1002 in the Revenue GL Code 2 field in this group.
- Enter 25.00 in the Revenue Percent 2 field in this group.
- Select GL Code 1003 in the Revenue GL Code 3 field in this group.
- Enter 25.00 in the Revenue Percent 3 field in this group.
Note:
If opting to split revenue for this Fee across two (2) GL Codes and/or Cost Center Codes only then leave the Revenue GL Code/Cost Center Code 3 fields blank.
Revenue GL Code 3 (SAFee_RevenueGLCode3)
This field is applicable only if you are opting to split Revenue for this Fee across multiple GL Codes.
Splitting revenue across multiple GL Codes and/or Cost Centers is supported in RecTrac on a by Fee basis. If opting to split revenue for this Fee click the Picklist icon and select the third GL Code to which this fee will be linked.
THEN
Enter a value in the Revenue Percent 3 field. The value you enter will be the percentage of this Fee that you wish to allocate to the GL Code/Cost Center (if applicable) that you selected in the fields above.
For Example: Your Fee Amount is $100.00. You wish to split revenue for this fee across three (3) GL Codes allocating 50% to GL Code 1001 and 25% each to GL Codes 1002 and 1003. To accomplish this you would:
- Enter 100.00 in the Amount field on the Core Settings group.
- Select GL Code 1001 in the Revenue GL Code field on the Core Settings group.
- Select GL Code 1002 in the Revenue GL Code 2 field in this group.
- Enter 25.00 in the Revenue Percent 2 field in this group.
- Select GL Code 1003 in the Revenue GL Code 3 field in this group.
- Enter 25.00 in the Revenue Percent 3 field in this group.
Note:
If opting to split revenue for this Fee across two (2) GL Codes and/or Cost Center Codes only then leave the Revenue GL Code/Cost Center Code 3 fields blank.
Revenue Cost Center 3 (SAFee_RevenueCostCenter3)
This field is applicable only if you are opting to split Revenue for this Fee across multiple Cost Center Codes.
Splitting revenue across multiple GL Codes and/or Cost Centers is supported in RecTrac on a by Fee basis. If opting to split revenue for this Fee click the Picklist icon and select the third Cost Center Code (if applicable) to which this fee will be linked.
Wildcard Cost Center? (SAFee_WildcardCostCenter)
Select this option to have income and expenses linked to this Fee wild carded" to the Cost Center identified in:
- The Wildcard Cost Center field on the Fees tab in File Management of the item to which this fee is linked.
- The Wildcard Cost Center field on the Drawer profile that is linked to the user who is logged in.
Allow GLCode Update? (SAFee_AllowGLCodeUpdate)
Select this option to allow on the fly" changes to the Revenue GL Code and Cost Center (if applicable) for this Fee during a transaction. When this option is enabled the GL Code (and Cost Center if applicable) field for this Fee becomes an update-able Picklist during the sale of the item(s) to which it is linked. Prior to completing the sale you can change the Revenue GL Code and/or Cost Center if desired.
Note:
To utilize this feature the Fee in question MUST be linked to a Fee Group and the Fee Group MUST have the Prompt for Fees during Add to Cart option enabled.
Leave this option de-selected to disallow the updating of the Revenue GL and/or Cost Center linked to this Fee during a sale.
Use Wildcard Cost Center From Original Sale For All Future Transactions? (SAFee_OriginalWildcardCostCenter)
This field is applicable only if Wildcard Cost Center? is enabled.
Select this option to "lock in" the Cost Center linked to the original SADetail record for any subsequent transactions involving this Fee. When an item linked to this Fee is sold the Cost Center linked to that record will never change when this option is enabled. So if changes are made to the Fee after the initial sale then the Cost Center linked to the original sale will always be used.
Leave this option disabled to allow the Cost Center linked to this Fee to remain Wildcarded for any subsequent transactions involving this Fee. When an item linked to this Fee is sold the Cost Center linked to that record will remain Wildcarded when this option is disabled. So if changes are made to the Fee after the initial sale the Cost Center will be subject to change based on Wildcard Cost Center hierarchy.
Refer to Wildcard Cost Center for further information.
Installment Billing Option (SAFee_InstallmentBillingOption)
This field is applicable only if you allow an Installment Billing option for the Item to which this Fee is linked. If you DO NOT offer an Installment Billing option for the Item to which this Fee will be linked leave this field at its default setting.
Click in the Combo Box icon to select your Installment Billing Option for this Fee. By default the selection list includes two (2) options (Charge When Not Billed and Always Charge) which are discussed in detail below. The other options in the selection list are your Installment Billing Templates. Select the appropriate template for this Fee.
Note:
IF you see the two default options only you do not have any Installment Billing Templates established in your database. Installment Billing Templates are maintained in Installment Billing Management.
See Also: Topic Doc - Installment Billing ACH and Auto-Debit
-
Charge When Not Billed - Select this option ONLY IF you allow patrons the option of paying "up front" for an item for which you also offer an Installment Billing plan. Selecting this option tells the system to charge the fee IF the patron opts NOT to be Installment Billed. (i.e. it tells the system to Charge [the patrons] When [they are] Not [Installment] Billed. If using this option your Fee Type must be something other than Installment Bill Fee such as a Standard Fee and the Amount should be equal to the full purchase price of the item.
For Example: Your Annual Membership Pass costs $600.00 and can be Installment Billed at $50/month for 12 months OR patrons may pay the full amount upfront. To create the "pay upfront fee you create a Standard Fee using $600.00 as the amount and select Charge When Not Billed here. You would include this Fee in your Fee Group for the Annual Pass. The Fee Group will also include your Installment Bill Fee(s) using your Annual Pass Template. -
Always Charge - Select this option ONLY IF you have additional fees for extras" which are included in the overall item cost but not included in the breakdown of the Installment Bills. This option is for fees that MUST BE CHARGED regardless of whether the patron is being Installment Billed or paying "up front." Fees of this nature might include but are not limited to extras, such as T-Shirts Class Supplies Supplemental Maintenace charges Pass Printing Fees etc.... If using this option your Fee Type must be something other than Installment Bill Fee such as a Standard Fee and the Amount should be equal to the price of the "extra" items.
For Example: Your Annual Membership Pass costs $600.00 and can be Installment Billed at $50/month for 12 months OR patrons may pay the full amount upfront. You also charge a one-time $5.00 Pass Printing Fee to cover the cost of the membership card that patrons swipe at your center. The $5.00 must be charged to each patron regardless of whether they pay up front or opt for installment bills. To set up the "pass printing fee you create a Standard Fee using $5.00 as the amount and select Always Charge here. You would include this Fee in your Fee Group for the Annual Pass. The Fee Group will also include your Installment Bill Fee(s) using your Annual Pass Template.Note:
The Always Charge option is for "extras" only as discussed above. Do NOT use Always Charge for Initial Fees. In the event you charge Initial Fees create a Standard Fee and select <Your Installment Billing Template options> as the Installment Billing Option. See below for further details.
-
<Your Installment Billing Template options>- Select the Installment Billing Template(s) you wish to use for this item. When selecting an Installment Billing Template(s) here:
- Your Fee Type can be Installment Bill Fee where the Amount is be equal to the value of each installment bill. This is the Installment Billing Fee
For Example: Your Annual Membership Pass costs $600.00 and can be Installment Billed at $50/month for 12 months. To accomplish this you would create an Installment Bill Fee using $50.00 as the amount and select <Your Installment Billing Template> here. You would include this Fee and any other billing or fee options for your Pass Memberships like those described above as needed. - Your Fee Type can be Standard Fee where the Amount is equal to whatever Initial Fee (if any) you charge for an Installment Billing plan.
For Example: Your Annual Membership Pass costs $630.00 and can be Installment Billed at $50/month for 12 months. There is also a $30 Initial Fee. To accomplish this you would create two (2) Fees: one (1) would be an Installment Bill Fee using $50.00 as the amount and with <Your Installment Billing Template> selected here. The other Fee would be a Standard Fee using $30.00 as the amount and with <Your Installment Billing Template> selected here. You would include both Fees and any other billing or fee options for your Pass Memberships like those described above as needed.
- Your Fee Type can be Installment Bill Fee where the Amount is be equal to the value of each installment bill. This is the Installment Billing Fee
Other scenarios are possible such as but not limited to supplemental fees variable payment plans for the same item etc….
Installment Bill Number List (SAFEE_InstallmentBillNumberList)
This field is applicable only if you allow an Installment Billing option for the Item to which this Fee is linked. If you DO NOT offer an Installment Billing option for the Item to which this Fee will be linked leave this field at its default setting.
The number(s) in this field identify the Installment Bill(s) that will be subject to the Amount being charged. Enter a number (i.e. 1) a comma-delimited list of numbers (i.e. 1 3 5) or a range of numbers (i.e. 1-5) in this field if desired. In the event you charge a different Amount for some Installment Bills for the same item than you do for others you will use this field to signify which billing records receive which rate.
For Example: Your Annual Membership pass costs $400.00 and is Installment Billed over a 12-month period. You do NOT want to charge $33.33 per bill. Rather you want to break the payments into two (2) payments of $50 ($100.00) and 10 payments of $30 ($300.00). To do this you would create two (2) Installment Bill fees and group them together. When setting up the first fee you would enter "1-2" in this field and enter "50.00" in the Amount field. When setting up the second fee you would enter "3-12" here and "30.00" in the Amount field. When selling a Membership 12 Installment Bills will be created because the fees are in the same group. Bills 1 and 2 will be charged at $50.00/bill and Bills 3-12 will be charged at $30.00/bill.
If you charge the same amount for each bill leave this field blank.
See Also: Topic Doc - Installment Billing ACH and Auto-Debit
Include In Fee Adjustment/Percent Of Purchase (SAFEE_IncludeInFeeAdjustment)
If this Fee is eligible for a Fee Adjustment, select this option to have the Fee included in the fee calculation process.
Leave this option de-selected if you do not want the system to include this fee in adjustment calculations.
If this Fee is not eligible for an adjustment, this option is not considered. Generally speaking, you will leave this field disabled.
Fee Adjustment Category List (SAFEE_FeeAdjustmentCategoryList)
Click the Picklist icon to select the Fee Adjustment Category Code(s) you wish to link to this Fee, if any. Fee Adjustment Category Codes linked here determine the type of adjustment that may be applied to this fee. (I.E. EARLY BIRD ENROLLMENT, LATE PAYMENT, etc...).
Fee Adjustment Category Codes are maintained in System Code Management. Code Type=Fee Adjustment Category.
Fee Adjustment Category Codes themselves do not ensure an adjustment will take place when a fee is charged. To ensure the adjustment two (2) fees should be created: the "regular fee" with the Fee Adjustment Category/Categories linked here and a second fee for the Adjustment Fee (Fee Increase Flat or Percent or Fee Decrease Flat or Percent). When creating the second Fee Adjustment Fee:
- Use the Advanced Fee Add button
- Select a Fee Increase or Fee Decrease Fee Type
- Expand the Fee Adjustment & Discount Settings Group.
- Select the Include in Fee Adjustment option.
- Select the matching Fee Adjustment Category Codes.
- Add Criteria as needed.
See Also: RecTrac Fees for a detailed description of RecTrac Fees set up information and examples.
Include In Auto Discount (SAFEE_IncludeInAutoDiscount)
If this Fee is eligible for a Discount, select this option to have the discount applied automatically when the conditions for it are met.
Leave this option de-selected if you do not want the system to automatically apply the discount in the event conditions are met.
If this Fee is not eligible for a Discount, this option is not considered. Generally speaking, you will leave this field enabled.
Discount Category (SAFEE_DiscountCategory)
This field applies to Discount Fee types only.
Click the Picklist icon to select the Discount Code(s) you wish to link to this Discount Fee if any. Discount Codes linked here determine the type of discount that may be applied to this fee. (i.e. DSCNT - Senior DSCNT - Employee etc...).
Discount Codes are maintained in System Code Management. Code Type=Discount Code.
Discount Codes themselves do not ensure a Discount will be applied when this fee is charged. To ensure the discount is in effect two (2) fees should be created: the "regular fee" with the Discount Category/Categories linked here and a second fee for the Discount Fee (Discount Flat or Percent) with or without Discount Codes linked. In the event Discount Codes are linked only those with matching codes will apply
When creating the Discount Fee:
- Use the Advanced Fee Add button.
- Select a Discount Fee Type.
- Expand the Fee Adjustment & Discount Settings Group.
- Select the matching Discount Codes.
- Add Criteria as needed.
See Also: RecTrac Fees for a detailed description of RecTrac Fees set up information and examples.
Discount Category List (Wildcard Allowed) (SAFEE_DiscountCategoryList)
Click the Picklist icon to select the Discount Code(s) you wish to link to this Fee, if any. Discount Codes linked here determine the type of discount that may be applied to this fee. (i.e. DSCNT - Senior, DSCNT - Employee, etc...).
Wildcarding this field is allowed.
OR
Leave this field blank to allow use of ALL Discount Codes if desired.
Discount Codes are maintained in System Code Management. Code Type=Discount Code.
Discount Codes themselves do not ensure a Discount will be applied when this fee is charged. To ensure the discount is in effect two (2) fees should be created: the "regular fee" with the Discount Category/Categories linked here and a second fee for the Discount Fee (Discount Flat or Percent).
When creating the Discount Fee:
- Use the Advanced Fee Add button.
- Select a Discount Fee Type.
- Expand the Fee Adjustment & Discount Settings Group.
- Select the matching Discount Codes.
- Add Criteria as needed.
See Also: RecTrac Fees for a detailed description of RecTrac Fees set up information and examples.
Flat Discount Factor (SAFee_FlatDiscountFactor)
This field is applicable for Fee Type Discount - Flat only.
Expand the Drop-down list to select how you want to control Flat Discounts.
- Quantity - This option multiplies the discount amount by fee quantity on the fee.
- Time Count - This option multiplies the discount amount by fee time count on the fee.
- Quantity and Time Count - This option multiplies the discount amount by both values.
- None - This option just applies the discount amount regardless of the quantity or time count.
Time Count Type (SAFee_TimeCountType)
Accept the default entry (Flat) or expand the Drop-down list to select the Time Count Type for this Fee.
Generally speaking, most of your fees (i.e. fees for Activity registrations, pass memberships, tee times, POS Inventory/Service Items/Tickets, Trips, etc...) will use the Flat Time Count option.
Certain fees, such as Facility Rentals; Equipment/Campsite Rentals; Court Rentals; Locker Rentals, Personal Trainer bookings; and/or Visit Fees, however, may be subject to Time Count options depending on your set up.
Time Count Types are as follows:
- Flat - A fee amount that is charged one (1) time per count/quantity. For Example: Enrollment cost for Senior Yoga is $50.00. This is a one-time fee.
- Hourly - A fee amount that is charged once per hour. For Example: You rent the Big Game Room for $25.00/hour. If rented for two hours, the charge is $50.00.
- Hourly Rounded A fee amount that is rounded up or down by the hour to account for partial hour reservations (i.e. a 1.25 hour reservation) when charging an hourly rate. Feature rounds to the hour only at this time and rounds up or down based on your Time Count Buffer.
- Daily - A fee amount that is charged once per day. For Example: Campsite rentals are $30.00/day.
- Weekly - A fee amount that is charged once per week. For Example: You have a weekly rate of $75.00 for kayak rentals.
- Monthly - A fee amount that is charged once per month. For Example: Boat moorings at your marina are $125.00 per month.
- Per Minute - A fee amount that is charged once per minute. For Example: Slots in your Auto Hobby Shop are $30/hour charged by the minute at $0.50.
- Semester - A fee amount that is charged once per semester. For Example: Locker rentals are $75.00 per semester.
- Minute Block - A fee amount that is charged by a default block of time counted in minutes, the length of which is set in the Time Factor field. For Example: Hourly Care Reservations are $10.00/hr charged with a minimum reservation time of 30 minutes. 30 minutes is the default time block, so a 90-minute reservation is three (3) time blocks. The system always rounds up, so if your default Time Block is 30 Minutes and the reservation lasts 40 minutes, the patron will be charged for two (2) time blocks. If your default Time Block is 60 minutes and the reservation lasts 25 minutes, the patron is charged for one (1) time block.
Time Count Buffer (SAFee_TimeCountBuffer)
Enter a value in whole numbers only. The value you enter is counted in minutes and will be used as a grace period" to calculate whether an item is returned "on time" or whether:
- Another increment will be charged.
- Late Return Fees will be invoked.
Example 1: Your Time Count Type is Hourly. The value you enter in this field is '7.' Rollerblade rentals are due back at 4:00pm. Any rollerblades that are checked in by 4:07pm are not subject to Late Return Fees Rollerblades checked in at or after 4:08pm will be subject to Late Return Fees.
Example 2: Your Time Count Type is Hourly Rounded. The value you enter in this field is '15.' A patron rents a room for 1.25 hours. The system will charge for one hour. A patron rents a room for any value greater than 1 1/4 hour (i.e. a 90-minute rental). The system will charge for two (2) hours.
Example 3: You charge $3.00/hour for pass visits and your time increment is Hourly. Using the same seven minute time buffer child who swipes into your center at 2:00pm would be charged $3.00 for the hour from 2:00-3:00pm. That child must be swiped out by 3:07pm or be charged for an additional hour at the center.
Time To Exclude (SAFee_TimeToExclude)
Enter a value in this field, if desired. The value you enter can be a whole number or a fractional value and it corresponds to the Time Count Type selected (i.e. if your Time Count Value is Hourly then the value you enter here is in hours; if your Time Count Value is Daily then the value you enter here is in Days, etc...).
The time value you enter here is excluded (i.e. not counted) from the rate to be charged when calculating fees for the item. Generally speaking, fees of this nature are used for facility rentals, equipment rentals and personal trainer bookings where fees change from one rate to another (i.e. where fee are scaled) over the time of the rental.
For Example: Your Time Count Type is Hourly." The value you enter here is "3.00 or three hours. When a facility reservation is being processed, this fee will NOT be charged for the first three hours of the rental. If the rental exceeds three (3) hours, this fee will be charged by the hour for every hour beginning with the fourth hour of the rental until the end of the rental OR until the Time to Include value is reached, if applicable.
You would use this type of setup in a situation where a facility (or rental item or personal trainer, etc...) rents for <x> dollar an hour for the first three hours and then <y> an hour after that. You would also create a separate fee for the first three hours and use the Time to Include field for that.
Time To Include (SAFee_TimeToInclude)
Enter a value in this field, if desired. The value you enter can be a whole number or a fractional value, and it corresponds to the Time Count Type selected (i.e. if your Time Count Value is Hourly then the value you enter here is in hours; if your Time Count Value is Daily then the value you enter here is in Days, etc...).
The time value you enter here is included in the rate until the time value entered is reached. After that, no further increases to this fee will occur for the item in question. Generally speaking, fees of this nature are used for facility rentals, equipment rentals and personal trainer bookings where fees change from one rate to another (i.e. where fee are scaled) over the time of the rental.
For Example: Your Time Count Type is Hourly." The value you enter here is "3.00 or three hours. The rate you are charging is $20.00/hour. When a facility reservation is being processed, this fee will be charged by the hour for the first three hours of the rental or any part thereof. If the rental exceeds three (3) hours, this fee will not be increased further. If the rental is two hours in length, the patron will be charged $40.00. If the rental is six hours in length, the patron will be charged $60.00 for this fee because the total rate for this fee cannot exceed the three hour value.
You would use this type of setup in a situation where a facility (or rental item or personal trainer, etc...) rents for <x> dollar an hour for the first three hours and then <y> an hour after that. You would also create a separate fee for the remaining hours and use the Time to Exclude field for that, with a value of '3.00.'
Time Factor (SAFee_TimeFactor)
This field is applicable to Weekly Monthly Semester and Minute Time Count Types only.
Enter the value in this field that corresponds to the number of days months or minutes in your Time Count Type.
- If your Time Count Type is 'Weekly ' enter the default number of Days in a Week. Typically you will enter '7.'
- If your Time Count Type is 'Monthly ' enter the default number of Days in a Month. Typically you will enter '30.'
- If your Time Count Type is 'Semester ' enter the default number of Months in a Semester. Typically you will enter '4.'
- If your Time Count Type is 'Minute Block ' enter the default number of minutes in a Time Block. For Example: Enter '30' if your default time block is 30 minutes. Enter '60' if your default time block is one hour.
The value you enter here tells the system how many days (or months or minute blocks) to count when calculating the count for an item the use of which spans a number of days. For Example: Your Time Count Type is 'Weekly.' The value you enter here is '7.00.' A campsite rental that starts on the 20th and runs through the 26th (7 days) will have a count of '1.00.' A campsite rental that starts on the 20th and runs through the 27th (8 days) will have a count of '2.00' because the eighth day starts the 2nd week of the rental. IF your value in this field was '5.00 ' a rental running for 7 days would have a count of '2.00.'
Exclude Pay Codes (SAFee_ExcludePayCodes)
Click the Picklist icon to select the Payment Code(s) you wish to disallow for payment on this Fee, if any. Multiple selection is allowed.
OR
Leave this field blank to allow payment for this Fee by any Payment Code listed on your Payment Profile.
Use of any Payment Code in this field as payment for this Fee will be disallowed. There are no Permission that will allow bypass of this stipulation.
For Example: You wish to disallow use of Reward Points when remitting for this Fee. You would enter your Reward Points Payment Code(s) in this field. When attempting to pay for this Fee clerks using RecTrac and patrons using WebTrac would be disallowed from using Reward Points as payment.
Exclude Pay Code Types (SAFee_ExcludePayCodeTypes)
Click in the Combo Box icon to select the Payment Type(s) you wish to disallow for payment on this Fee, if any. Multiple selection is allowed.
OR
Leave this field blank to allow payment for this Fee by any Payment Code listed on your Payment Profile.
Press and hold the <CTRL> key and click with your mouse to multi-select.
Use of any Payment Type in this field as payment for this Fee will be disallowed. There are no Permission that will allow bypass of this stipulation. Payment Types encompass all Payment Codes of that Type.
For Example: You wish to disallow use of Reward Points when remitting for this Fee. You have two (2) separate Reward Point Payment Codes. Rather than listing both Reward Point Payment Codes in the Exclude Pay Codes field you could select 'Reward Points' in this field. When attempting to pay for this Fee clerks using RecTrac and patrons using WebTrac would be disallowed from using either of your Reward Point payment codes.
Include Pay Codes (SAFee_IncludePayCodes)
Click the Picklist icon to select the Payment Code(s) you wish to allow for payment on this Fee. Multiple selection is allowed.
OR
Leave this field blank to allow payment for this Fee by any Payment Code listed on your Payment Profile.
This field is exclusive meaning only those Payment Codes listed here are allowed unless the field is left blank as noted above. So if you listed Paycode 1 (Check) and Paycode 2 (Cash) in this field Payment Codes 1 and 2 only would be allowed when paying for this Fee. Remitting with any other Payment Code would be disallowed.
Include Pay Code Types (SAFee_IncludePayCodeTypes)
Click in the Combo Box icon to select the Payment Type(s) you wish to allow for payment on this Fee. Multiple selection is allowed.
OR
Leave this field blank to allow payment for this Fee by any Payment Code listed on your Payment Profile.
Press and hold the <CTRL> key and click with your mouse to multi-select.
This field is exclusive meaning only those Payment Types listed here are allowed unless the field is left blank as noted above. So if you listed Cash and Reward Points in this field your various Payment Codes for Cash and Reward Points only would be allowed when paying for this Fee. Remitting with any other Payment Type would be disallowed.
Coupon List (Wildcard Allowed) (SAFEE_CouponList)
Click the Picklist icon to select the Coupon Code(s) you wish to link to this Fee, if any. Coupon Codes linked here determine the type of coupons that may be applied to this fee when patrons remit, either using RecTrac or WebTrac (i.e. 10PPCNT, 20PCNT, etc…).
Wildcarding this field is allowed. Using the example above entering *PCNT in this field would allow for selection/use of both the 10PCNT and 20PCNT coupons when applying a coupon toward this Fee. Entering a lone asterisk (*) only in this field results in ALL Coupon Codes being allowed for this Fee regardless of their Code.
Coupon Codes are maintained in Coupon Code Management.
See Also: Topic Doc - RecTrac Coupons.
Gift Certificate List (Wildcard Allowed) (SAFee_GiftCertificateList)
Click the Picklist icon to select the Gift Certificate Code(s) you wish to link to this Fee, if any. Gift Certificate Codes linked here determine the type of gift certificates that may be applied against this fee when patrons remit, either using RecTrac or WebTrac (i.e. GC25, GC50, etc…).
Wildcarding this field is allowed. Using the example above entering GC* in this field would allow for selection/use of both the GC25 and GC50 certificate types when using a Gift Certificate toward this Fee. Entering a lone asterisk (*) only in this field results in ALL Gift Certificate Codes being allowed for this Fee regardless of their Code.
See Also: Topic Doc - Gift Certificates/Gift Cards.
Time Frame (SAFee_TimeFrame)
Expand the Drop-down list to select your Time Frame for this Fee as it pertains to your Daycare Program. The Time Frame option you choose here will be applied to whatever Fee Length option you select below. For Example, if you select 'Weekly,' the fees you create here will be based on the number of days a child is enrolled in a single week, whether you are charging by the day (Fee Length = Day) or by the week (Fee Length = Week).
Note:
The Time Frame option that you choose here should be consistent with all applicable Fees you are charging for the current Daycare Program with which you are working. It is ill-advised to mix and match Time Frame options within the same Fee Group for the same Daycare Program. In other words if you charge fees by the Week but have a Daily Rate (For Example: $50/day) and a Weekly Rate (For Example: $230/week) the Time Frame option for both Fees should be Weekly and you should have a Fee Group containing one Fee with a Day Fee Length and another Fee with a Week Fee Length.
Time Frame Options
- Daily - Fees are based by the day. The system applies the value entered in the Amount field to each day a person is enrolled so if the Amount is $50.00 and a child is enrolled for 10 days the total fee is $500.00.
-
Weekly - Fees are based on a week and are charged in accordance to your Fee Length by the number of days in a week that a child is enrolled. By default a new week starts on Sunday regardless of whether your Daycare is open. For Example: Your Daycare is open Monday - Friday. A child enrolled for up to three (3) days in a week is charged $70.00/day. A child who is enrolled for four (4) or five (5) days in a week Is charged the flat weekly rate of $275.00. Enrolling a child from Thursday the 16th through Thursday the 23rd would be cost $415.00 for the six (6) days of enrollment (2 days at $70.00/day for the Thursday and Friday of the first week and the flat weekly rate of $275.00 for the four (4) days (Mon-Thurs) of the next week).
Note:
A week runs Sunday - Saturday by default. However, Advanced Fee Criteria offers Time Units options for Week (Sunday - Saturday) and Week (Monday - Sunday).
- Monthly - Fees are based on a month that runs 01 - the last day of a month (28-31) and are charged in accordance to your Fee Length by the number of days in a month that a child is enrolled. the number of days a child is enrolled in a single month. For Example: Your Daycare is open Monday - Friday. A child enrolled for up to 15 days in a month (any 15 days starting on/after the first of the month and ending on/before the last day of the month) is charged $70.00/day. A child who is enrolled for 16+ days in a month (any 16 or more days starting on/after the first of the month and ending on/before the last day of the month) is charged the flat monthly rate of rate of $1100.00. On the first day of the next month the cycle begins again. There is no carry-over..
- Specific Date Range - Fees are based on the number of days a child is enrolled between the range of dates entered using "Item Date Range" criteria. This option might be used by organizations that base fees on semesters which run over a specific date range (i.e.10 September - 19 December). If using this option enter your Begin/End Date range in the fields that appear.
Begin Date (SAFee_DayCareBeginDate)
This field is applicable only if your Time Range is Specific Date Range.
Click the Calendar icon to select your specific date range for which this fee will apply.
End Date (SAFee_DayCareEndDate)
This field is applicable only if your Time Range is Specific Date Range.
Click the Calendar icon to select your specific date range for which this fee will apply.
Begin Days (SAFee_BeginDays)
Enter the value that corresponds to the beginning day on which this Fee will be in effect.
This field works in conjunction with the Time Frame and Fee Length to help determine which fee you wish to charge based on the number of enrollment days in a given Time Frame. Examples appear below.
Examples. If your Time Frame is:
-
Daily and you have a Daily rate, you would:
- Choose Daily as your Time Frame to tell the system to charge fees by the day.
- Enter '1' in the Begin Days field and '1' in the End Days field because you are charging by the day."
- Select 'Day' as your Fee Length because you're charging a Daily rate.
- Result: Any child enrolled would be charged the Daily rate times the number of days enrolled. A child enrolled for one (1) day would be charged 1 times the Daily rate. A child enrolled for 15 days would be charged 15 times the Daily rate. To offer a discount for multiple day enrollments you cannot use Daily as your Time Frame.
-
Weekly and you have a Daily ratefor up to three (3) days in any given week you would:
- Choose Weekly as your Time Frame to tell the system to charge fees from any given Sunday to the next Saturday.
- Enter '1' in the Begin Days field and '3' in the End Days field to account for "up to three days."
- Select 'Day' as your Fee Length because you're charging a Daily rate for up to three days in a week.
- Result: Any child enrolled for any three days in a given week would be charged the Daily Fee times the Number of Enrollment Days.
-
Weekly and you have a Weekly Ratefor up to four (4) or five (5) days in any given week you would:
- Choose Weekly as your Time Frame to tell the system to charge fees from any given Sunday to the next Saturday.
- Enter '4' in the Begin Days field and '5' in the End Days field to account for the fourth and fifth days of the week."
- Select 'Week' as your Fee Length because you're charging a Weekly rate for enrollments of 4+ days in a week.
- Result: Any child enrolled for four or five days in a given week would be charged the Weekly Fee one time. The same Fee would be charged regardless of whether the child was enrolled for four days or five days in this example.
-
Monthly and you have a Daily Ratefor up to 15 days in any given month you would:
- Choose Monthly as your Time Frame to tell the system to charge fees from 1st to the last day of any given month.
- Enter '1' in the Begin Days field and '15' in the End Days field to account for up to any given 15 days in the month.
- Select 'Day' as your Fee Length because you're charging a Daily rate over the course of a month.
- Result: Any child enrolled for up to any 15 days (consecutive or non-consecutive) would be charged the Daily Fee times the number of days in the month for which the child was enrolled.
-
Monthly and you have a Monthly Ratethat is applied for any child enrolled 16 or more days in a given month you would:
- Choose Monthly as your Time Frame to tell the system to charge fees from 1st to the last day of any given month.
- Enter '16' in the Begin Days field and '31' in the End Days field to account for enrollments of 16 or more days in a given month.
- Select 'Month' as your Fee Length because you're charging a Monthly rate.
- Result: Any child enrolled for more than 16 days (consecutive or non-consecutive) in a given month would be charged the Monthly Fee one time for that month. A child enrolled for 16 days in a month would be charged the same amount as a child enrolled for 23 days in a month in this example
Begin and End Days for Specific Date Ranges fall under more special circumstances.
See Also: Topic Doc - Daycare
End Days (SAFee_EndDays)
Enter the value that corresponds to the ending day for which this Fee will be in effect.
This field works in conjunction with the Time Frame and Fee Length to help determine which fee you wish to charge based on the number of enrollment days in a given Time Frame. Examples appear below.
Examples. If your Time Frame is:
-
Daily and you have a Daily rate, you would:
- Choose Daily as your Time Frame to tell the system to charge fees by the day.
- Enter '1' in the Begin Days field and '1' in the End Days field because you are charging by the day."
- Select 'Day' as your Fee Length because you're charging a Daily rate.
- Result: Any child enrolled would be charged the Daily rate times the number of days enrolled. A child enrolled for one (1) day would be charged 1 times the Daily rate. A child enrolled for 15 days would be charged 15 times the Daily rate. To offer a discount for multiple day enrollments you cannot use Daily as your Time Frame.
-
Weekly and you have a Daily ratefor up to three (3) days in any given week you would:
- Choose Weekly as your Time Frame to tell the system to charge fees from any given Sunday to the next Saturday.
- Enter '1' in the Begin Days field and '3' in the End Days field to account for "up to three days."
- Select 'Day' as your Fee Length because you're charging a Daily rate for up to three days in a week.
- Result: Any child enrolled for any three days in a given week would be charged the Daily Fee times the Number of Enrollment Days.
-
Weekly and you have a Weekly Ratefor up to four (4) or five (5) days in any given week you would:
- Choose Weekly as your Time Frame to tell the system to charge fees from any given Sunday to the next Saturday.
- Enter '4' in the Begin Days field and '5' in the End Days field to account for the fourth and fifth days of the week."
- Select 'Week' as your Fee Length because you're charging a Weekly rate for enrollments of 4+ days in a week.
- Result: Any child enrolled for four or five days in a given week would be charged the Weekly Fee one time. The same Fee would be charged regardless of whether the child was enrolled for four days or five days in this example.
-
Monthly and you have a Daily Ratefor up to 15 days in any given month you would:
- Choose Monthly as your Time Frame to tell the system to charge fees from 1st to the last day of any given month.
- Enter '1' in the Begin Days field and '15' in the End Days field to account for up to any given 15 days in the month.
- Select 'Day' as your Fee Length because you're charging a Daily rate over the course of a month.
- Result: Any child enrolled for up to any 15 days (consecutive or non-consecutive) would be charged the Daily Fee times the number of days in the month for which the child was enrolled.
-
Monthly and you have a Monthly Ratethat is applied for any child enrolled 16 or more days in a given month you would:
- Choose Monthly as your Time Frame to tell the system to charge fees from 1st to the last day of any given month.
- Enter '16' in the Begin Days field and '31' in the End Days field to account for enrollments of 16 or more days in a given month.
- Select 'Month' as your Fee Length because you're charging a Monthly rate.
- Result: Any child enrolled for more than 16 days (consecutive or non-consecutive) in a given month would be charged the Monthly Fee one time for that month. A child enrolled for 16 days in a month would be charged the same amount as a child enrolled for 23 days in a month in this example
Begin and End Days for Specific Date Ranges fall under more special circumstances.
See Also: Topic Doc - Daycare
Fee Length (SAFee_FeeLength)
Expand the Drop-down list to select your Fee Length for this Fee as it pertains to your Daycare Program. The Fee Length option you choose here determines work in conjunction with the Time Frame to determine how a rate will be charged. For Example, if you select 'Weekly,' as your Time Frame. The Amount of this Fee will be based on the number of days a child is enrolled in a single week. The Fee Length you select here will determine how the fee is charged, such as by the day (Fee Length = Day) or by the week (Fee Length = Week).
Time Frame Options
-
Day - Fees are based by the day. The system applies the value entered in the Amount field to each day a person is enrolled, so if the Amount is $50.00 and a child is enrolled for 10 days, the total fee is $500.00.
Note:
IF your Time Frame is Daily you MUST choose Day as your Fee Length because you are opting to charge fees by the day.
IF your Time Frame is anything OTHER THAN Daily you may choose Day or another option here if desired.
- Week - Fees are based on a week that runs Sunday - Saturday and are charged in accordance to your Time Frame by the number of days in length that you determine a week to be. (See Begin/End Days field description.) A new week starts on Sunday regardless of whether your Daycare is open. For Example: Your Daycare is open Monday - Friday. Your Fee Length is Weekly. You enter Week here. A child enrolled in your Daycare will be charged the Amount of this Fee on a weekly basis.
- Month - Fees are based on a month that runs 01 - the last day of a month (28-31) and are charged in accordance to your Time Frame by the number of days in length that you determine a month to be. (See Begin/End Days field description.) A new month always starts on the 1st regardless of whether your Daycare is open. For Example: Your Daycare is open Monday - Friday. Your Fee Length is Monthly. You enter Month here. A child enrolled in your Daycare for equal to or over the value in your Begin/End days fields will be charged the Amount of this Fee on a monthly basis.
- Date Range - Fees are based option selected in the Fee Length field and the system charges the Amount accordingly over the range of days a child is enrolled for the number of days entered in the Begin and End Days fields.
Purchase/Renewal Prorate Option (SAFee_PurchaseProrateOption)
Expand the Drop-down list to select your Purchase/Renewal Prorate Option for this fee, if any
THEN
Select a Purchase Prorate Basis Date and Purchase Prorate Start Date, if necessary.
Purchase Prorate is available for Pass Memberships and Locker Rentals. Proration for Activity Enrollments is also allowed but by Class Count only. When patrons purchase a Pass or rent a Locker that uses proration, the system uses the start date (i.e. the Membership Date for a pass or the purchase/rental start date for a locker) and then uses the Purchase Prorate Basis Date to determine how much pro-ration is needed based on the number of days/months/quarters/half year that have passed since the date entered in the Purchase Prorate Basis Date field. Partial time periods are NOT taken into account when prorating. The entire time block (day, month, quarter, etc…) must pass before the next prorate threshold is used.
For Example: Your annual pool pass costs $120.00 and is valid from 01/01/20xx-12/31/20xx. Your prorate option is set to Monthly. Your Purchase Prorate Basis Date is 01/01/20xx. A patron purchases a pass on 05 March. The system will use 05 March as the Membership Date for the pass and prorate the cost by $20, or $10/month for January and February because two full months have passed and you're now in the third month. If a patron purchases a pass/starts a Membership on 23 April, the system will prorate for three (3) months because three full months have passed and you're still in the 4th month of the year.
Note:
"Purchase Prorate" refers to initial purchases and renewals.
Prorate Options include:
- None - There is no proration on this fee.
- Daily - The system will deduct incrementally for each day that has passed since the Purchase Prorate Basis Date. Using the example above the system will prorate the membership cost at the rate of $0.32/day (120/365 = 0.32). A patron who purchases a pass/starts a membership on 10 April (the 101st day of year) will be prorated $32.00 or $0.32/day for the 100 days that have passed.
- Weekly - Not available at this time. Option is for future use.
- Monthly - The system will prorate for every date during the same month. Using the example above if the patron purchases the pass/starts the membership on any day in March the system will prorate for two (2) months (January and February). From 01-30 April the system will prorate for three (3) months: (January February and March) and it will prorate for four (4) months if purchased on any day 01-31 May etc…
- Quarterly - The system will prorate for any date during the same quarter. Using the example above if the patron purchases the pass/starts the membership on any day during the first quarter of the year based on the membership criteria (01 January through 31 March) the patron will receive no prorate because the 1st quarter hasn't passed. Starting on 01 April and running through 30 June the system will prorate the pass by 25% because you're into the 2nd quarter. Starting on 01 July and running through 30 September the system will prorate the pass by 50% because two (2) quarters have passed (prorate =$60) and the system will prorate the pass by 75% ($90) if the membership is purchased on any date 01 October - 31 December because three quarters have passed.
- Semi-Annually - The system will prorate for the 2nd six months of a year. Using the example above if the patron purchases the pass/starts the membership on any day 01 January through 30 June (the first half of the year based on the membership criteria) the patron will receive no prorate. Starting on 01 July and running through 31 December the system will prorate the pass by 50% (one half of year or $60).
-
Class Count - This option is applicable to Activity Enrollments only. The system will prorate by the number of meeting dates remaining for the Activity into which the patron is enrolling.
For Example: Your Calligraphy class meets 10 times and the enrollment fee is $100.00 ($10/class meeting). A member who registers during the enrollment period will be charged $100.00 because all 10 meetings remain. However a member who registers beginning on Week 3 will be charged $70 because the class will have seven (7) meetings remaining. - Day of Month - This option is designed for use with Monthly Pass Memberships (i.e. passes that are valid for one month) or for Pass Memberships that are billed on a Monthly basis. The system will prorate based on the number of days left in a month upon the date of purchase so a pass sold with a Membership Date of April 10 20xx would be prorated by 33% or 1/3 of the month.
-
Until Next Bill - This option is designed for use with on-going items that are Installment Billed and where the start date may vary such as when a Day Care Activity (Additional Settings group) is set to Prompt for Enrollment Date or monthly passes that have different renewals dates. The system will prorate initial purchase fees by the number of days left in the current billing cycle. Regular Installment Bills for the item will be created starting with the next Billing Cycle.
For Example: You bill Day Care semi-monthly on the 1st and 15th. Your Installment Billing Fees are set to prorate Until Next Bill and the Activity is set to Prompt for Enrollment Date. Raymond Spruance signs his child up for an Activity and selects 06 June as the Enrollment Date. Fees calculate to $100.00 per billing cycle. Upon selecting 06 June as the Enrollment Date the system will prorate initial fees for the days 06-14 June and set up semi-monthly Installment Bills for $100.00 starting with the 15 June Billing Cycle.
Purchase/Renewal Prorate Begin Date (SAFee_PurchaseProrateDate)
Click the Calendar icon to select the Prorate Start Date for this fee, if applicable. If you are prorating your pass memberships and/or locker rentals and IF you want to set a fixed date on or after which proration will start, enter that date here
THEN
Set your Purchase Prorate Basis Date and Purchase Prorate Option accordingly.
For Example: Your annual pool pass costs $120.00 and is valid from 01 January-31 December annually. You want to prorate the purchase price by the month, BUT you do not want to start allowing proration until 01 April. To do this, you would:
- Leave the Default Member Date field on your Pass Code blank and enter 12/31/20xx as the fixed Expiration Date, where 20xx" is the current year.
- Set your Purchase Prorate Option to "Monthly" on this fee.
- Enter 04/01/20xx in this field where "20xx" is the current year.
- Enter 01/01/20xx in Purchase Prorate Basis Date field where "20xx" is the current year.
Under this setup a patron who purchases a pass on 05 March would pay full price because proration hasn't started. But a patron who purchases a pass on 12 April would have their pass prorated by $30.00 or $30/month for January February and March because April 1st has passed.
Note:
"Purchase Prorate" refers to initial purchases and renewals.
Purchase/Renewal Prorate Basis Date (SAFee_PurchaseProrateBasisDate)
Click the Calendar icon to select the Prorate/Renewal Basis Date for this fee, if applicable. If your pass type or locker has a fixed ending date, and if you wish to prorate the cost depending on when patrons register, enter the date you wish to use as the Prorate Basis Date in this field. This field interacts with the Expiration Date field on the Pass Type or Locker Room and the Prorate Option field on this Fee to calculate the prorated pass type fees.
To use Proration on pass memberships or locker rentals:
- Leave the Default Member Date field in Pass Management and/or Locker Room Management blank.
- Enter the date on which your pass or locker will expire in the applicable end date field in Pass and/or Locker Management.
- Enter the default "beginning date" for the membership and/or locker room in this field.
- Select a prorate option in the Prorate Opt field.
For Example: Your annual pool pass costs $120.00 and is valid from 01 January-31 December annually. You want to prorate the purchase price by the month so a pass purchased in March would be prorated for the first three (3) months. To do this you would:
- Leave the Default Member Date field on your Pass Code blank and enter 12/31/20xx as the fixed Expiration Date where "20xx" is the current year.
- Set your Purchase Prorate Option to "Monthly" on this fee.
- Enter 01/01/20xx in this field where "20xx" is the current year.
Under this setup a patron who purchases a pass on 05 March would have their pass prorated by $20.00 or $10/month for January and February because two full months have passed.
Note:
"Purchase Prorate" refers to initial purchases and renewals.
Cancel Prorate Option (SAFee_CancelProrateOption)
Expand the Drop-down list to select your Cancel Prorate Option for this fee, if any
THEN
Select a Cancel Prorate Basis Date and Cancel Prorate Start Date, if necessary.
When patrons cancel an item that uses proration, (or transfers a Pass membership), the system uses the transaction date of the cancellation and then uses the Prorate Option to determine how much proration is needed based on the number of days/months/quarters/half year that have prior to the Cancel Prorate Basis Date, i.e the Expiration Date of the membership. Partial time periods are NOT taken into account when prorating. The entire time block (day, month, quarter, etc…) must pass before the next prorate threshold is used.
For Example: Your annual pool pass costs $120.00 and is valid from 01/01/20xx-12/31/20xx. Your cancel prorate option is set to Monthly. Your Cancel Prorate Basis Date is set to 12/31/20xx. A patron cancels a pass on 05 March. The system will use 05 March as the cancellation date for the pass and prorate the cost by $100, or $10/month for January and February because two full months have passed and you're now in the third month. If a patron cancels a pass on 23 April, the system will prorate for nine (9) months because three full months have passed and you're in the 4th month of the year.
Cancel Prorate Options include:
- None - There is no proration on this fee.
- Class Count - This option is applicable to Activity Enrollments only. The system will prorate by the number of meeting dates remaining for the Activity from which the patron is cancelling. For Example: Your Calligraphy class meets 10 times and the enrollment fee is $100.00 ($10/class meeting). A member who cancels prior to Week 3 will receive a $70 refund because the class will have seven (7) meetings remaining.
- Daily - The system will deduct incrementally for each day that remains before the Cancel Prorate Basis Date. Using the example above the system will prorate the membership cost at the rate of $0.32/day (120/365 = 0.32). A patron who cancels a pass on 10 April (the 101st day of year) will be prorated 84.80 or $0.32/day for the 265 days that remain.
- Weekly - Not available at this time. Option is for future use.
- Monthly - The system will prorate for every date during the same month. Using the example above if the patron cancels the pass on any day in May the system will prorate for eight (8) months (May-December).
- Quarterly - The system will prorate for any date during the same quarter. Using the example above if the patron cancels the pass on any day during the third quarter of the year based on the membership criteria the patron will receive a 25% refund because one quarter of the year remains.
- Semi-Annually - The system will prorate for the 2nd six months of a year. Using the example above if the patron cancels the pass on any day 01 January through 30 June (the first half of the year based on the membership criteria) the patron will receive a 100% refund. Starting on 01 July and running through 31 December the system will prorate the pass by 50% (one half of year or $60).
- Remaining Punches - For Use with Punch Passes only. The system will prorate the refund based on how many punches were used on the pass. For Example: A 10 punch pass was sold and five (5) punches were used prior to cancellation. In this event half of the fee would be refunded.
- NonRefundable - Patrons who cancel are not entitled to a refund regardless of the cancellation date. The system sets the Prorate percentage to 0%.
- Since Last Bill - This option is applicable only for fees that are installment billed.. The system finds the prorate percentage to be kept by dividing the number of days since the last bill into the number of days in the billing cycle. The resulting percentage is the amount of the total bill that you will keep. The remainder will be refunded. For Example: Installment Bills for your Annual Pass are $100.00/month. You bill on the 1st of every month. You run billing on 01 March. On 12 March Edward Clayton cancels his pass. To calculate the amount to keep and the amount to refund to Edward the system will check the number of days that have passed since the last billing. In this example the number is 12 (the system counts the day of the cancellation). The system then checks the number of days between billing. In this example that value is 31 because there are 31 days in March. The system divides the days used (12) into days between bills (3)1 to achieve the prorate percentage (.38709677) which is the amount (.3871percent of 100 = $38.71) that you will keep. Edward will be refunded the remainder ($61.29).
Cancel Prorate End Date (SAFEE_CancelProrateDate)
Click the Calendar icon to select the Cancel Prorate Start Date for this fee, if applicable. If you are prorating cancellations for your pass memberships and/or locker rentals and IF you want to set a fixed date on or after which cancellation proration will start, enter that date here
THEN
Set your Cancel Prorate Basis Date and Cancel Prorate Option accordingly.
Refer to the field help for Purchase Prorate Date for examples. The logic works the same way.
Cancel Prorate Basis Date (SAFEE_CancelProrateBasisDate)
Click the Calendar icon to select the Cancel Prorate Basis Date for this fee, if applicable. If your pass type or locker has a fixed ending date, and if you wish to prorate the cost should patrons cancel, enter the cancel prorate basis date. Cancelations on or before this date will be prorated based on your Cancel Prorate Option.
Refer to the field help for Purchase Prorate Basis Date for examples. The logic works the same way.
Cancel GL Option (SAFee_CancelGLOption)
This field is applicable only if your Transaction Type for this Fee is Cancellation.
Expand the Drop-down list and select the GL Account to which you want money from this fee applied when it is charged.
- This Fee GL - Money will be applied to the account linked to this fee in the Revenue GL Code field.
- Original GL - Money will be applied to the GL Code linked to the original transaction as opposed to the account linked in Revenue GL Code field.
For Example: Activity registrations go to GL Code 100100. This is a $5.00 Cancellation Fee and it is linked to GL Code 999000.
- When This Fee GL is selected the $5.00 would go to GL Account 999000 in the event of an Activity Cancellation.
- When Original GL is selected the $5.00 would go to GL Account 100100 in the event of an Activity Cancellation.
Include In Instructor Pay? (SAFee_IncludeInInstructorPay)
Select this option if this Fee is to be included in calculations when running the Instructor Pay Processing program.
See Also: Topic Doc - Instructor Pay Processing.
Published Price (SAFee_PublishedPrice)
Enter the general public" price for this Fee in this field if applicable. This is PRINT ONLY field for use on receipts Template Design Studio templates brochures promotional emails etc...
The purpose is to provide you with a means of showing patrons the price difference between purchasing an item through you as opposed to purchasing elsewhere such as "at the gate." Generally speaking you most likely will use this field when selling Tickets but it may be used for other items as well.
For Example: Each Autumn members of your department can purchase tickets to your local County Fair/Expo through your main office. If purchased through you your members pay $20.00 per ticket. If purchased at the Fairgrounds (i.e. "at the gate) they will pay $25.00 per ticket. You would enter' $25.00' in this field because that is the "general admission" Published Price for a ticket to the fair. When generating your promotional items for the Autumn season you could have this field print to show your members the benefit of buying through you vs. waiting to purchase at the gate.
Savings (SAFee_Savings)
Enter the savings over general public price" for this Fee in this field if applicable. This is PRINT ONLY field for use on receipts Template Design Studio templates brochures promotional emails etc....
The purpose is to provide you with a means of showing patrons how much they saved by purchasing an item through you as opposed to purchasing elsewhere such as "at the gate." Generally speaking, you most likely will use this field when selling Tickets but it may be used for other items as well.
For Example: Each Autumn members of your department can purchase tickets to your local County Fair/Expo through your main office. If purchased through you your members pay $20.00 per ticket. If purchased at the Fairgrounds (i.e. "at the gate) they will pay $25.00 per ticket. You would enter '$5.00' in this field because that is how much money a member will Save against the general admission price for each ticket purchased for the fair. When generating your receipts (or promotional items) for the Autumn season you could have the sum total of this field print to show your members how much they saved by buying through you vs. purchasing at the gate.
Use Head/Visit Count/Punches For Quantity? (SAFee_UseHeadCountForQuantity)
Select this option to have Headcount, Visit Count, and/or Punch Pass Punches determine the Quantity for this Fee. When updating any of those fields during the sales process, the default Quantity will adjust to match, thus allowing to charge of applicable fees based on quantity.
Note:
Enable this option on all Daily Pass Types for which you allow/process negative visits that result in a refund.
Interface Post Option (SAFee_InterfacePostOption)
This field is applicable only if you are using a GL Interface.
Expand the Drop-down list to determine your GL Post option for this Fee:
- Detail - A separate line item will appear in your G/L Interface post each time this Fee is found. So if 10 transactions occur that use this fee then 10 line items will post to your G/L Interface.
- Summary - A single summary line item will appear on your G/L Interface post when this Fee is found. So if 10 transactions occur that use this fee then one (1) line item will post to your G/L Interface with the summary total for all 10 transactions.
QuestionLinkID (SAFee_QuestionLinkID)
Enter a Question number in this field, if desired. This field can be used for cross referencing and reporting, if desired.
For Example: You use a question to determine shirt size for the Youth Girl's Soccer program to which this fee is linked. You could use this field as a means to report on the answers to that question, if desired.
Receipt Fee Detail Print Option (SAFee_PrintOption)
Select your Receipt Fee Detail Option if desired. The selection you make here determines how multiple fees linked to a single item will print on a receipt.
In order to print fee details on receipts the appropriate RecTrac module(s) must be listed in the Fee Detail field of your Receipt Format profile.
- Print Individually - Each Fee will print on its own line. For Example: You charge $30.00 for an Activity registration but the fee is spread over three (3) GL Codes (i.e. 3 Fees at $10.00 and each fee to a different GL Code). With this option selected when the receipt prints the $10.00 fee will print on its own line when a receipt is generated for the Activity registration so if the option was selected for all three Fees the receipt would have three (3) lines each displaying a $10.00 charge.
-
Print with First Fee -This Fee will be included along with the first applicable fee when printed on the receipt. Generally speaking the first applicable fee will be the first Fee in your ordering of the fees.For Example: You charge $30.00 for an Activity registration but the fee is spread over three (3) GL Codes (i.e. 3 Fees at $10.00 and each fee to a different GL Code). With this option selected when the receipt prints each $10.00 fee will be rolled into the same line on the receipt as the first applicable fee found so if this option was selected for all three Fees one line only for $30.00 would be printed on the receipt.
Note:
Optionally you could set the first fee to Print Individually and Fees 2 & 3 to Print with First Fee for the same result.
-
Print with Last - This Fee will be included along with the last applicable fee when printed on the receipt. Generally speaking the last applicable fee will be the last Fee in your ordering of the fees.For Example: You charge $30.00 for an Activity registration but the fee is spread over three (3) GL Codes (i.e. 3 Fees at $10.00 and each fee to a different GL Code). With this option selected when the receipt prints each $10.00 fee will be rolled into the same line on the receipt as the last applicable fee found so if this option was selected for all three Fees one line only for $30.00 would be printed on the receipt.
Note:
Optionally you could set the last fee to Print Individually and Fees 1 & 2 to Print with Last Fee for the same result.
Due Option (SAFee_DueOption)
Expand the Drop-down list to select your Due Date option for this fee if desired. When a Due Date option is selected items linked to this fee will not be charged when added to the Shopping Cart and payments are processed. Rather the fee will be listed as "pending" until the due date is reached and the fee becomes "charged."
Select the desired Due Date Option from the Drop-down list and then fill in the Due Days/Due Date field. Due Date Options are:
- Not Applicable - The Due Date Option is not used.
- Fixed Date - The Due Date for this fee will be the date entered in the Due Date field.
- Days After Transaction - The Due Date for this fee will be the number of days equal to the value entered in the Due Days field.
- Days Before Item Begin Date - The Due Date for this fee will be the number of days prior to the Start Date of the item which is equal to the value entered in the Due Days field.
-
Days Before Item End Date - The Due Date for this fee will be the number of days prior to the End Date of the item which is equal to the value entered in the Due Days field..
Note:
The status of a "pending" fee is changed to "charged" (and thus appears on a Household's balance) the first time the Charge Pending Fees program is run on or after the pending fee's due date. For Example: The Due Option is set to 10 Days Before Item Begin Date. On 01 February Molly Brown makes a Facility Reservation for 10 April. You've scheduled the Charge Pending Fees program to run daily. The Fees for Molly's reservation will carry a "pending" status through all of February and March. When Charge Pending Fees is run on 01 April the status of Molly's reservation fee for 10 April will change to "Charged" because you are 10 days from the reservation (the Item Begin Date) and the Fee will be added to her balance.
Charge Pending Fees should be run as a Scheduled Event. It can also be run manually.
Due Date (SAFee_DueDate)
This field is applicable only if your Due Option is Fixed Date.
Click the Calendar icon and select the fixed Due Date for this fee.
When a Due Date option is selected items linked to this fee will not be charged when added to the Shopping Cart and payments are processed. Rather the fee will be listed as "pending" until the due date is reached and the fee becomes “charged.”
Note:
The status of a "pending" fee is changed to "charged" (and thus appears on a Household's balance) the first time the Charge Pending Fees program is run on or after the pending fee's due date. For Example: The Due Option is set to 10 Days Before Item Begin Date. On 01 February Molly Brown makes a Facility Reservation for 10 April. You've scheduled the Charge Pending Fees program to run daily. The Fees for Molly's reservation will carry a "pending" status through all of February and March. When Charge Pending Fees is run on 01 April the status of Molly's reservation fee for 10 April will change to "Charged" because you are 10 days from the reservation (the Item Begin Date) and the Fee will be added to her balance.
Charge Pending Fees should be run as a Scheduled Event. It can also be run manually.
Due Days (SAFee_DueDays)
This field is applicable only if your Due Option is Days After Transaction Days Before Item Begin Date or Days Before Item End Date.
Enter a value in the Due Days field. The value you enter is then number of days in which this fee will be due based on your Due Date Option.
When a Due Date option is selected items linked to this fee will not be charged when added to the Shopping Cart and payments are processed. Rather the fee will be listed as "pending" until the due date is reached and the fee becomes “charged.”
Note:
The status of a "pending" fee is changed to "charged" (and thus appears on a Household's balance) the first time the Charge Pending Fees program is run on or after the pending fee's due date. For Example: The Due Option is set to 10 Days Before Item Begin Date. On 01 February Molly Brown makes a Facility Reservation for 10 April. You've scheduled the Charge Pending Fees program to run daily. The Fees for Molly's reservation will carry a "pending" status through all of February and March. When Charge Pending Fees is run on 01 April the status of Molly's reservation fee for 10 April will change to "Charged" because you are 10 days from the reservation (the Item Begin Date) and the Fee will be added to her balance.
Charge Pending Fees should be run as a Scheduled Event. It can also be run manually.
Rewards Option (SAFee_RewardsOption)
Expand the Drop-down list and determine how/when you wish any Reward Points linked to this fee to be earned.
- None - No Reward Points are earned from the Fee.
-
Earn When Fee Paid - Reward points will be earned when this Fee is paid. When you select this option the patron will earn Reward Points equal to the value entered for the appropriate module on your Rewards profile.
For Example: This is a $50.00 registration fee linked to an Activity. Your Rewards Profile offers 10.00 Reward Points per Dollar Spent. When a patron registers for this activity and pays the fee the patron will earn 500 Reward Points (50 x 10.00 per dollar spent = 500). -
Earn When Fee is Charged - Reward points will be earned when this Fee is charged. When you select this option enter a value in the Reward Points Earned field. The value you enter there is the total number of points a patron will earn per time this Fee is charged. This is a good option for scenarios where you allow patrons to earn Reward Points for "No charge" transactions such as pass visits.
For Example: Your Fitness Pass members earn 2.00 points per visit but the visit itself is free because they're pass holders. You would create a $0.00 Standard Visit Fee select Earn When Fee is Charged and enter "2.00" in the Reward Points Earned field. When a Fitness Pass members swipe into your Fitness Center the system will charge the $0.00 fee and award the member 2.00 Reward Points.
Note:
RecTrac 3.1 currently does not offer a method to "stack" Reward Points without creating two (2) separate Fees. (i.e. You cannot combine points earned from a Fee being Charged and a Fee being Paid on one Fee.) This functionality will be included in a future release.
See Also: Topic Doc - RecTrac Reward Points.
Rewards Points Earned (SAFee_RewardsPoints)
Enter the number of Reward Points that will be earned as a byproduct of this fee being charged/paid. The value you enter is the total number of Reward Points that a patron will earn when this fee is charged; it is NOT a per dollar charged" value.
Note:
Rewards Points earned as part of this Fee will stack with any Rewards Points earned on a per Dollar basis if any as defined on your Rewards profile.
See Also: Topic Doc - RecTrac Reward Points.
Default Quantity (SAFee_DefaultQuantity)
Accept the default entry (1.00) or overwrite with another value as needed. The value entered here dictates the number of times this fee will be charged, by default, during a transaction.
This field is NOT applicable to POS Service Items POS Inventory and POS Tickets. The default quantity for Fees linked to those items is always one (1).
Maximum Quantity (SAFee_MaximumQuantity)
Accept the default entry <blank> or overwrite with another value as needed. The value entered here dictates the maximum number of times this fee can be charged, by default, during any one transaction.
For obvious reasons, this value should not be less than the Default Quantity for this fee.
This field is NOT applicable to POS Service Items POS Inventory and POS Tickets.
Minimum Quantity (SAFee_MinimumQuantity)
Accept the default entry <blank> or overwrite with another value as needed. The value entered here dictates the minimum number of times this fee must be charged, by default, during any one transaction.
This field is NOT applicable to POS Service Items POS Inventory and POS Tickets.
Minimum Payment Option (SAFee_MinimumPaymentOption)
After selecting your Minimum Payment Option, accept the default value (100.00) or enter an alternate value for the minimum payment in this field. This field dictates the minimum dollar amount (either in flat rate" or "percentage") you want paid for this fee when it is charged based on the Interface selection in the previous field.
- If using Percentage use full numbers. For Example: 5.00 = 5% or .05 and 5.50 = 5.5% or .055.
- If using Fixed Amount enter the value in dollars and cents. For Example: 5.00 = $5.00 and 5.50 = $5.50.
These two fields dictate the minimum payment you will accept for this fee at the time it is charged. For Example: If you always want patrons to pay the full amount due for this fee when it is charged then you would set the Minimum Payment Option field to "Percent - All Interfaces" and set this field to "100.00" because you want full (100%) payment. If you do not require any payment when this fee is charged (i.e. if you let households run a balance on items purchased) then you could set the Minimum Payment Option field to "Percent - All Interfaces" and set this field to "0.00" because you do not require any payment (0.00%) at the time of charge. Optionally you could choose any amount in between by either percentage or flat dollar rate.
Note:
The Override Minimum Amount Due For field the your Payment profile • Core Settings 2 group allows you to bypass your settings here for transactions performed in RecTrac. If you require full payment at the time of purchase in RecTrac then ensure that field is blank for all of
Expand the Drop-down list to select your Minimum Payment Option if desired.
THEN
Make changes to the Minimum Payment Amount field as needed. This field dictates the interface being used as a criterion for how much payment is due when this fee is charged. The Minimum Payment Amount dictates the actual dollar value.
Your options for this field are:
-
Percent - All Interfaces - The value in the Minimum Payment Amount field will be a percentage of the total fee regardless of the interface being used for the transaction (RecTrac or WebTrac).
For Example: If the value entered is "30.00" (30%) and fee = $125.00 a patron would have to pay at least $45.00 to meet the minimum payment regardless of whether the item is being purchased in RecTrac or in WebTrac. -
Percent - RecTrac Only - The value in the Minimum Payment Amount field will be a percentage of the total fee for transactions processed in RecTrac only.
For Example: If the value entered is "30.00" (30%) and fee = $125.00 a patron would have to pay at least $45.00 to meet the minimum payment when the item is purchased in RecTrac. A patron purchasing the same item in WebTrac could pay any amount. -
Percent - WebTrac Only - The value in the Minimum Payment Amount field will be a percentage of the total fee for transactions processed in WebTrac.
For Example: If the value entered is "30.00" (30%) and fee = $125.00 a patron would have to pay at least $45.00 to meet the minimum payment when the item in purchased in WebTrac. A patron purchasing the same item in RecTrac could pay any amount. -
Fixed Amount - All Interfaces - The value in the Minimum Payment Amount field will be a fixed dollar amount regardless of the interface being used for the transaction (RecTrac or WebTrac).
For Example: If the value entered is "30.00" ($30.00) and fee = $125.00 a patron would have to pay at least $30.00 to meet the minimum payment regardless of whether the item is being purchased in RecTrac or in WebTrac. -
Fixed Amount - RecTrac Only - The value in the Minimum Payment Amount field will be a fixed dollar amount for transactions processed in RecTrac only.
For Example: If the value entered is "30.00" ($30.00) and fee = $125.00 a patron would have to pay at least $30.00 to meet the minimum payment when the item is purchased in RecTrac. A patron purchasing the same item in WebTrac could pay any amount. -
Fixed Amount - WebTrac Only - The value in the Minimum Payment Amount field will be a fixed dollar amount for transactions processed in WebTrac only.
For Example: If the value entered is "30.00" ($30.00) and fee = $125.00 a patron would have to pay at least $30.00 to meet the minimum payment when the item in purchased in WebTrac. A patron purchasing the same item in RecTrac could pay any amount.
These two fields dictate the minimum payment you will accept for this fee at the time it is charged. For Example: If you always want patrons to pay the full amount due for this fee when it is charged then you would set this field to "Percent - All Interfaces" and set the Minimum Payment Amount field to "100.00" because you want full (100%) payment. If you do not require any payment when this fee is charged (i.e. if you let households run a balance on items purchased) then you could set this field to "Percent - All Interfaces" and set the Minimum Payment Amount field to "0.00" because you do not require any payment (0.00%) at the time of charge. Optionally you could choose any amount in between by either percentage or flat dollar rate.
The Override Minimum Amount Due For field the your Payment profile • Core Settings 2 group allows you to bypass your settings here for transactions performed in RecTrac. If you require full payment at the time of purchase in RecTrac then ensure that field is blank for all of your Payment profiles.
Minimum Payment Amount (SAFee_MinimumPayment)
After selecting your Minimum Payment Option, accept the default value (100.00) or enter an alternate value for the minimum payment in this field. This field dictates the minimum dollar amount (either in flat rate" or "percentage") you want paid for this fee when it is charged based on the Interface selection in the previous field.
- If using Percentage use full numbers. For Example: 5.00 = 5% or .05 and 5.50 = 5.5% or .055.
- If using Fixed Amount enter the value in dollars and cents. For Example: 5.00 = $5.00 and 5.50 = $5.50.
These two fields dictate the minimum payment you will accept for this fee at the time it is charged. For Example: If you always want patrons to pay the full amount due for this fee when it is charged then you would set the Minimum Payment Option field to "Percent - All Interfaces" and set this field to "100.00" because you want full (100%) payment. If you do not require any payment when this fee is charged (i.e. if you let households run a balance on items purchased) then you could set the Minimum Payment Option field to "Percent - All Interfaces" and set this field to "0.00" because you do not require any payment (0.00%) at the time of charge. Optionally you could choose any amount in between by either percentage or flat dollar rate.
Note:
The Override Minimum Amount Due For field the your Payment profile • Core Settings 2 group allows you to bypass your settings here for transactions performed in RecTrac. If you require full payment at the time of purchase in RecTrac then ensure that field is blank for all of your Payment profiles.
Exclude Quantity (SAFee_ExcludeQuantity)
Enter a value in this field, if desired. The value entered is the number of items that will be excluded (i.e. NOT charged) when this item is being added to the Shopping Cart. This field allows you to specify how many times the fee for this item needs to be charged when being added to the Shopping Cart before the fee is applied.
For Example: The Amount for this Fee is $10.00. You enter '2.00' in this field. The system will charge the $10.00 fee only after two (2) of these items added to the Shopping Cart at the same time. So if the Quantity was three (3) when adding an item to the Shopping Cart, the system would charge $10.00 because the first two are being excluded. If the Quantity on the sale was four (4), the system would charge $20.00, etc….
Note:
This is a per add to the Shopping Cart process so if you add items to the Shopping Cart individually the Exclude Quantity value might not always apply. Using the Example above if your Fee was $10.00 and your Exclude Quantity was 2.00 you could add two items to the Cart for $0.00 then add another two of the same item for $0.00 and then another two for $0.00 and so forth which obviously is not the purpose. When using this option you will want to ensure your clerks use the Quantity field when adding items.
Include Quantity (SAFee_IncludeQuantity)
Enter a value in this field, if desired. The value entered is the maximum number of times that this fee will be charged in a single transaction when items are being added to the Shopping Cart, regardless of the actual quantity. This field allows you to specify a maximum charge based on an up to" quantity.
For Example: The Amount for this Fee is $10.00. You enter '5.00' in this field. The system will charge the $10.00 fee if the quantity being added to the Shopping Cart is five or fewer so for a quantity of one (1) of these items the charge is $10.00 for a quantity of two (2) of these items the charge is $20.00 $30.00 for three (3) and so forth up to five (5). For any quantity greater than five (5) being added to the Shopping Cart at the same time the system will charge only $50.00 so a patron could purchase 10 items linked to this fee and be charged $50.00.
Note:
This is a per add to the Shopping Cart process so if you add items to the Shopping Cart individually the Include Quantity value might not always apply. Using the Example above if your Fee was $10.00 and your Include Quantity was 5.00 you could add two items to the Cart for $20.00 then add another two of the same item for $20.00 and then another two for $20.00 and so forth for a total price of $60.00. If you added all six (6) items at once (i.e. you made your Quantity 6.00) the charge would be $50.00.
Rental Visit Daily Pass (SAFEE_RentalVisitDailyPass)
This field is applicable only if your Fee Type is Rental Visit
Click the Picklist icon to select the Daily Pass Code you wish to use for this Fee. When recording attendance for rentals such as campsites and charging for occupancy by the day the Daily Pass Code you select here is used for recording attendance.
Daily Pass Codes are maintained in Pass Management.
Note:
Entering a valid Daily Pass Code in this field is required if you are recording attendance for rentals such as campsites and charging for occupancy by the day. See also: Tracking Rental Attendance and Charging for Occupancy by Day.
Search Index Price Calculation Option (SAFee_SearchIndexPriceOption)
Accept the default entry or expand the Drop-down list to select your Search Index Price Calculation Option. The setting in this field determines whether this fee will be included in the Price column in Global Sales and on the SuperGrid, and on WebTrac Search screens.
- Include this fee in Price Calc - The fee will be included in the price column in Global Sales and on the SuperGrid, and on WebTrac Search screens.
- Exclude this fee in Price Calc - The fee will not be included in the price column in Global Sales and on the SuperGrid, and on WebTrac Search screens.
For Example: Your Activity Registration Fee is $100.00. You also have a $10.00 Materials fee. When displaying the Activity in WebTrac Searches, you want to list the $100.00 only. You would set this option to Include for your Registration Fee and to Exclude for your Materials Fee. When the Activity is added to the cart, the full $110.00 total will display, showing the separate fees for registration and materials. The same logic applies to GUI.
Rounding Option (SAFee_RoundingOption)
Expand the Drop-down list to select the Rounding Option for this Fee, if any.
THEN
Enter the desired Rounding Amount in its field.
- Do Not Round - No rounding will take place when this Fee is charged. Leave the Rounding Amount field blank.
- Round to Nearest - When this Fee is charged, the system will round up or down to the nearest Rounding Amount entered. For Example: The Rounding Amount is 0.25." The Fee charged is $10.12. The system will round down to .00 because that is the closest quarter value. If the Fee charged were .13 then the system would round up to $ 10.25.
- Round Up - When this Fee is charged the system will round up to the nearest Rounding Amount entered. For Example: The Rounding Amount is "0.25." The Fee charged is $10.35. The system will round up to .50 because that is the next quarter value up from the amount being charged.
- Round Down - When this Fee is charged the system will round down to the nearest Rounding Amount entered. For Example: The Rounding Amount is "0.25." The Fee charged is $10.47. The system will round down to .25 because that is the next quarter value down from the amount being charged.
Notes:
- When you set this value on a Standard Fee all calculations are done first such as adjustments discounts prorates etc…. Once done the Fee is rounded.
- When you set this value on a Fee Increase/Decrease type the increase or decrease amount is rounded first and then added or removed from the Fee.
- When you set this value on time-based fees the system calculates the base fee first and rounds that. Then it applies the time count. As a result the final Fee may or may not round as expected. For Example: The base fee is $37.50 and the time count is 1:15 (or 1.25 hours). The system will round the $37.50 fee up to $38.00 and then apply the 1.25 increase making the final price $47.50.
Rounding Amount (SAFee_RoundingAmount)
This field is applicable only if your Rounding Option is other than "Do Not Round."
Enter the dollar value by which you wish to round this Fee. For Example: 1.00 if rounding to the dollar or .50 if rounding to the half dollar or 0.25 if rounding to the quarter or 0.10 if rounding the nearest dime or .05 if rounding to the nickel etc….
Notes:
This option applies to all fees and discounts. When you set this value on a Fee Increase/Decrease type the increase or decrease amount is rounded first and then added or removed from the Fee. When you set this value on a Standard Fee all calculations are done first such as adjustments discounts prorates etc…. Once done the Fee is rounded.
Insurance Option (SAFee_InsuranceOption)
This option is applicable only for the CardConnect/AIG/RegSaver Insurance Option.
Expand the Drop-down list to select your Insurance Option for this Fee:
- None - This Fee is not insurable. This is the default option.
- Percent - This Fee is insurable via the CardConnect/AIG/RegSaver Insurance option. When this Fee is charged patrons will be prompted to purchase insurance for the Fee. If insurance is purchased then patrons will be able to recoup some or all of the fee paid in the event they have to cancel at a later date. Insurance is charged by Fee and the cost is 7% of the Fee or $7.00 whichever is greater. Refer to Topic Doc - CardConnect for further details if needed.